- Applications
- Support
- Support Center
- Download
[ Manual E2 – How to Replace the Extruder Side Blowing Fan – V1.0 ]
* The steps of replacing both sides of the extruder side fans are similar. Here is an example of the left extruder’s side fan replacement.
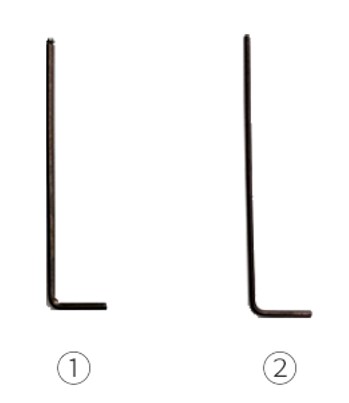
①2mm hex wrench
②1.5mm hex wrench
1.Power off the printer.
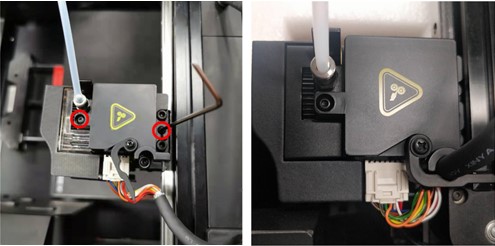
2.Use a 2mm hex wrench to loosen and remove the two screws securing the extruder cover to the print head, as shown (marked in red) in the pictures below.

3.Release the buckle securing the ribbon cable by pinching the latch and opening the lever.
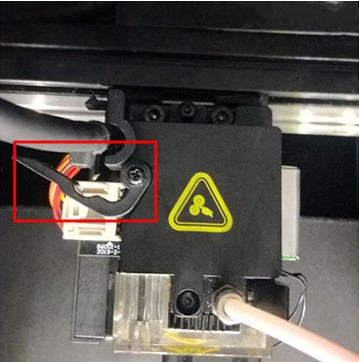
4.Use a 2mm hex wrench to loosen and remove the two screws securing the extruder connection board cover to the print head.
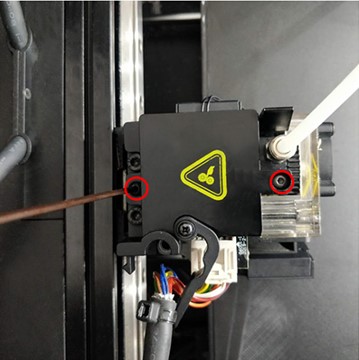
5.Use a 2mm hex wrench to remove the two screws securing the extruder connection board to the print head.
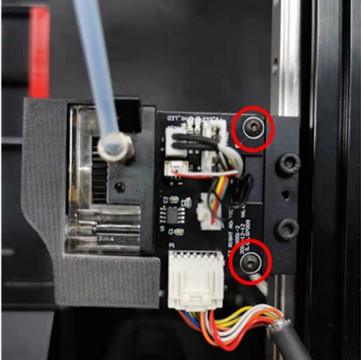
6.Gently pull out the extruder connection board in the direction of the arrow shown below. Be mindful of the small tab holding it in place.
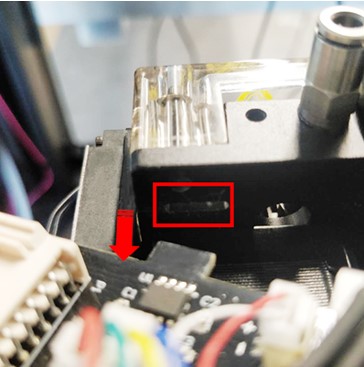
7.Remove the fan plug from the slot marked in red as shown in the picture below.

Note: If the connector is difficult to unplug, you can use a small pair of tweezers to gently wiggle the connector out of the slot.

8.Use a 1.5mm hex wrench to loosen and remove the two screws securing the fan to the print head.
At this step, you should be able to completely remove the fan from the machine.
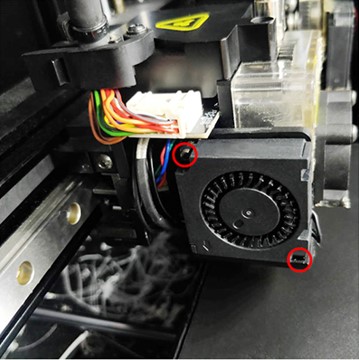
9.Install the new fan with the arrow pointing down.
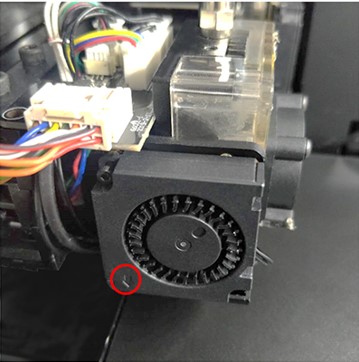
10.Thread the right or left side fan cable directly up to the extruder connection board.

Note: Use the length of the fan cable to determine which extruder it belongs to.
The longer cable is for the left print head and the shorter cable is for the right print head.
11.Reinstall the extruder connection board by orienting the tab towards the feeding gear.
Once it’s oriented properly, tuck the wires into the cable management slot.

12.Reconnect the fan cable to the terminal slot marked FAN0 for the left fan and the terminal slot marked FAN2 for the right fan.
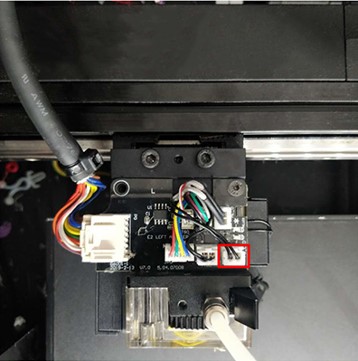
13.Retighten the two screws by using a 2mm hex wrench.

14.Reconnect the colorful ribbon cable back into the extruder connection board.
Leave enough slack to be sure it’s not strained. Secure the ribbon cable using the buckle.
[ Manual E2 – How to Replace the Extruder Side Blowing Fan – V1.0 ]
- END-