


- Applications
- Support
- Support Center
- Download
Inquiry@raise3d.com
+1 888 963 9028
© 2019. All Rights Reserved. Raise 3D Technologies, Inc.

[ Manual E2 – How to Replace the Heated Bed – V1.0 ]
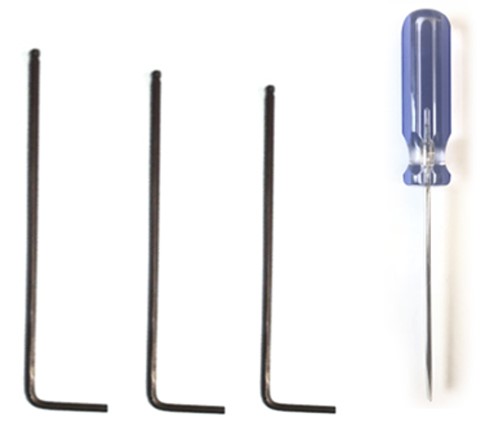
① 2.5 mm hex wrench
② Flat head screwdriver
③ 2 mm hex wrench
④ 1.5 mm hex wrench
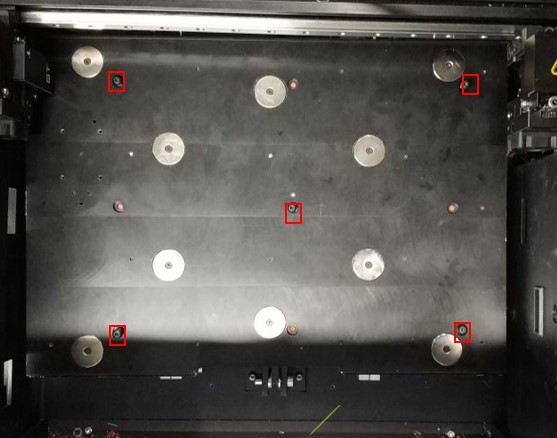
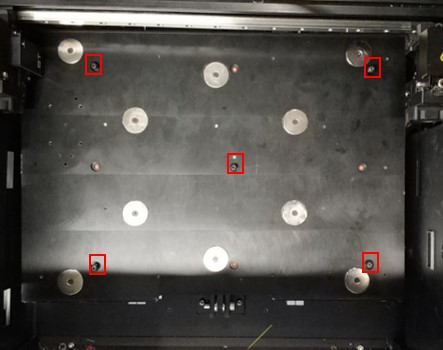
1. Remove the 5 bed leveling screws using a 2.5 mm hex wrench.
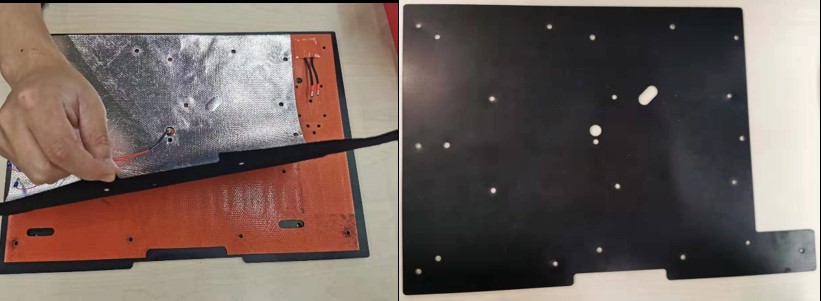
2. Flip the heated bed assembly by lifting the back side of the plate over the front side.
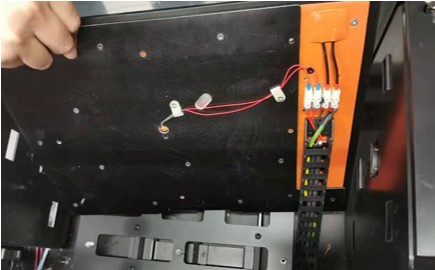
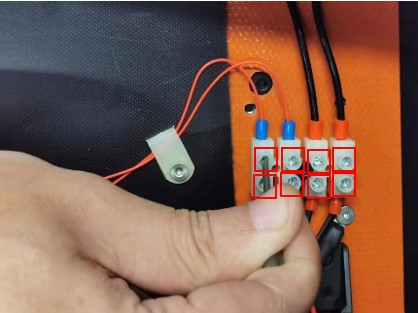
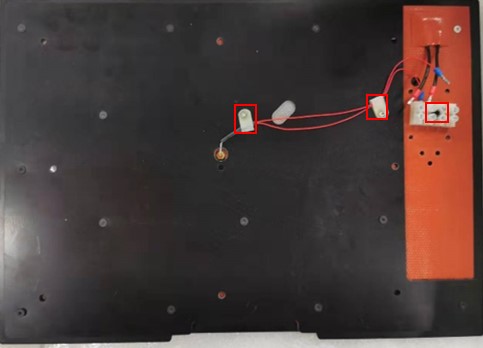
3. Loosen the eight securing screws on the power socket with a small flat head screwdriver so the eight wires can be removed.
(Note: Please label the two different colored wires to ensure they are properly installed later. The black wires are on the outside.
The wires from the cable chain may be difficult to remove from the terminal block while the grounding wire is still installed.)
4. Remove the ground wire securing screw with a 1.5 mm hex wrench. Then remove the 2 screws for the cable chain with a 2 mm hex wrench.

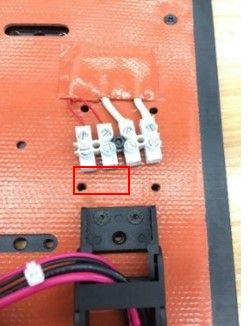
5. Remove the securing screws on the two cable clamps, marked in red, with a 2 mm hex wrench. Then remove the one screw that secures the power socket using a 2.5 mm hex wrench.
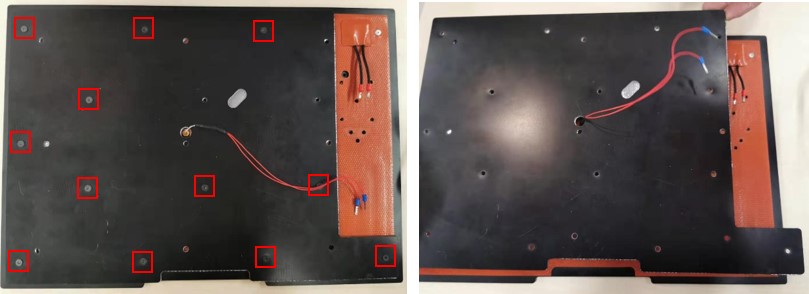
6. After removing the 12 screws that hold the plastic plate to the bed with a 2 mm hex wrench, remove the bed and keep it.
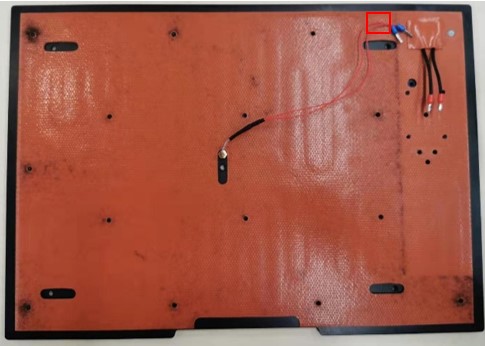
7. Peel off the insulation pad and keep it.

8. Remove the screw on the silicon heated plate with a 1.5 mm hex wrench.
9. Replace the old silicon heated plate with a new one. Put it on the aluminum baseplate and put the thermocouple wires through the center hole.
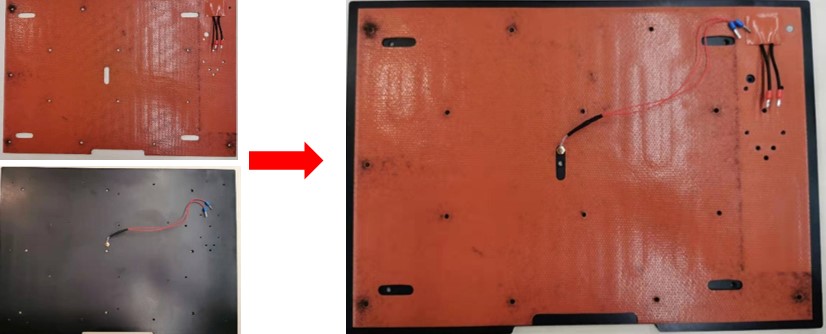
10. Cover the silicon heated plate with the insulation pad. Then put the thermocouple wires through the center hole. Put on the plastic plate.
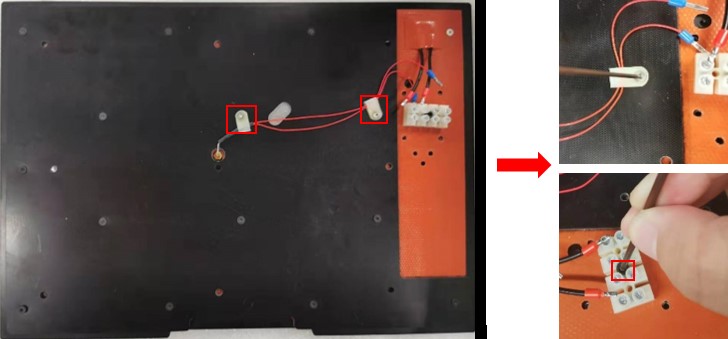
11. Slide the thermocouple wires into the wire clamps and secure them to the bed as shown below.
12. Reinstall the screws on the cable chain with the 2 screws.
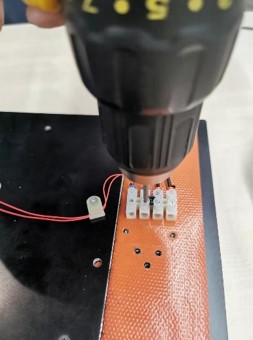
13. Tighten the eight securing screws on the power socket with a drill.
(Note: Please make sure the wires completely reach the screws that secure them and won’t fall out. The drill should be on a low setting.)
Install the securing screw of the ground wire with a 1.5 mm hex wrench.
14. Place the bed back on the printer, ensuring the screws line up with the center of the springs, and tighten them all down.
(Note: It may be necessary to compress the spring by pushing down on the bed to install the screws.)
15. After finishing the replacement, please use the auto bed-leveling feature in the ‘Utilities/Leveling’ page on the RaiseTouch to make sure the heated bed is completely level.
[ Manual E2 – How to Replace the Heated Bed – V1.0 ]
-END-
Inquiry@raise3d.com
+1 888 963 9028