
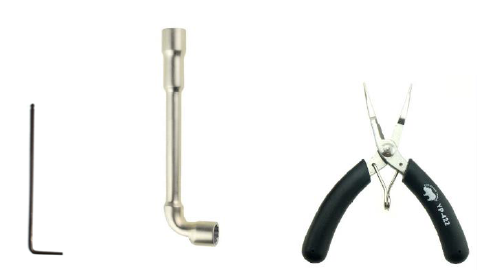
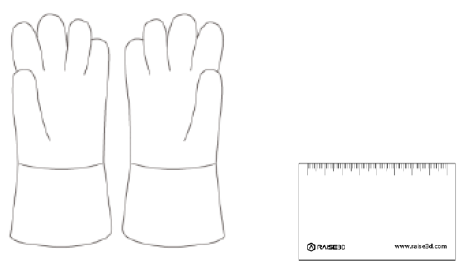
Tools:
①2mm hex wrench
②8mm socket wrench
③Long nose pliers
④Heat resistant gloves
⑤0.3 mm Stainless Steel Feeler Gauge
1.Turn on the printer.
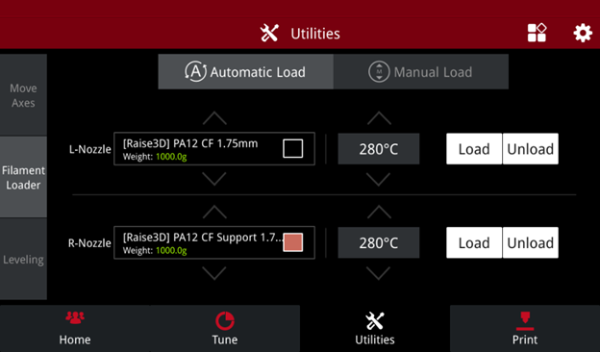
2.On the touchscreen, select the Utilities” tab ->” Filament Loader”-> ”Unload” to unload any filament present in the printhead.
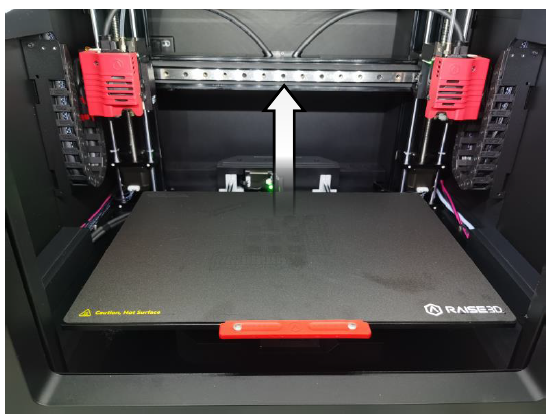
3.On the “Utilities” tab, select ”Move Axes”. Press the blue up arrow to raise the X-axis gantry to a suitable height for the following operation. (Refer to the picture below as a reference for a suitable height.)
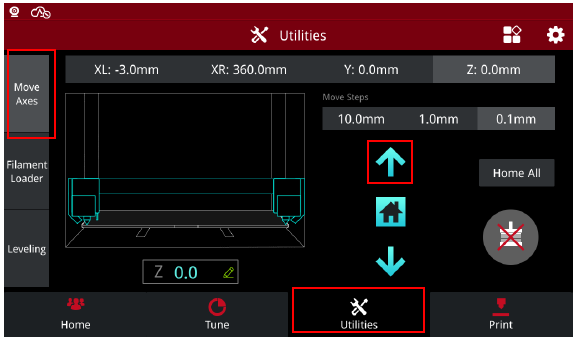
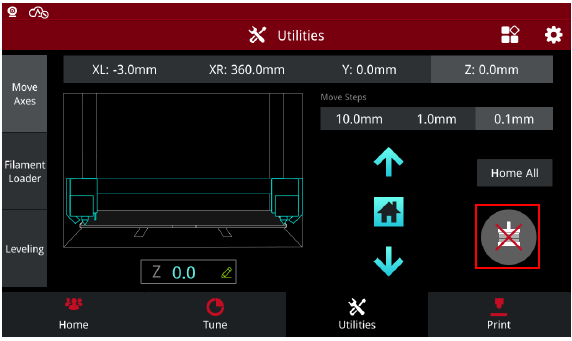
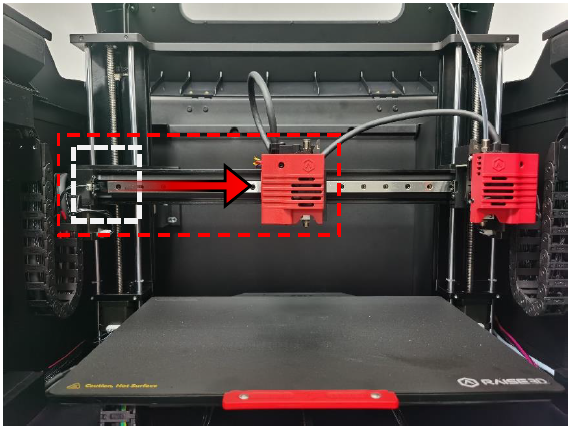
4.Press the “Motor Disable” icon, marked in a red box below, to manually center-position the printhead for clearly accessing the hot end nozzle being replaced.
This tutorial will reference replacing the left nozzle as an example.
5.Use a 2mm wrench to loosen the set screw securing the hot end assembly to the printhead.
Important: The hot end may not have completely cooled after unloading filament. Please wear heat-resistant gloves to prevent personal burns, if necessary.

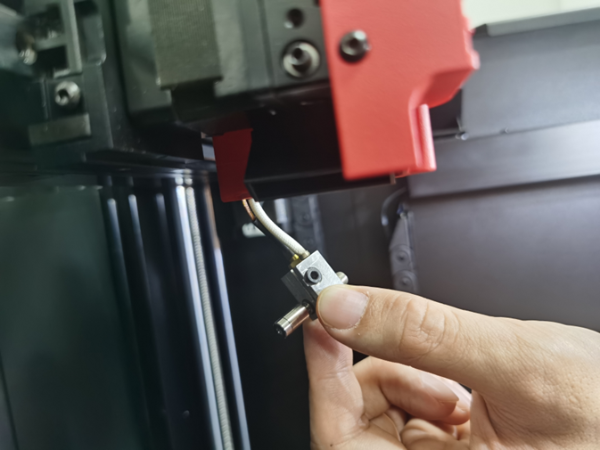
6.At the underside of the printhead, use the wrench to remove the cable holder to release the heating rod and thermocouple cables.
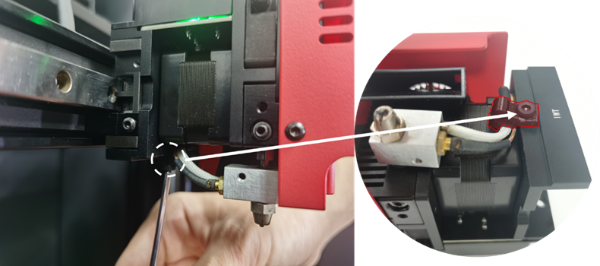
7. Carefully slide out the hot end assembly from the printhead.
Important: The hot end may not have completely cooled after unloading filament. Please wear heat-resistant gloves to prevent personal burns, if necessary.
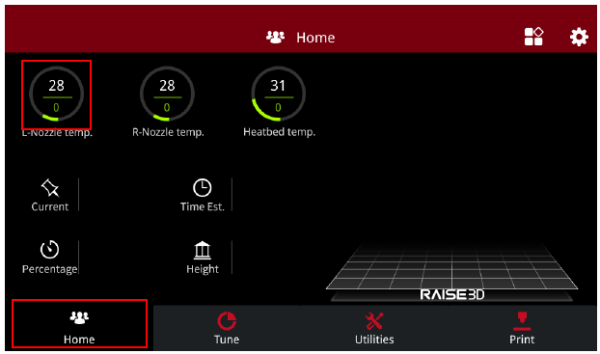
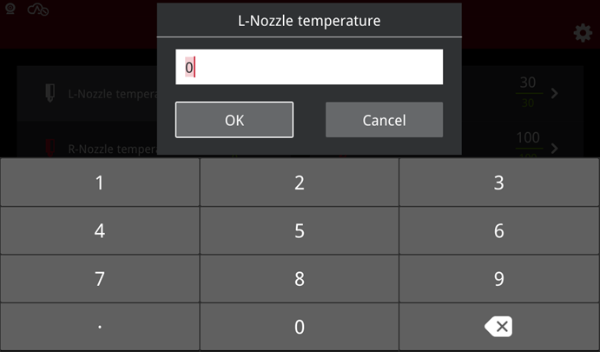
8. At the touchscreen, select the “Home” tab-> ”L-Nozzle temp” and set the nozzle temperature to 200℃.
Important: The hot end component will become hot (200℃). Do not handle the hot end component without wearing the provided heat-resistant gloves.
Avoid contacting the wires with any tool.

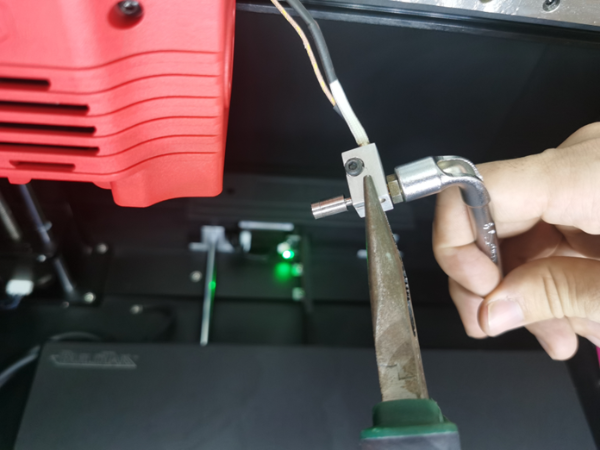
9. Secure the hot end at the heater block, using the plier tool, and loosen the nozzle using an 8mm socket wrench. It is important to keep the heat-resistant gloves on during this process.
NOTE: The aluminium heater block is a soft metal. To avoid damaging the block, please clamp it with care.
Important: Avoid twisting the plier tool, as this may cause the throat tube to bend.
Avoid contacting the wires with any tool.
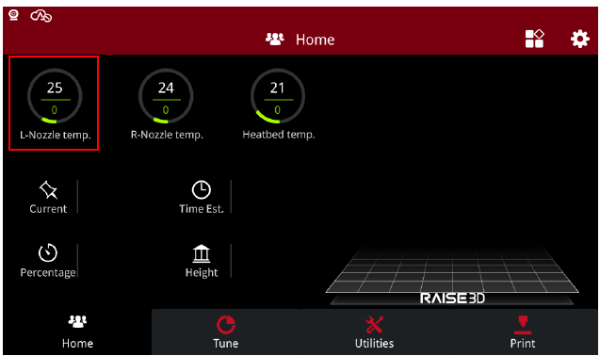
10.After removing the former nozzle from the hot end, set the nozzle temperature to 0℃, and wait for the nozzle to cool to room temperature.
11.After the hot end has cooled to room temperture, begin the process of installing the replacement nozzle into the hot end component.
12.At the touchscreen, set the hot end temperture to 200℃.
Secure the aluminium heater block using the plier tool, then install and tighten the replacement nozzle using an 8mm socket wrench.
Important: Keep the heat-resistant gloves on during this process.
Avoid twisting the plier tool, as this may cause the throat tube to bend.
Avoid contacting the wires with any tool.

After installing the replacement nozzle, set the nozzle temperature to 0℃ on the touchscreen, and wait for the hot end to cool to room temperature.
13.When the hot end has cooled to room temperature, reinstall the hot end into the printhead. Securely fasten the hot end set screw to firmly hold the hot end in place.

14.Fasten the cable holder onto the printhead while securing the cables of the heating rod and thermocouple.

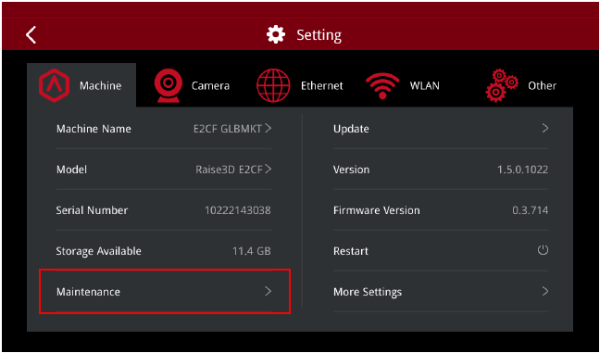
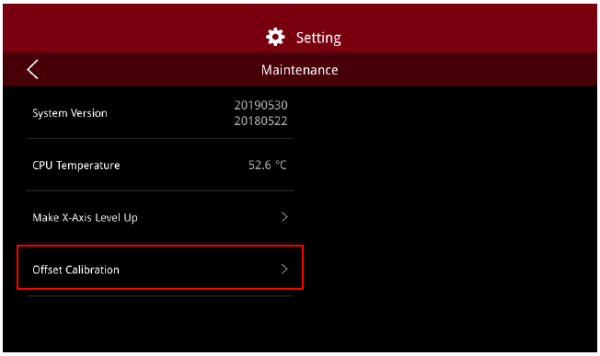
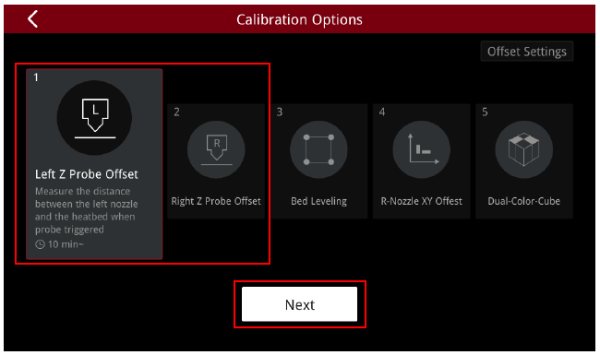
15.Any time a hot end is adjusted, it is important to run the “Left Z Probe Offset” and “Right Z Probe Offset” for successful printing. On the touchscreen, press the gearwheel icon in the upper right corner of the screen, then Maintenance -> Left Z Probe Offset/ Right Z Probe Offset ->
Finally, carefully follow the on-screen instructions.

[14.024-EN.2.0.20240201-E2CF-How to Replace the Nozzle]
-END-
