
The Flexible Filament Auxiliary Feeder (hereinafter referred to as the Feeder) adds an auxiliary feeding and buffer system, improving the feeding of flexible filaments such as TPU. With the Feeder installed, the E3 printer can print TPU at speeds of up to 200 mm/s while ensuring high print quality and success rates. Furthermore, the Feeder expands the E3's compatibility with flexible and elastomeric filaments.
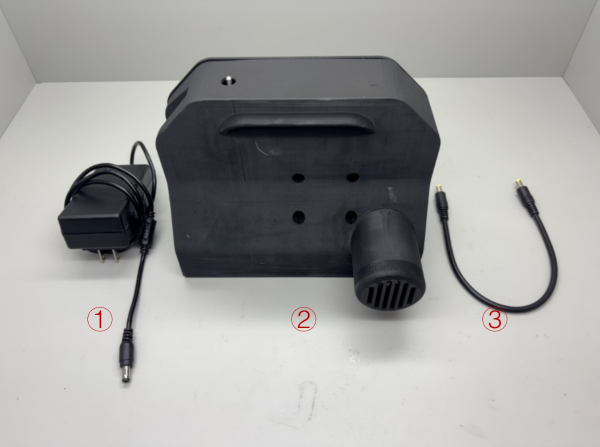
1) 24V power adapter
2) Flexible Filament Auxiliary Feeder
3) Power Cable
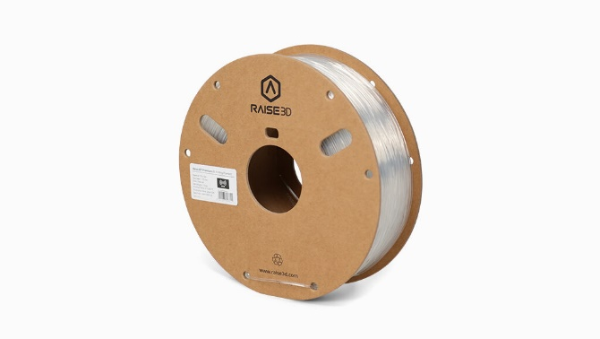
Compatible Filaments: When equipped with the Flexible Filament Auxiliary Feeder, the E3 is compatible with TPEs (TPU, TPE-A, TPE-S, TPE foam, etc.) with Shore (A) durometers between 95A and 80A (e.g., TPU-95A, 90A, 80A), as well as all Shore (D) durometers. In this guide, Raise3D Premium TPU-95A is used as an example.
Note: Please use dried TPU filaments. For newly opened TPU, please ensure it has been dried at 60°C for 12 to 24 hours, to avoid jamming and excessive stringing. For specific drying methods, please refer to the guide of each filament.
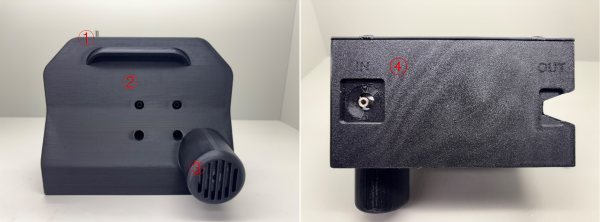
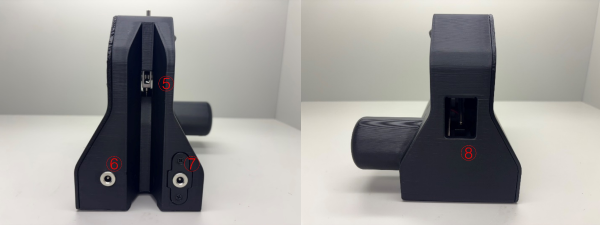
1 | Filament feeding spring button |
2 | Handle |
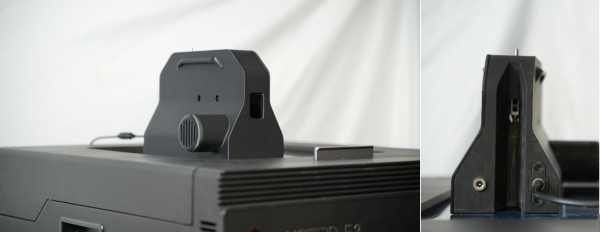
3 | Motor cooling vent |
4 | IN port |
5 | OUT port |
6 | Power port 1 |
7 | Power port 2 |
8 | Swing arm |
Part 1 How to Use the Feeder
1. Prepare the Feeder, 24V power adapter, and TPU filament. Connect the power cord to any power port on the Feeder.
2. Make sure you have completely unloaded the filaments from E3 printer. For how to unloaded the filaments, please refer to Part 2 How to Load & Unload Filament.
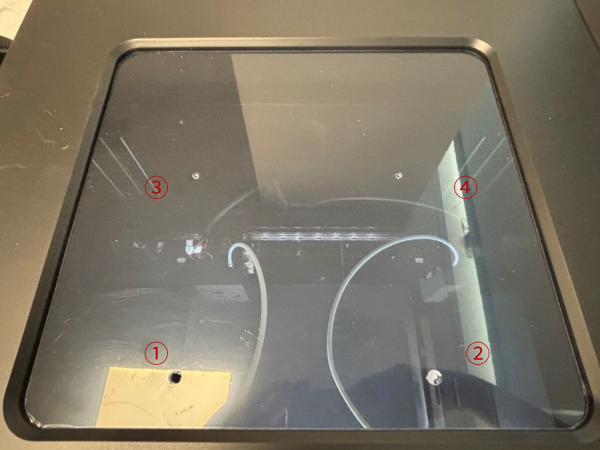
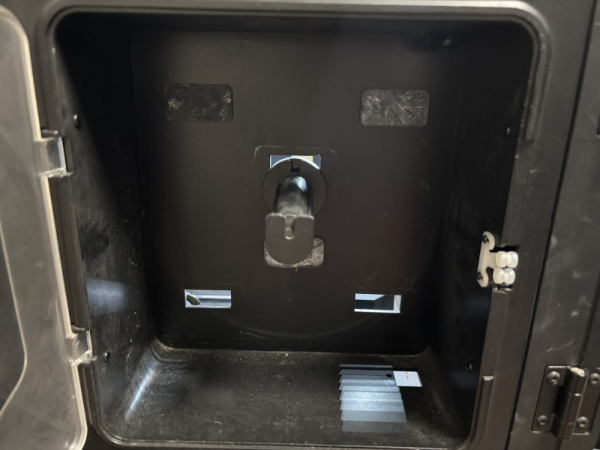
3. There are four holes on the top of the E3. Remove the rubber plugs from the four holes.
Note: If you are using an Raise3D E2 printer, please make holes on the top of the printer yourself. If you are using other printers, please find a proper place to place the feeder.
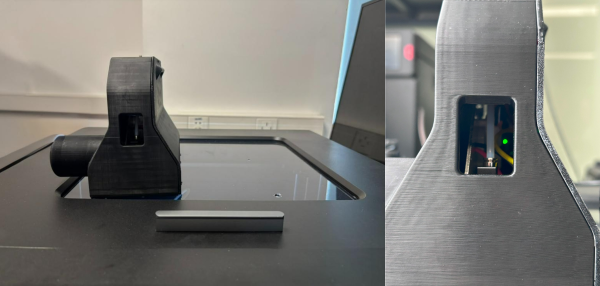
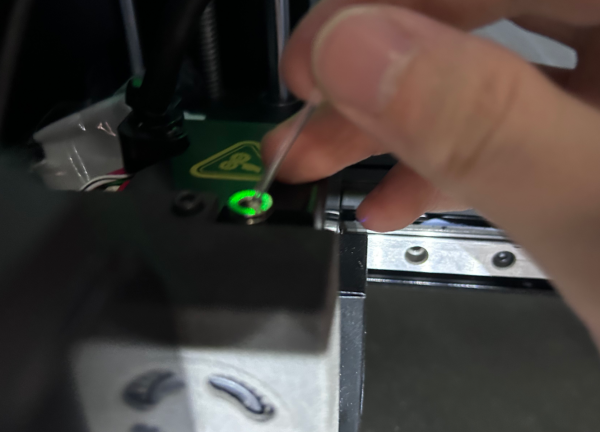
4. The Feeder is placed on the E3 as shown below (the left side is used as an example). After connecting to the power supply, the green light indicates that the Feeder is working properly.
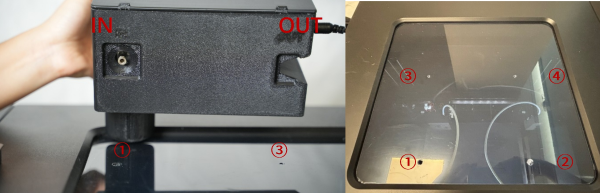
5. If you're using the left extruder, the Feeder should be placed on the left. The bottom of the Feeder has "IN" and "OUT" marked. The "IN" port should align with hole 1, and the "OUT" port should align with hole 3, as shown in the image below.
6. Open the front door of the E3 printer, find the filament feed port on the left side, press the metal connector of the feed port, and then unplug the filament guide tube.
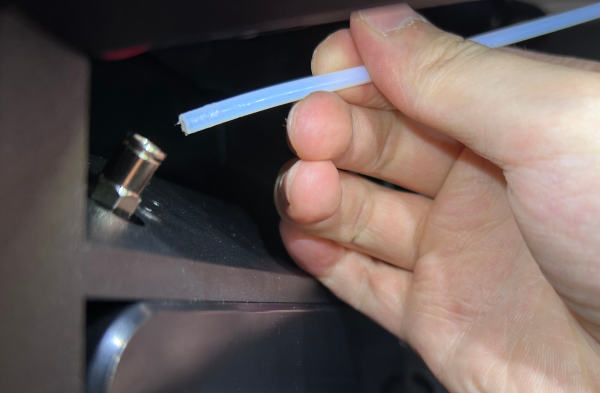
7. Press the quick connector on the feed port of the left extruder and remove the filament guide tube.
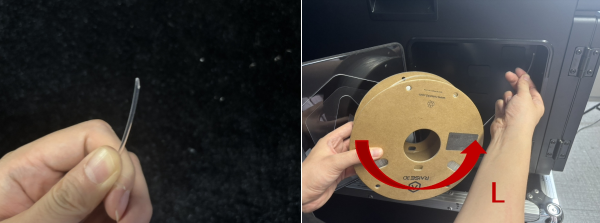
8. Prepare a spool of TPU filament, cut the end of the filament into an angled shape with scissors, and insert it into the feed port of the E3 printer.
Note:
1. The filament placement direction differs between the left and right feed ports. Insert the filament counterclockwise into the left feed port, and clockwise into the right feed port. Failure to do so may cause the filament to jam. See the image below.

2. The E3 comes with two filament holders. You can also remove the rubber plug in the middle of the hopper and install the holder in the middle. Hanging the filament in this way can reduce the resistance to feeding.
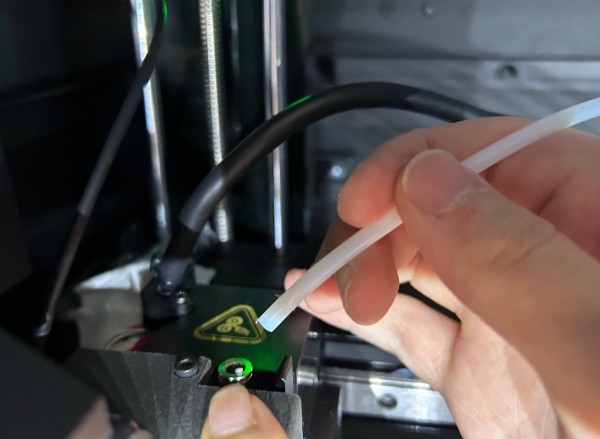
9. After the filament comes out of the printer's feed port, manually pass the filament through port 1 on the top cover of the E3 printer.

10. After the filament passes through port 1 of the top cover, start inserting the filament into the "IN" port.
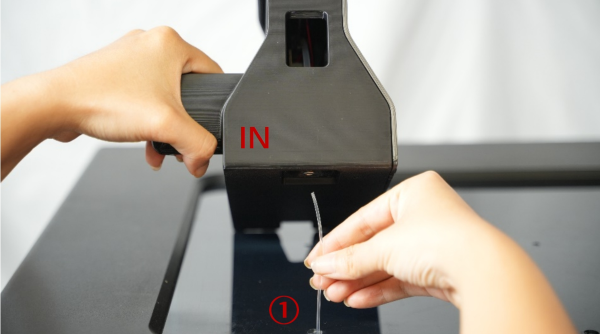
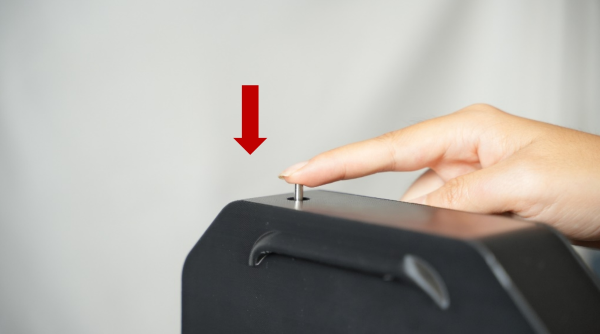
7. Insert the TPU filament into the feeder with some power. You will feel some resistance before you can insert the filament into the feeder. Once the filament has entered the feeder, continue to press the spring button on the top of the feeder to automatically start feeding.
Note:
1. You must press the spring button several times to feed the TPU filament. Feeding is successful only when the TPU filament comes out of the OUT port.

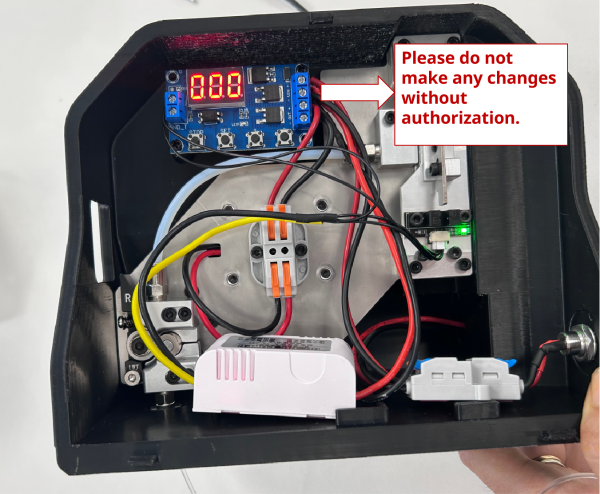
2. When you long-press the spring button, the filament will be loaded continuously, but this process only lasts for 1 second. After 1 second, the Feeder will stop feeding to prevent jamming. You will need to long-press the spring button again. Although this duration can be set by yourself, please note that Raise3D is not responsible for any device malfunction caused by your own debugging.
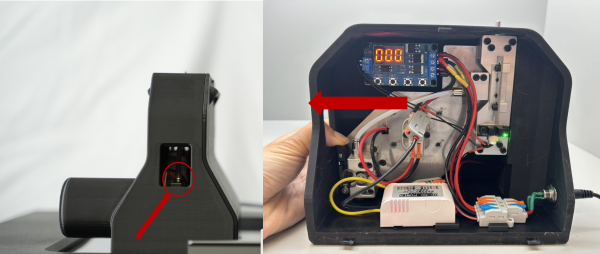
3. If you feel some difficulty when feeding, you can pull the swing arm of the feeder to the left and then insert the filament into the feeder, which may alleviate the difficulty of feeding.
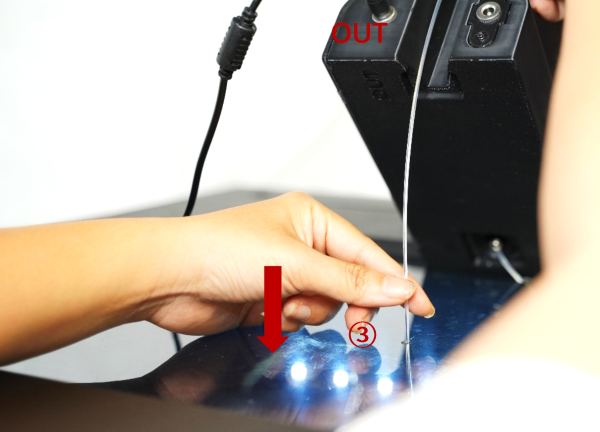
8. After the TPU filament comes out of the "OUT" port of the Feeder, insert the filament into the E3 printer through port 3 on the E3 top cover.
9. Insert the TPU filament into the left extruder feed port and prepare to perform the filament loading.
10. If you purchase two Feeders, you can connect another Feeder via the included power cable. Both Feeders will work simultaneously.
Part 2 How to Load & Unload Filament
1. Select "Utilities" on the screen and then select "Filament Loader"
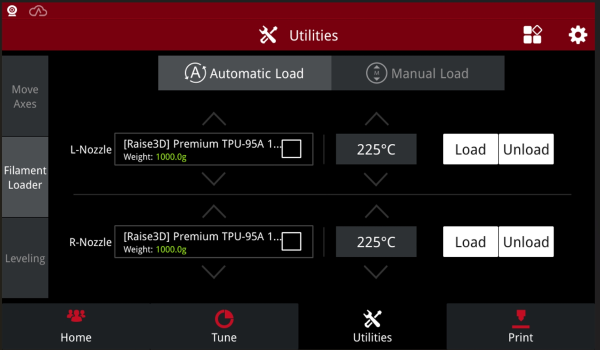
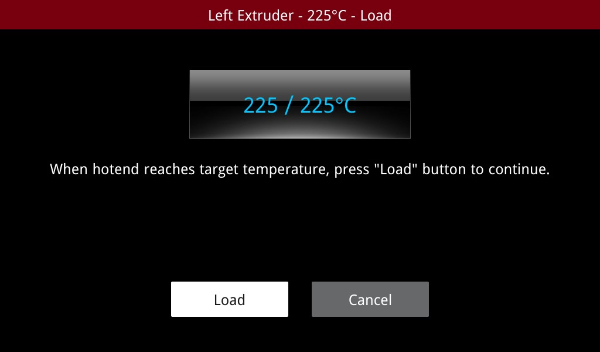
2. Confirm that the filament of your left extruder is TPU filament, confirm the temperature, and click "Load". After the extruder is heated to the target temperature, click "Load" and the extruder will automatically start loading.
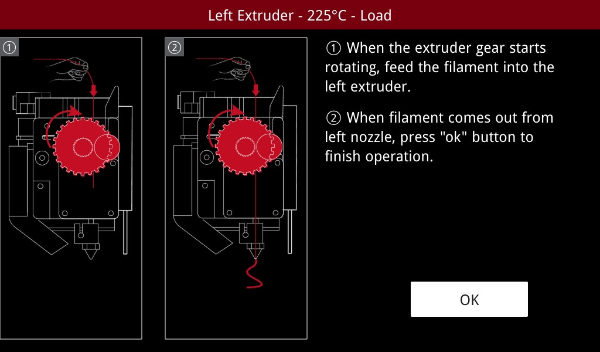
3. Follow the on-screen instructions to start loading. Wait until filament comes out of the nozzle, which means loading is complete and you can start printing.
4. You can refer to the unloading process and follow the on-screen instructions to unload the filament.
[35.011-EN.1.0.20250829-E3-How to Use the Flexible Filament Auxiliary Feeder]
-End-
