
[ Manual N2&N2 Plus - How to Adjust the Voltage of A4988 -V1.0 ]
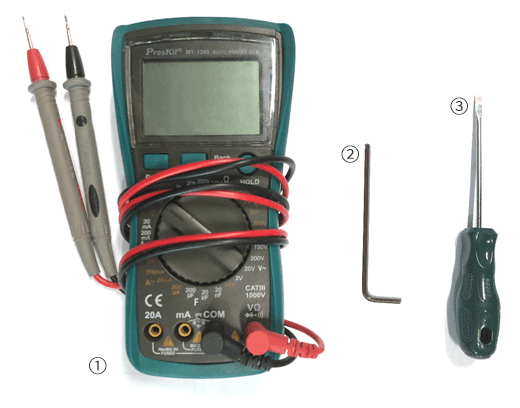
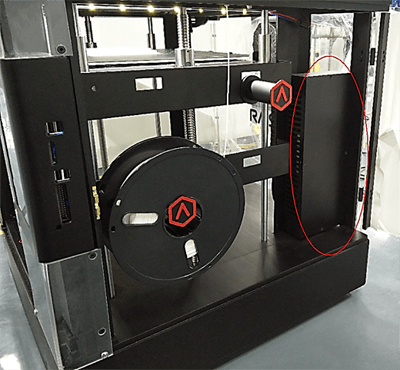
1. Locate the electronic box located at the right side of your printer.
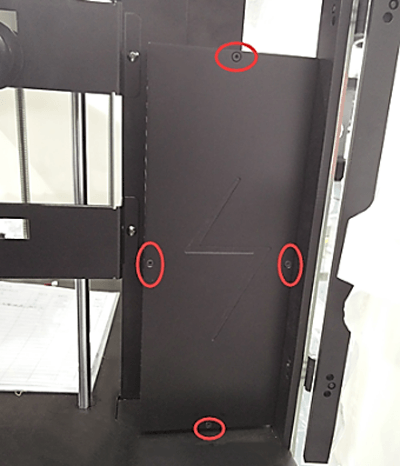
2. Unscrew the four attachment screws with the 2mm hex wrench to remove the cover.(Some printers may not have the screws, may have the tabs)
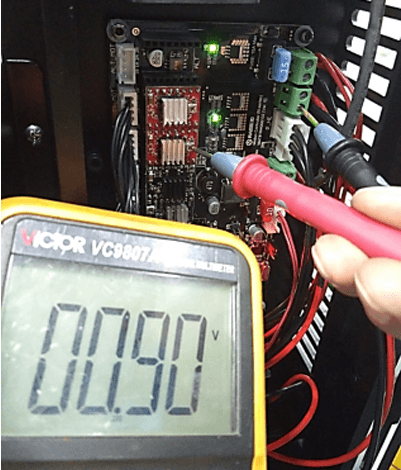
3. Shown below are the two adjustable A4988 stepper drivers (Red).

4. Use your Philips head screwdriver to turn the adjustable screw. The voltage will to up when turned clockwise, and down when turned counterclockwise.

6. Make changes slowly and measure the voltage periodically until the measurement reads 0.7V. Repeat last two steps until the goal of 0.9V is reached.
[ Manual N2&N2 Plus - How to Adjust the Voltage of A4988 -V1.0 ]
-END-
