
[ Manual N2&N2 Plus - How to Replace the Feeding Gear - V1.0 ]
1. First turn off the Printer, then remove the extruder motor cable (refer to Figure 1).

Figure 1: The extruder motor cable.
2. Remove the plastic PC cover (refer to Figure 2).
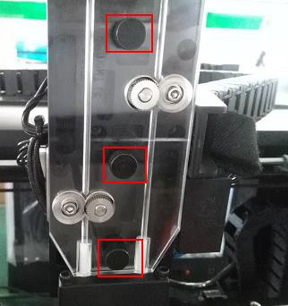
Figure 2 Remove the plastic PC cover.
3. Remove the screws which retain the extruder motor (refer to Figure 3).
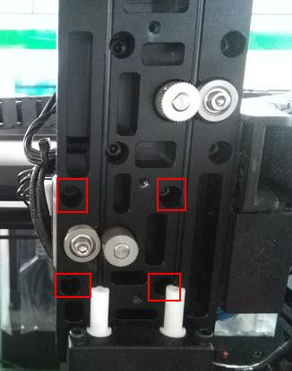
Picture 3: Screws which fix extruder motor
4. After removing the motor, remove the two retaining screws that secure the gear to the motor, and exchange the gear with a new one.
5. The horizontal plane of the feeding wheel should be aligned with the lower edge of the motor shaft (refer to Figure 4), and then install the grub screws into the feeding wheel until it cannot be rotated (refer to Figure 5).
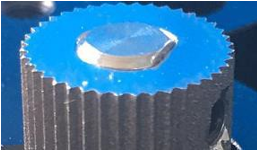
Figure 4 Align the feeding wheel with the lower edge of the motor shaft.
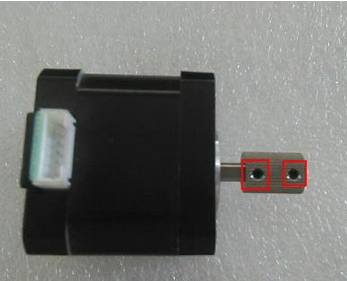
Figure 5 Install the grub screws into the feeding wheel.
6. Reinstall the motor and leave a small gap between the gear and the bearing when tightening the 4 screws. The closer the gear is to the bearing, the better the grip of the extruder on the filament. However, they should not be touched. If you find that the plastic cover cannot be reinstalled because the feeding wheel cannot pass through the hole, please readjust the motor.
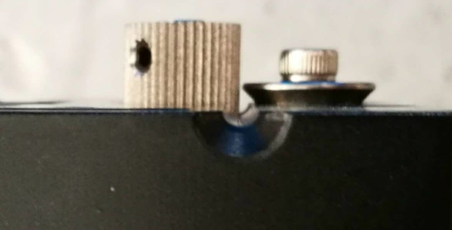
Figure 5 The gap between the feeding gear and the bearing.
7. Reinstall the plastic PC cover (refer to Step 2).
8. Reconnect the motor cable.
[ Manual N2&N2 Plus - How to Replace the Feeding Gear - V1.0 ]
