
[ Manual N2&N2 Plus - How to Replace the Right Rod –V1.0 ]
1. Turn the printer off.
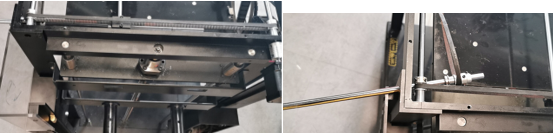
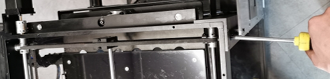
2. Unscrew the silver cross screws shown in figure 1.
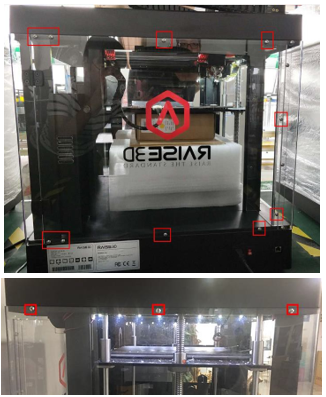

Figure 1
3. Unscrew the 8 black screws on the top cover shown in figure 2.
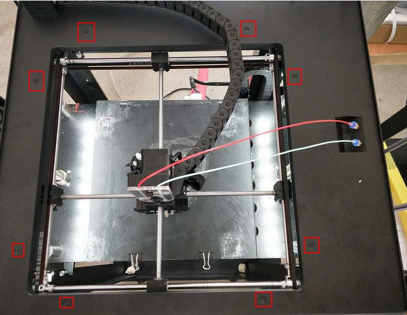
Figure 2: 8 Screws on the top cover
4. Loosen the USB cable via a straight screwdriver, this cable is fixed by glue as shown in Figure 3.
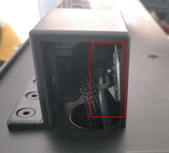
Figure 3: USB cable
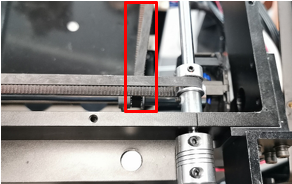
5. Remove the chain towing fixed screws shown in figure 4.
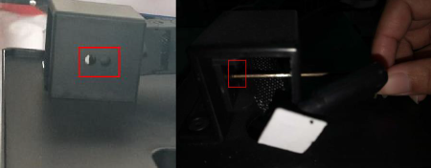
Figure 4: Chain towing fixed screws
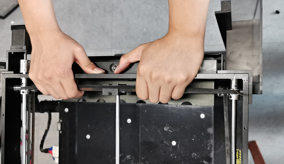
6. Remove the ties which are under the top cover. Now you can lift the top cover up.
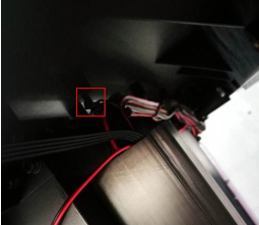
Figure 3: Ties which bundle cables
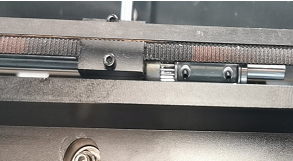
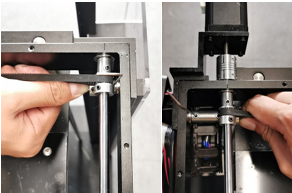
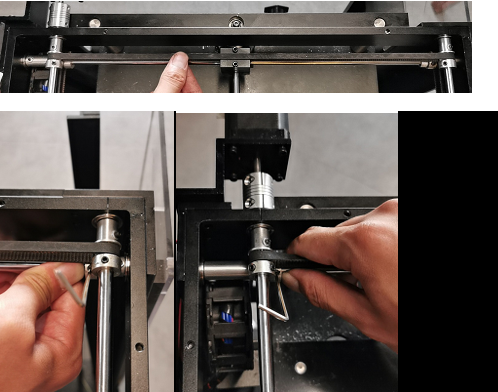
7.a Loosen the screws in the belt pulleys and spacer collets on the front side.
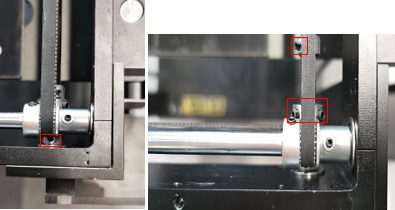
7.b Loosen the screws in the belt pulleys and spacer collets on the right side.

8. Pull off the old rod from the front side of the printer.
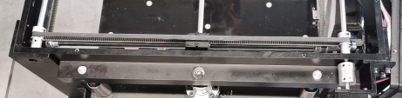
9. Take out the bearings and pulleys from the rod.
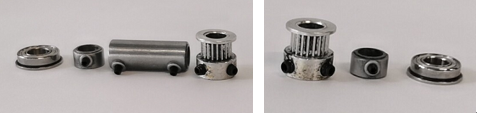
10. Push the new shaft into the original position. Put the belt pulleys ,spacer collets and bearing back on the new shaft before it reaches the sliding block. Wrap the left belt onto the belt pulley.
11. Put the belt pulleys ,spacer collets and bearing back on the new shaft after it reaches the sliding block. Wrap the right belt onto the belt pulley.
12. Push the bearing into their corresponding holes while pulling tension onto the belts.
13. Push the shaft backwards till you can’t push it anymore .
14. Tighten the screws of the front and back spacer collets by pushing the belt pulleys to their ends.
15. Push the belt pulley to their ends and pinch the belt to feel its tension. If the belt tension is qualified ,please tighten the screws.
[ Manual N2&N2 Plus -How to Replace the Right Rod –V1.0 ]
END
