


- Applications
- Support
- Support Center
- Download
Inquiry@raise3d.com
+1 888 963 9028
© 2019. All Rights Reserved. Raise 3D Technologies, Inc.

[ Manual N Series - Replace main board – V1.0 ]
1. Turn off the power supply.
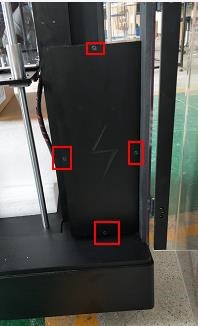
2. Remove the main board cover by unscrewing the four screws as shown in the picture above.
Note: Some printers may not have screws, simply use a spatula to remove the cover.
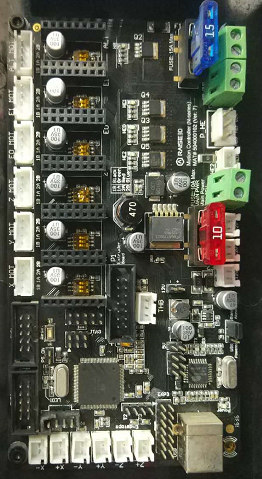
3. Remove all cables connected to the main board (Label the cables and take a picture of the MCB to ensure all cables can be properly re-installed. )
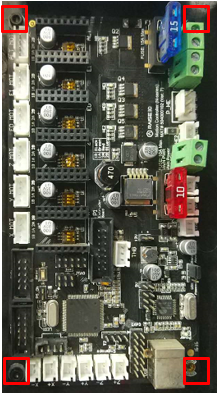
4. Loosen the four screws as shown in the image below. Replace the main board with a new one.
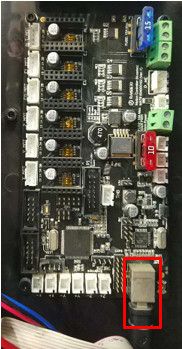
5. Reconnect the USB cable and transfer all drivers to the new board. Carefully transfer each cable one at a time, paying close attention to the direction of each one.
6. Reconnect the end stop cables. Be sure to verify the proper XYZ positions.
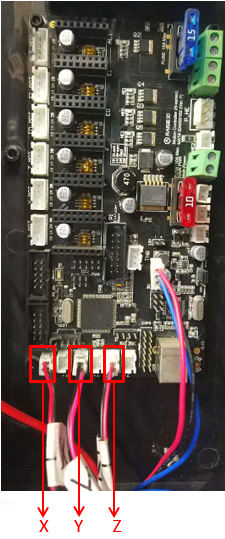
X, Y, Z limit switch cables
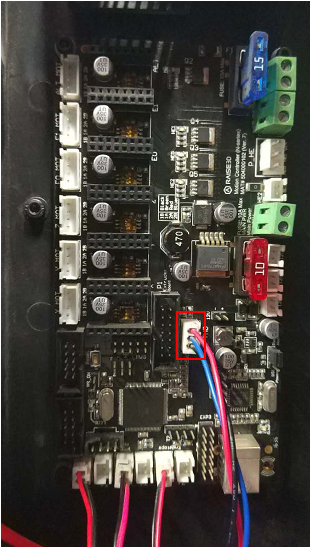
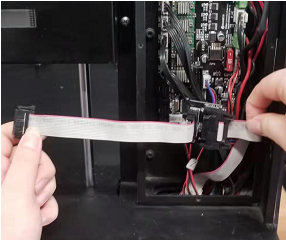
7. Reconnect the bed temperature sensor cable and extruder board cable (The cable with 3 different colors is the bed temperature sensor cable, refer to picture 7)
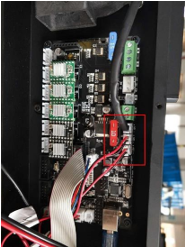
8. Connect the ribbon board onto the thermal-protector. Point the ribbon cable head towards the left.
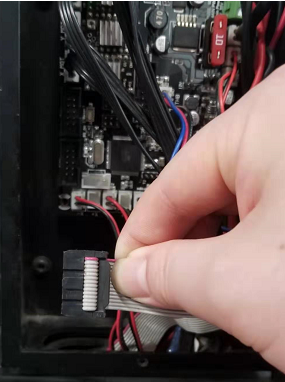
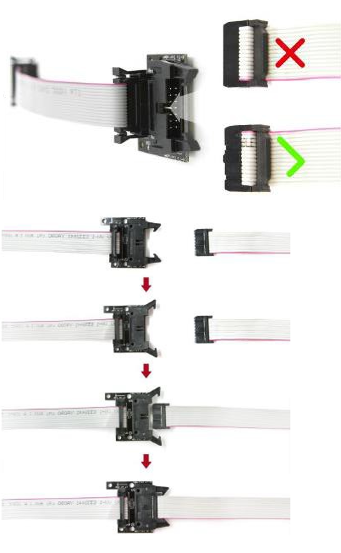
9. Make sure the fasteners are tightly fixed.
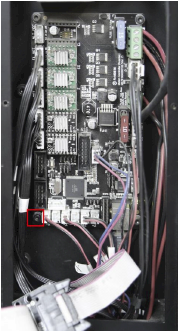
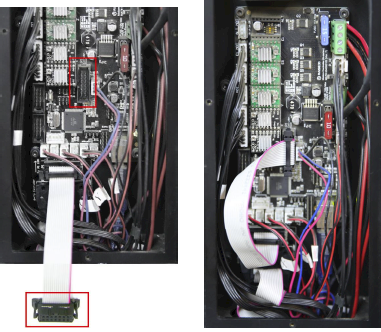
10. Install the protector onto the main board. Remove the screw marked in the picture below.
11. Screw the protector onto the motion board.
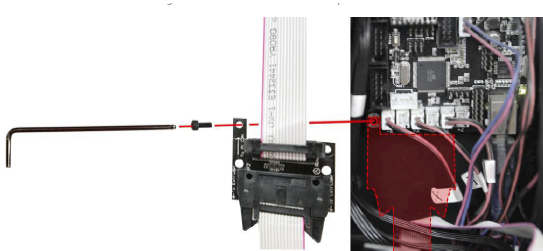
12. Plug in the other side of protector.
13. Reconnect the LED power cable and main board fan cable.
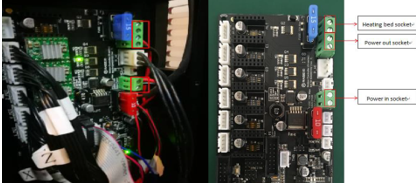
14. Reconnect the power supply cable for the bed and power cords (red line corresponds to the anode and is always connected to the upper socket).
Notice: The heating plate power supply cable consists of three small red lines and three small black lines.
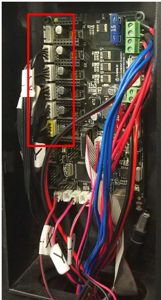
15. Reconnect motor cables. From top to bottom, they follow this order: right extruder motor cable, left extruder motor cable, Z motor cable, Y motor cable and X motor cable.
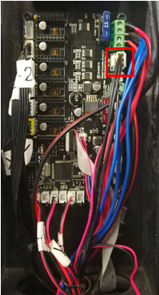
16. Reconnect the nozzle heating power supply cable.
17. Power on the printer, if the screen displays an error message take a picture of the message, along with the motion controller board and submit a ticket on the support page of our website.
If the printer boots up without an error refer to Manual N2&N2 Plus - Stepper Driver Replacement-V1.0 to set the driver.
[ Manual N Series - Replace main board – V1.0 ]
END
Inquiry@raise3d.com
+1 888 963 9028