
[ Manual Pro2 Series - How to Install the Build Plate - V1.0 ]
1. Remove original build plate.
1) Anticlockwise rotate the two retaining screws in front of the build plate.

Figure 1 Anticlockwise rotate the two retaining screws.
2) Lift the front of build plate to the position of the retaining screws, and remove the build plate out of the machine.
2. Install new build plate.
1) Place the new build plate onto the Z platform. Make the surface with the Raise3D logo facing up.

Figure 2 Place the new build plate onto the Z platform.
2) Reinstall the retaining screws. Now the printer is ready to print.
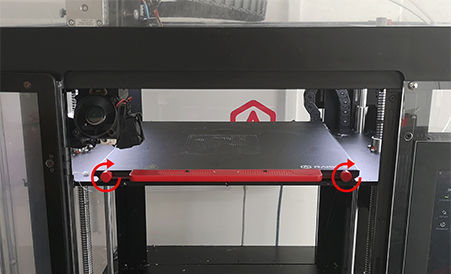
Figure 3 Reinstall the retaining screws.
[ Manual Pro2 Series - How to Install the Build Plate - V1.0 ]
-END-
