
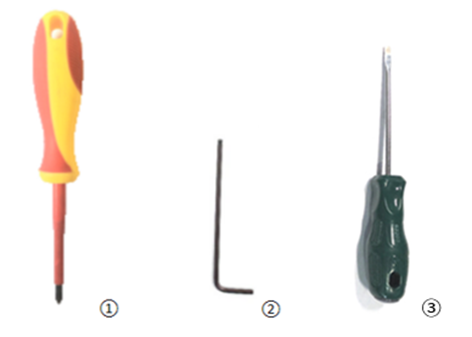
Tools:
① Phillips head screwdriver
② 2.5 mm hex wrench
③ Flathead screwdriver
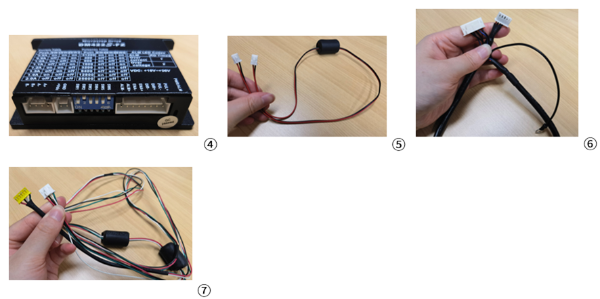
Components:
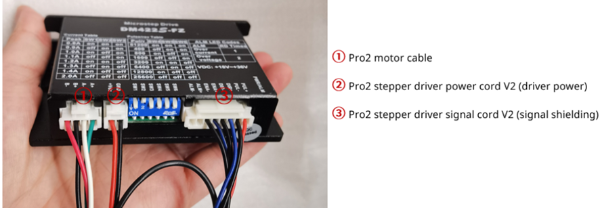
④ Motor driver
⑤ Pro2 stepper driver power cord V2 (driver power)
⑥ Pro2 stepper driver signal cord V2 (signal shielding)
⑦ Pro2 motor cable
1. Power off the printer, then gently place it down on the left side (with the filament-side door facing up). Use a 2.5 mm hex wrench to remove the four M4x8 screws on the bottom cover.
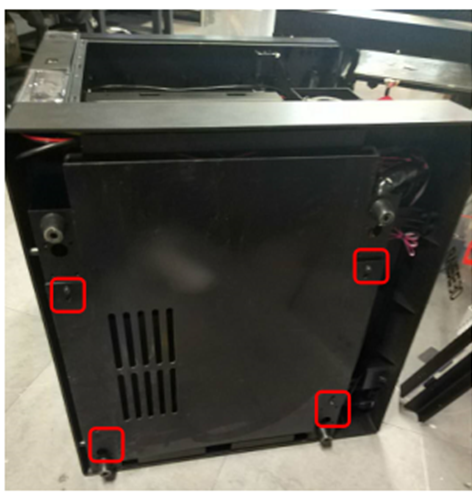
2. Remove the bottom panel to expose the stepper driver.
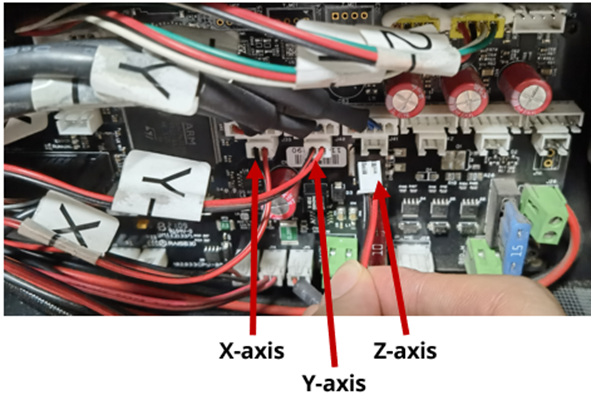
The X-axis matches the X-axis stepper driver. The Y-axis matches the Y-axis stepper driver. The Z-axis matches the Z-axis stepper driver.

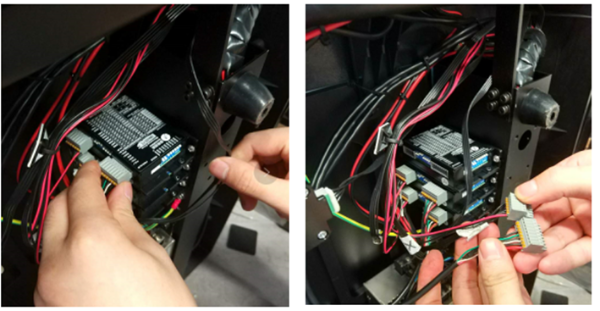
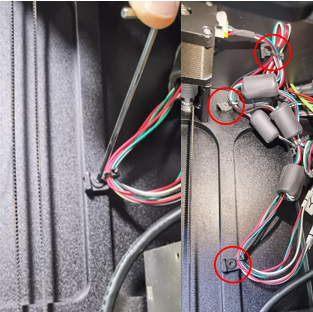
3. We will use the Z-axis stepper driver as the example for this document. Disconnect the two plugs from the driver to be replaced as shown in the following image.
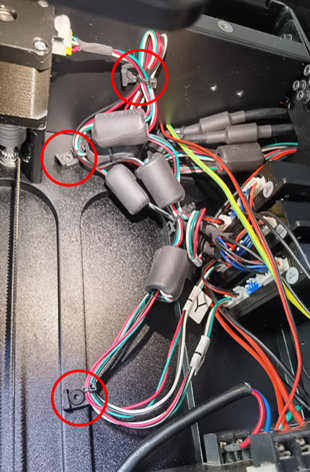
4. Unscrew the three clamps as shown in red circles. Free the cables from the clamps by undoing the cable ties.
5. Use a Phillips head screwdriver to remove the outside and inside retaining screws on the stepper driver.
6. Remove the Z-axis stepper driver as shown in the image.
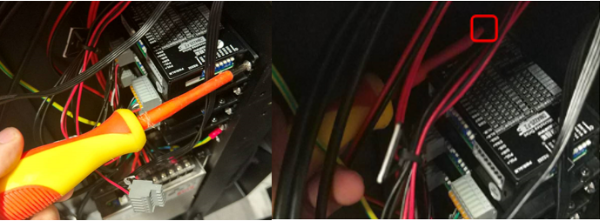
7. Open the filament-side door, where the spools are mounted, to access the Motion Controller Board’s rectangular housing box. Using your fingers, gently pull the cover out and insert the tip of a flathead screwdriver to assist with levering the cover off.

8. Disconnect the two plugs from the motion controller board to remove the cables corresponding to the Z-axis stepper driver, as shown in the following image.
Note: Disconnect the plugs corresponding to the cables from the stepper driver for the X/Y/Z axes.

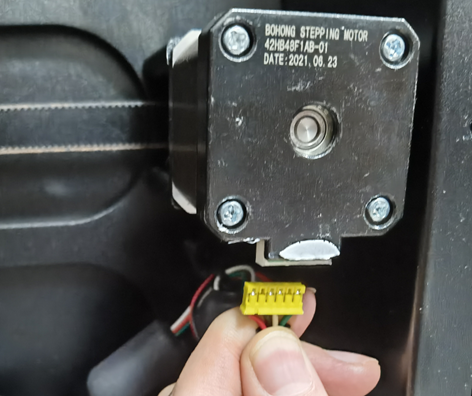
9. Remove the Pro2 motor cable from the Z-axis motor as shown in the image.
Note: If the X/Y-axis stepper driver needs to be replaced, find the corresponding X/Y-axis motor, then remove the Pro2 motor cable for the X/Y-axis.

10. Gently insert the Pro2 stepper driver power cord V2 (driver power), Pro2 stepper driver signal cord V2 (signal shielding), and Pro2 motor cable into the new stepper driver as shown in the image.
Insert the plugs with clips into the stepper driver as shown below.
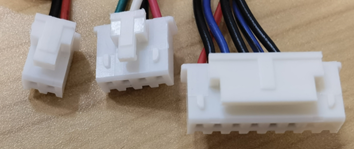
Note: Do not insert the plugs as shown below into the stepper driver. Please note the differences in clips to distinguish between the types of plugs, as well as the colour.

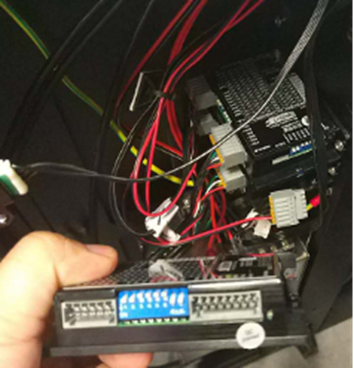
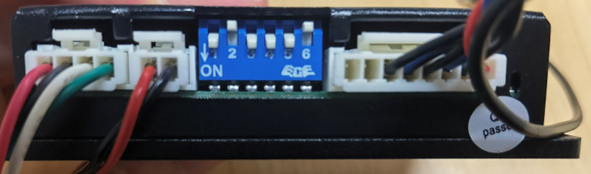
11. Set the current switches in the blue area of the stepper driver.
The current switches for the Z-axis stepper driver are shown in the image. Switches for 1, 3, 4, and 5 are ON. Switches for 2 and 6 are OFF.
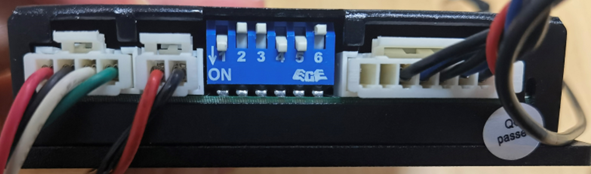
The current switches of the X/Y-axis stepper driver are shown in the image. Switches for 1, 4, and 5 are ON. Switches for 2, 3, and 6 are OFF.
12. Install the new stepper driver, and tighten the outside and inside retaining screws.
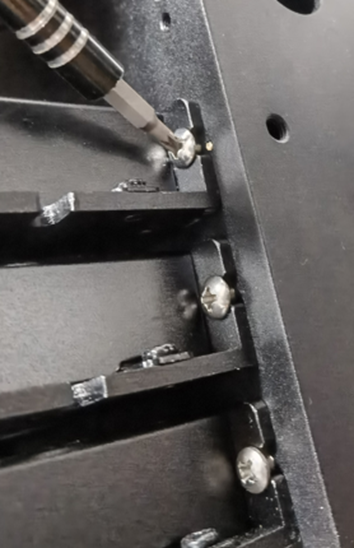
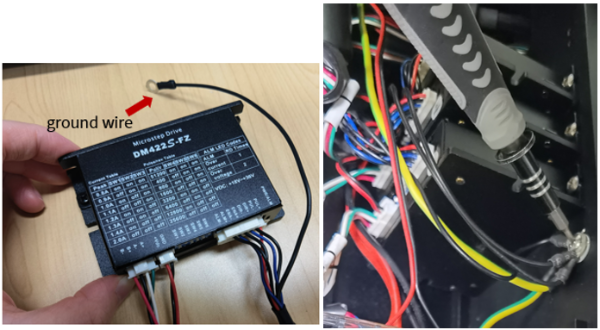
13. Screw in the ground wire of the stepper driver as shown in the image.
14. Reconnect the three cables to the clamps using cable ties. Screw the three clamps back into place as shown in the red circles.
15. Insert the Pro2 stepper driver power cord V2 (driver power) and Pro2 stepper driver signal cord V2 (signal shielding) into the motion controller board as shown in the image.

16. Insert the Pro2 motor cable with a yellow plug into the Z-axis motor as shown in the image.
Note: If the X/Y axis stepper driver needs to be replaced, find the corresponding X/Y-axis motor, then insert the Pro2 motor cable for the X/Y-axis.
17. Put the cover of the motion controller board back. Close the filament-side door.
18. Attach the bottom cover and reinstall the screws.
19. Put the machine back into its upright position.
20. The replacement is complete.
[13.117-EN.1.0.20230719-Pro2 Series-How to Replace the New Stepper Driver]
-End-
