
[ Manual Pro2 Series - 042 Replace Right Y Belt –V1.0 ]
1. Loosen the grub screws in pulleys until they can move freely.

2. Loosen the screws which hold the belt block until you can split it from sliding block.

3. Remove belt from printer.
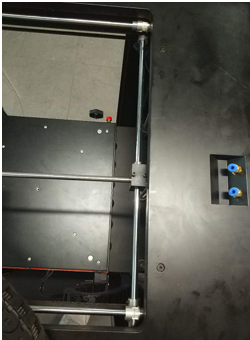
4. Put the new belt on the rod. Wrap the belt around the pulleys on both sides.
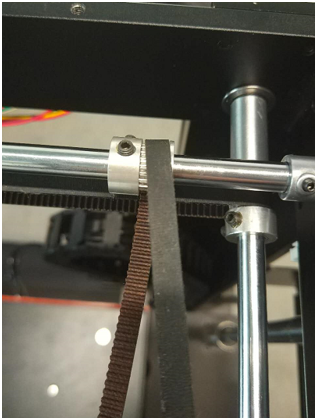
5. Hold both ends of belt and push into the belt block.
Note: The belt should be placed exactly at the middle gap of belt block.
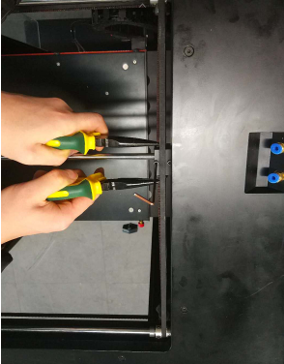
6. Using two pliers, pinch both ends of belt. Push the belt wheels to the ends of rod.
7. With ample force, firmly push both pliers toward the middle block.

Note: The belt should be centered at the middle gap of belt block.
8. Tighten the screws that hold the belt block (with help from second person).
9. Pinch the belt to check the tension matches the opposite side.
If tension is uneven, choose the looser of the two and repeat steps 1 thru 9.
If the tension is almost even refer to the manual <Gantry Alignment>.
[ Manual Pro2 Series - 042 Replace Right Y Belt –V1.0 ]
-END-
