
The Pro3 Series is equipped with a flexible build plate. The flexible build plate can be used to easily remove printed parts while minimizing potential damage to the final print. Additionally, the flexible build plate can quickly regain its shape and return to printing quickly.
Tool:
① Raise3D Pro3 Build Plate
1. When you get your brand new Pro3 series printer, the build plate will be completely and correctly installed on the heatbed. You do not need to install the build plate.

Figure 1 The build plate is installed.
2. It will be necessary to remove the build plate from the printer when you need to remove a model from the build plate, or clean the BuildTak printing surface.
1) When the build plate cools to room temperature, turn the 2 thumb screws counterclockwise until the thumb screws are loose.
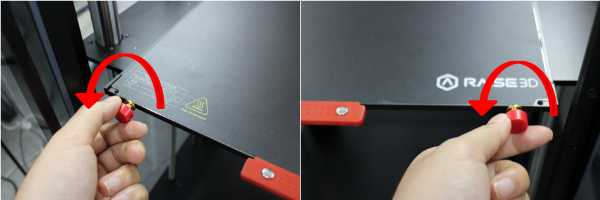
Figure 2 Turn the 2 thumb screws counterclockwise to loosen them.
2) Wait for the build plate to cool to room temperature. Hold the red handle on the build plate, slightly lift the build plate, and then take the build plate out.
Note: The build plate temperature is high. Do not remove the build plate while the printer is heating. It is recommended to wear the heat-insulating gloves provided.

Figure 3 Take the build plate out of the printer.
3. After removing the model or cleaning the build plate, you need to put the build plate back on the printer. Please attach the whole build plate to the heatbed. The edge of the build plate should be clamped by the thumb screw.
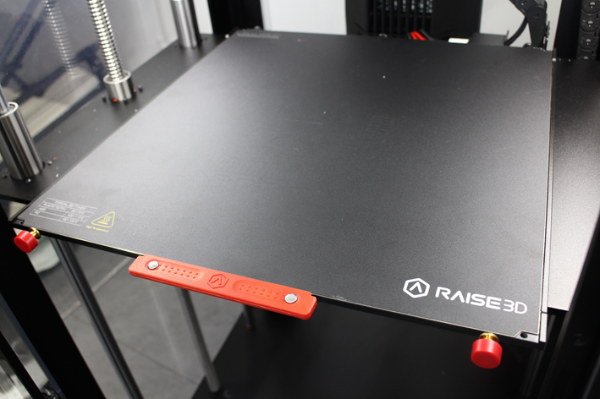
Figure 4 Install the new build plate.
4. When the build plate is at room temperature, turn the two thumb screws clockwise until the thumb screws are tightened.
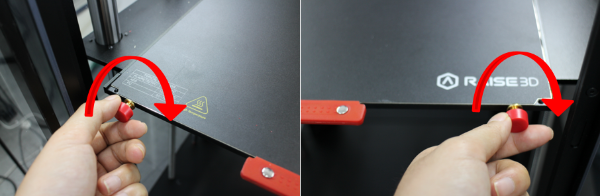
Figure 5 Turn the 2 thumb screws clockwise to tighten them.
[Pro3 Series- How to Install the Build Plate - V1.0]
-END-
