
Tools:
①2.5 mm hex wrench
①Phillips screwdriver

A. Turn off the printer
Turn off the printer and disconnect the power cord.
Figure 1 Turn off the printer and disconnect the power cord.
B. Remove the Endstop
The X-axis endstop does not require removal of the clear plastic side panel, and the operational steps are ssimilar for the Y-axis endstop. The following guide will use the Y-axis endstop as an example. The picture below shows the X-axis endstop.
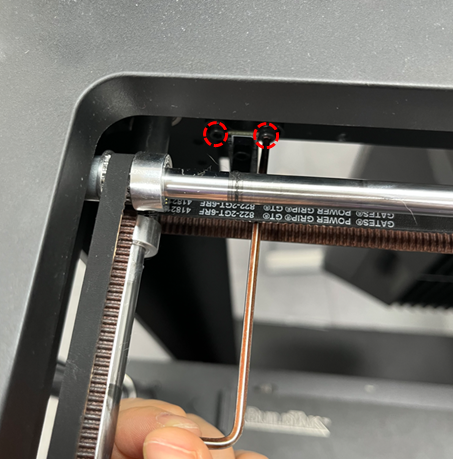
Figure 2 The X-axis endstop replacement steps are similar to that of the Y-axis endstop.
1. Remove the 7 screws on the plastic side panel with a Phillips screwdriver to remove the clear plastic side panel.


Figure 3 Remove the 7 screws on the plastic side panel using a Phillips screwdriver.
2. Carefully depress the buckle on the endstop assembly to unplug the connection cable.
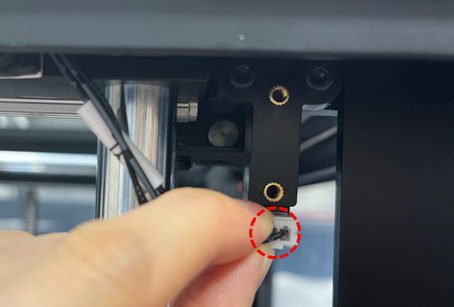
Figure 4 Depress the buckle on the endstop assembly to unplug the connection cable.
3. Use a 2.5 mm wrench to remove the 2 screws securing the endstop assembly to the printer, and then remove the endstop assembly from the printer.


Figure 5 Use a 2.5 mm wrench to remove the 2 screws securing the endstop assembly, and then remove the endstop assembly from the printer.
4. Remove the 2 screws on the endstop board with a 2.5 mm wrench. Remove the limit endstop board from the assembly.


Figure 6 Remove the 2 screws on the endstop board with a 2.5 mm wrench.
C. Install the New Endstop
1. With a new limit endstop board, use a 2.5 mm wrench to install the 2 screws to secure the replacement board to the endstop assembly.
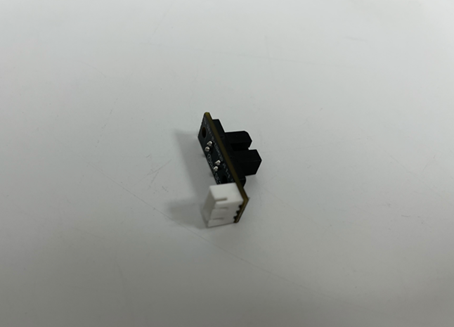
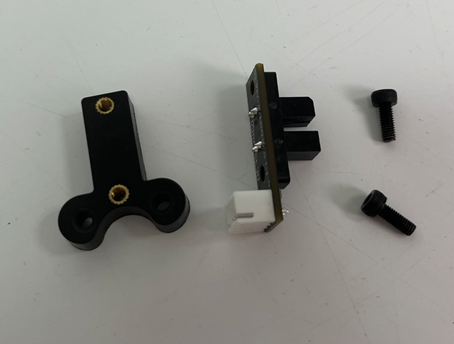
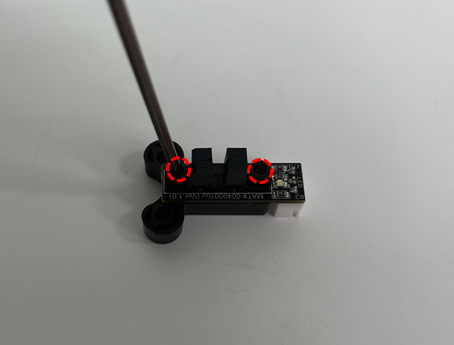
Figure 7 Use a 2.5 mm wrench to install the 2 screws on the endstop assembly.
2.Pre-insert the 2 screws on the endstop assembly, and then install the endstop assembly.

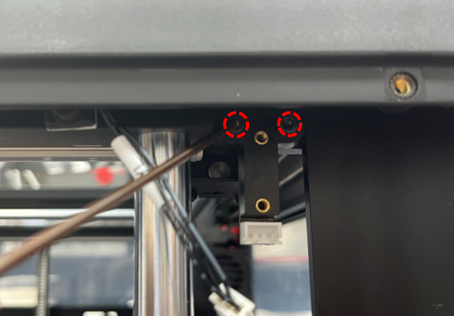
Figure 8 Use a 2.5 mm wrench to install the 2 screws on the endstop assembly to secure it to the printer.
3. Carefully insert the connecting cable for the endstop fully into the board connector.

Figure 9 Insert the connecting cable into the endstop board connector.
4. Install the 7 screws on the clear plastic side panel with a Phillips screwdriver and install the clear plastic side panel to the printer.
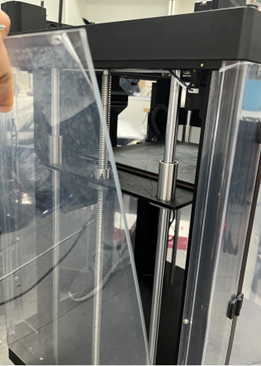
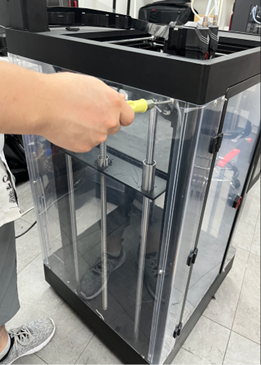
Figure 10 Install the 7 screws on the clear plastic side panel with a Phillips screwdriver.
D. Check whether the machine runs normally after replacing the endstop
Reconnect the power cord, turn the printer on, and wait for the touchscreen computer to boot.
1. At the touchscreen, open the Utilities tab and select the green Home icon to home the X/Y axis. If the printhead cannot successfully home the X/Y axis, check if the installation is correct.
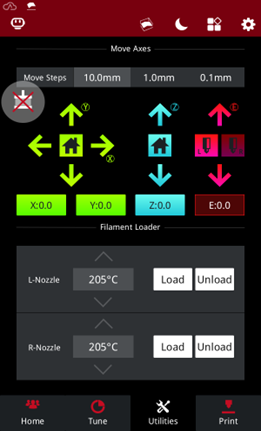

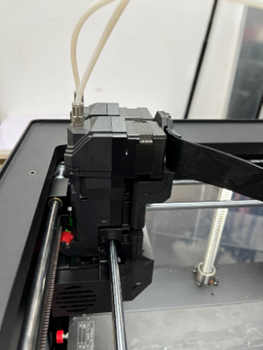
Figure 11 Verify that the printhead can home the X/Y axis.
[15.082.EN.2.0-20240123-Pro3 Series-How to Replace the Endstop]
-END-
