
Tools:
① A Phillips-head screwdriver
② A 2.5 mm hex wrench

Component:
A sheet metal of filament holder for replacement

1. Use a Phillips-head screwdriver to remove four screws in green circles as shown below. Use a 2.5 mm hex wrench to remove eight screws in red circles as shown below. Then gently remove the front right PC plate.


2. Open the filament-side door of the printer and find the sheet metal of filament holder.
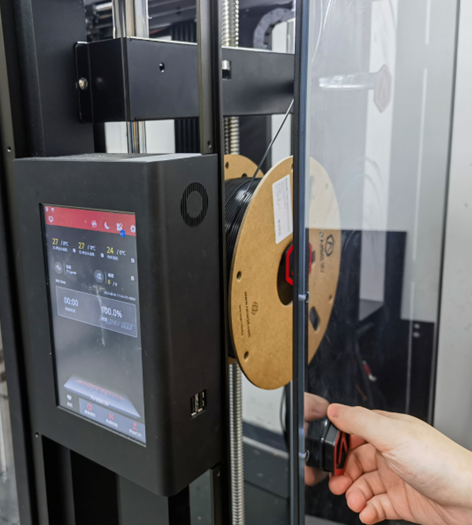

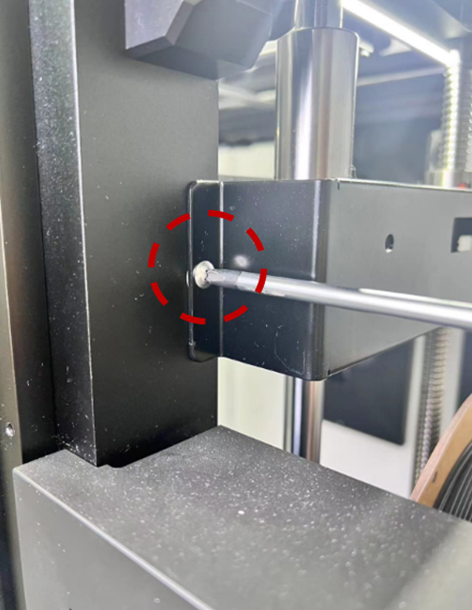
3. Remove the two screws as shown below with a Phillips-head screwdriver. Then remove the current sheet metal of filament holder.

4. Install the sheet metal of filament holder for replacement back in place. Tighten the screws with a Phillips-head screwdriver.

Note: The side of the sheet metal of filament holder near rectangular holes should face up as shown with the red arrows in the above figure.
5. Close the filament-side door of the printer. Install the front right PC plate back in place. Tighten 12 screws with a Phillips-head screwdriver and a 2.5 mm hex wrench.


6. The replacement is complete.
[15.119-EN.1.0.20230807-Pro3 Series-How to Replace the Sheet Metal of Filament Holder]
-End-
