
Tools:
①2mm hex wrench
②2.5mm hex wrench

A.Turn off the Printer
Turn off the printer and cut off the power.
Figure 1 Turn off the printer and cut off the power.
B.Remove the Touchscreen Assembly
1. Use a 2.5mm wrench to remove the 2 screws on the cuboid block below the touchscreen assembly and lower the cuboid block.

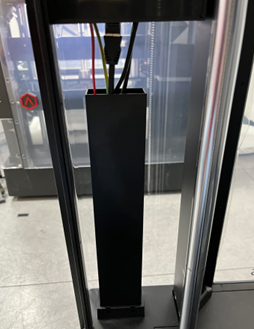
Figure 2 Use a 2.5mm wrench to remove the 2 screws on the cuboid block below the touchscreen assembly and lower the cuboid block.
2. Use a 2.5mm wrench to remove the 3 screws in the same line circled in red on the side of the touchscreen assembly.
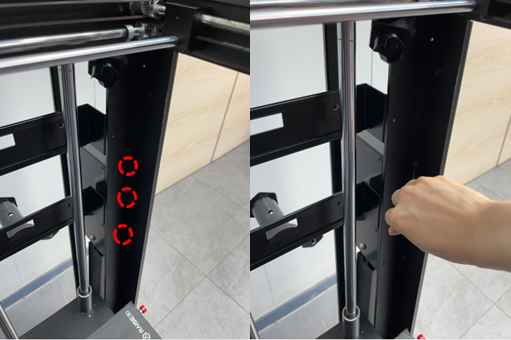
Figure 3 Use a 2.5mm wrench to remove the 3 screws in the same line circled in red on the side of the touchscreen assembly.
3. Use a 2mm wrench to remove the 4 screws on the touchscreen assembly and take off the cover.
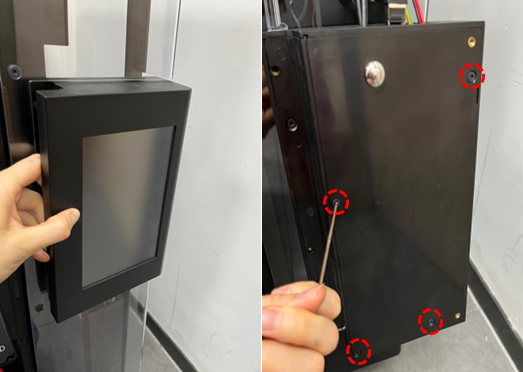
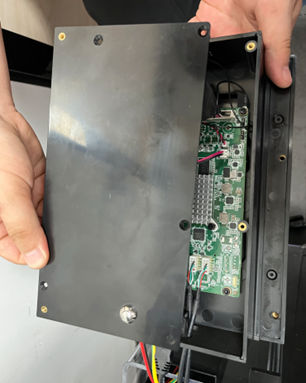
Figure 4 Use a 2mm wrench to remove the 4 screws on the touchscreen assembly and take off the cover.
4. Unplug the 5 wires on the wiring board, as shown in the red circle, use a 2.5mm wrench to remove the 1 screw that fixes the ground wire and remove the touchscreen assembly.
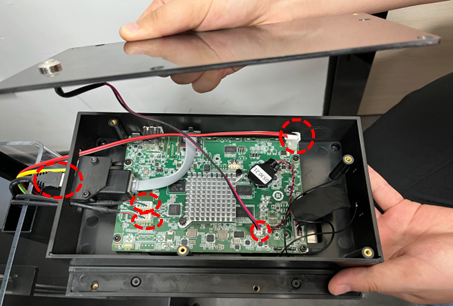
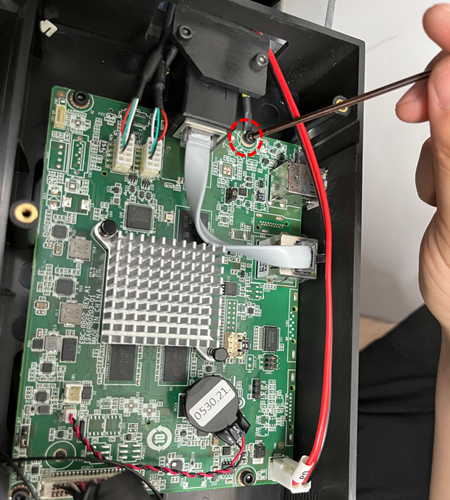
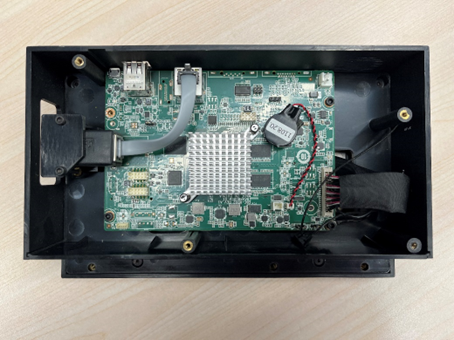
Figure 5 Unplug the 5 wires on the wiring board, as shown in the red circle, use a 2.5mm wrench to remove the 1 screw that fixes the ground wire and remove the touchscreen assembly.
C.Install the New Touchscreen Assembly
1. Take the new touchscreen assembly.
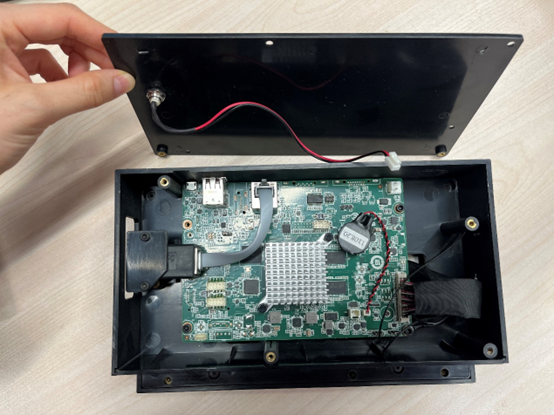
Figure 6 Take the new touchscreen assembly.
2. Use a 2.5mm wrench to tighten the 1 screw connecting the ground wire, and insert the 5 connecting wires circled in the figure.


Figure 7 Use a 2.5mm wrench to tighten the 1 screw connecting the ground wire, and insert the 5 connecting wires circled in the figure.
3. Close the touchscreen cover, tighten the 4 screws on the touchscreen assembly with a 2mm wrench, and put the touchscreen assembly back in place.

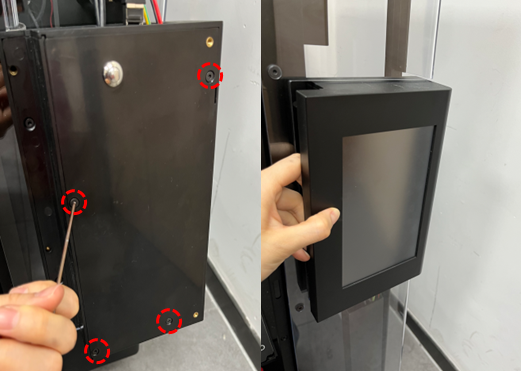
Figure 8 Close the touchscreen cover, tighten the 4 screws on the touchscreen assembly with a 2mm wrench, and put the touchscreen assembly back in place.
4. Install the 3 screws in the same line circled in red on the side of the touchscreen assembly with a 2.5mm wrench.
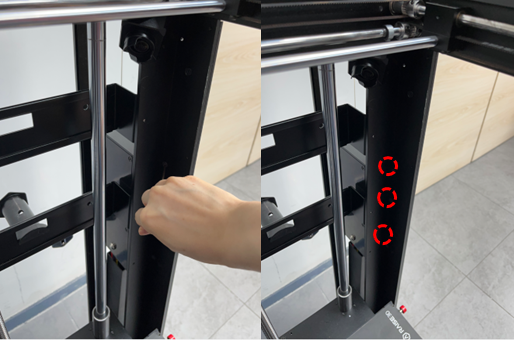
Figure 9 Install the 3 screws in the same line circled in red on the side of the touchscreen assembly with a 2.5mm wrench.
5. Use a 2.5mm wrench to install the 2 screws on the cuboid block below the touchscreen assembly, and install the cuboid block back to its position.

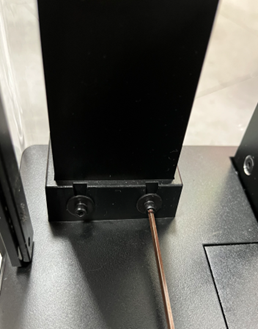
Figure 10 Use a 2.5mm wrench to install the 2 screws on the cuboid block below the touchscreen assembly, and install the cuboid block back to its position.
D. Power-on to check if the screen display is normal.
Figure 11 Power-on to check if the screen display is normal.
[ 15.081-EN.1.0.20220629-Pro3 Series-How to Replace the Touchscreen Assembly]
-END-
