
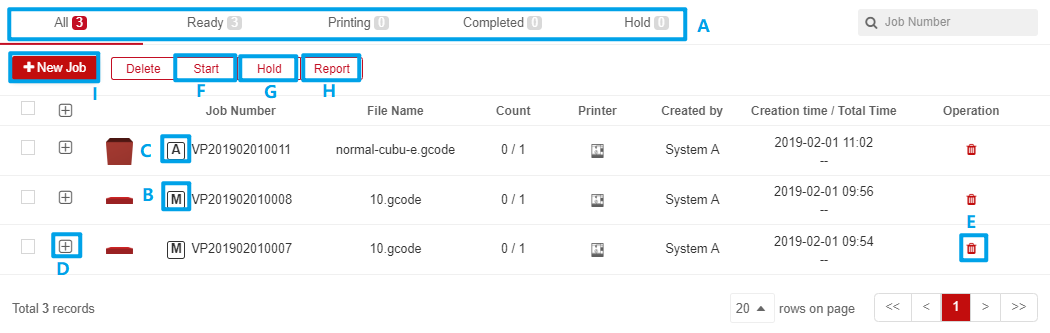
The Jobs List module presents all the printing jobs of the team.
Queue: The printing job is queue. It will be printed when printer finishes last printing job or is available in Queue status. Note that automatic jobs will remain in Queue status until it turns into Complete.
Printing: Job is printing;
Completed: Job will become this status when you get model from printer and push button in printer screen.
Hold: The printing job is held and will not be printed until it turns into Queue.
Individual: The printing job is assigned from Files module on RaiseCloud. It could be
Automatic or Manual. (Automatic: and Manual:
 );
);
Printer: The printing job is assigned locally from the printer or the USB drive on it;
Work Order: The printing job is assigned from Work Order module on RaiseCloud.
Click  to check details of the printing job or job list. The printing job will turn grey when it is completed.
Click  button to delete printing jobs. The deleted jobs will be moved to trash bin module.
Note: Trash Bin jobs are permanently removed after 10 days.
Click Start button to start the printing job that is in Hold state. Printer in Queue status will start the job.
If the User does not want to print the job, you can select the Hold button to hold job.
Click Report button, choose date range to export the job list.
User can generate new job in this module:
1. Click + New job;
2. Choose from My Files / Team Files;
3. Choose file and click Confirm;
4. Create the printing job in Print page;
5. Click Start Print Now.
