
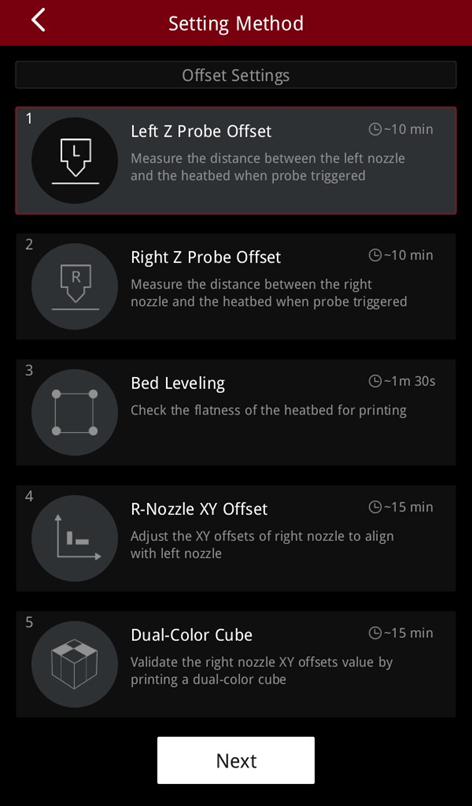
In the “Offset Calibration” interface, you can calibrate the “Left Z Probe Offset”, “Right Z Probe Offset”, “Bed Leveling", "R-Nozzle XY Offset", and "Dual-Color Cube".
Make sure that two spools of Raise3D Hyper Speed PLA filament are installed in the filament holders before calibration.
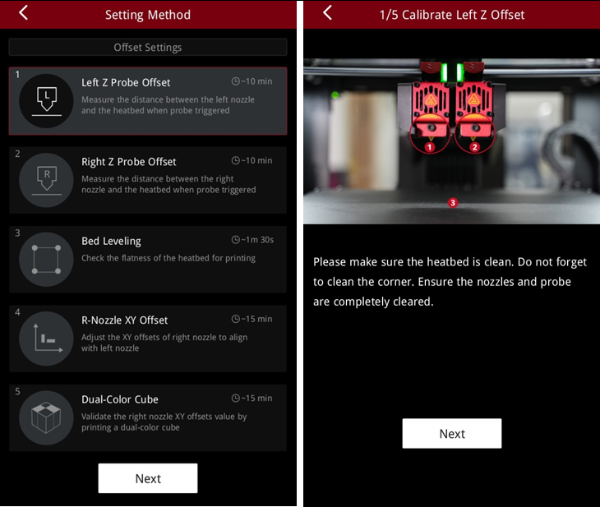
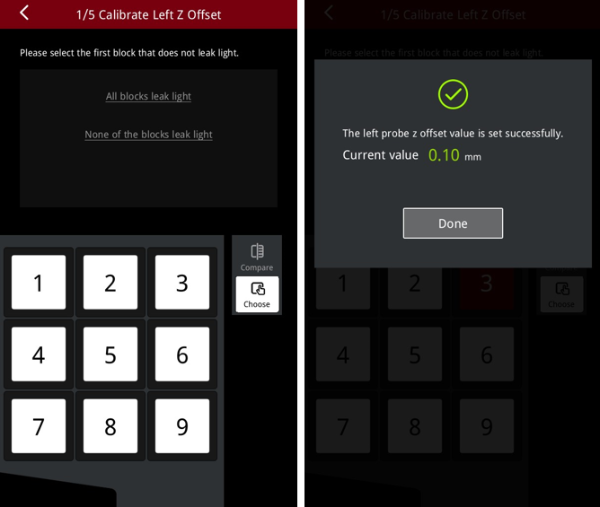
The “Left Z Probe Offset” calibrates the distance between the left nozzle and the build plate when the left probe is triggered.
If the distance is too far, the model will not stick to the build plate and will be distorted. If the distance is too close, problems such as insufficient filament extrusion and scratching of the nozzle may occur.
Make sure that the build plate and nozzle are clean before calibration.
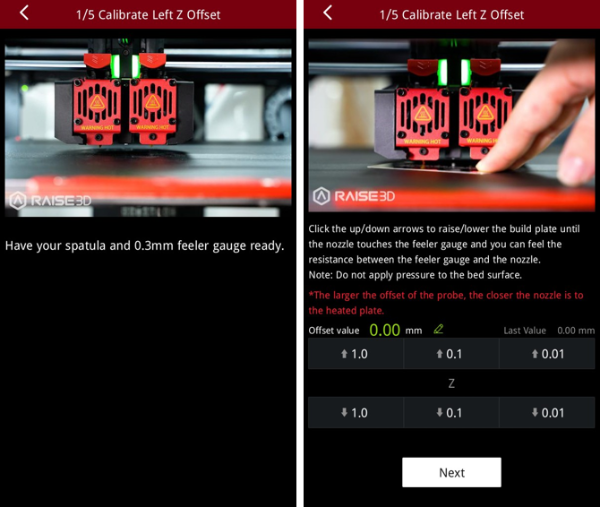
Prepare a 0.3 mm feeler gauge. Adjust the distance between the nozzle and the build plate according to the prompts on the screen. Make sure you can feel some resistance as the feeler gauge moves between the nozzle and build plate.
Note: Do not press hard on the build plate during calibration.
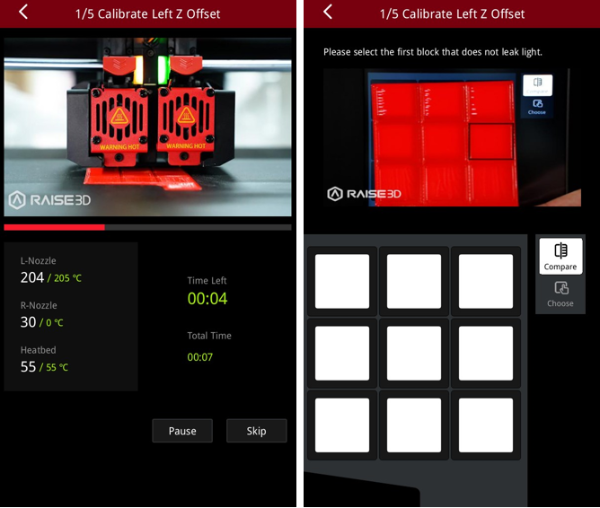
The printer will print a 9-square calibration model.
After the model is printed, compare the model with the on-screen example. Select the first block that doesn’t leak light. The printer will automatically adjust the offset value of the left nozzle.
Note: If all the blocks leak light or do not leak light, it means that there may be deviations when measuring the distance between the build plate with a feeler gauge, and it is necessary to recalibrate by selecting the corresponding scenario.
If all the blocks leak light, the clearance between the nozzles and the build plate is too large. Select "All blocks leak light" and the machine will lower the nozzle and recalibrate.
If all the blocks do not leak light, the clearance between the nozzle and the build plate is too small. Select "None of the blocks leak light" and the machine will lift the nozzle and recalibrate.
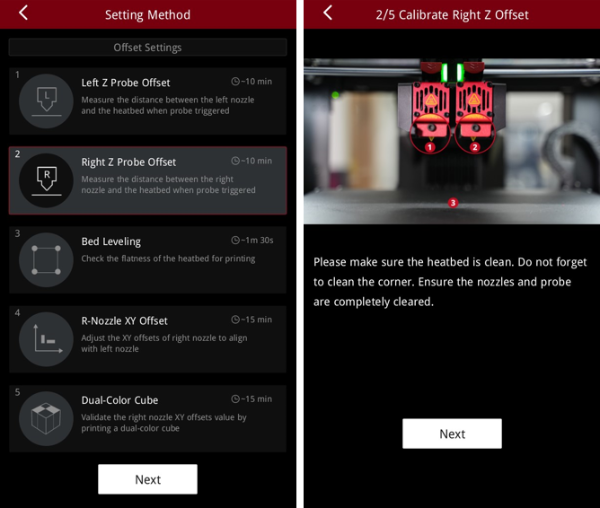
The “Right Z Probe Offset” calibrates the distance between the right nozzle and the build plate when the right probe is triggered.
Make sure that the build plate and nozzle are clean before calibration.

Prepare a 0.3 mm feeler gauge. Adjust the distance between the nozzle and the build plate according to the prompts on the screen. Make sure you can feel some resistance as the feeler gauge moves between the nozzle and build plate.
Note: Do not press hard on the build plate during calibration.
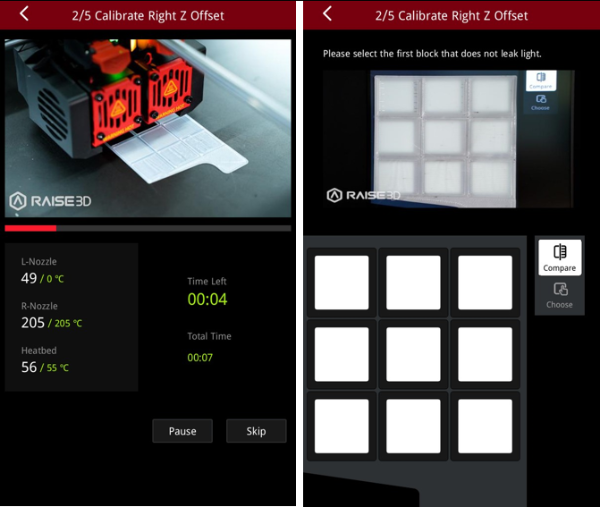

The printer will print a 9-square calibration model.
After the model is printed, compare the model with the on-screen example. Select the first block that doesn’t leak light. The printer will automatically adjust the offset value of the left nozzle.
Note: If all the blocks leak light or do not leak light, it means that there may be deviations when measuring the distance between the build plate with a feeler gauge, and it is necessary to recalibrate by selecting the corresponding scenario.
If all the blocks leak light, the clearance between the nozzles and the build plate is too large. Select "All blocks leak light" and the machine will lower the nozzle and recalibrate.
If all the blocks do not leak light, the clearance between the nozzle and the build plate is too small. Select "None of the blocks leak light" and the machine will lift the nozzle and recalibrate.
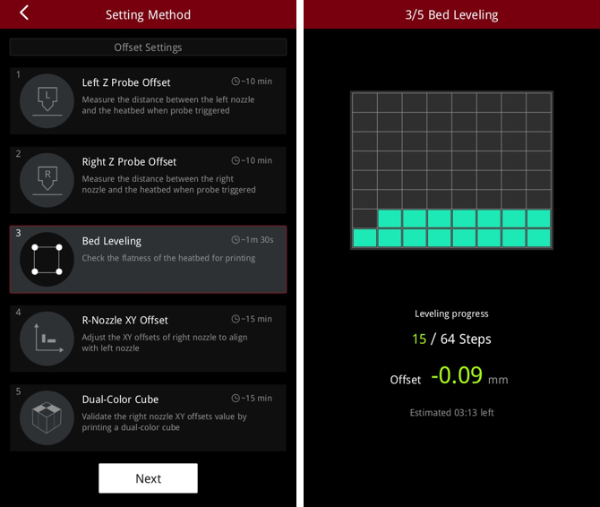
The “Bed Leveling” function is to calibrate the flatness of the build plate. The printer will automatically probe 64 points on the build plate and adjust the flatness of the build plate.
Make sure the build plate is clean before leveling.
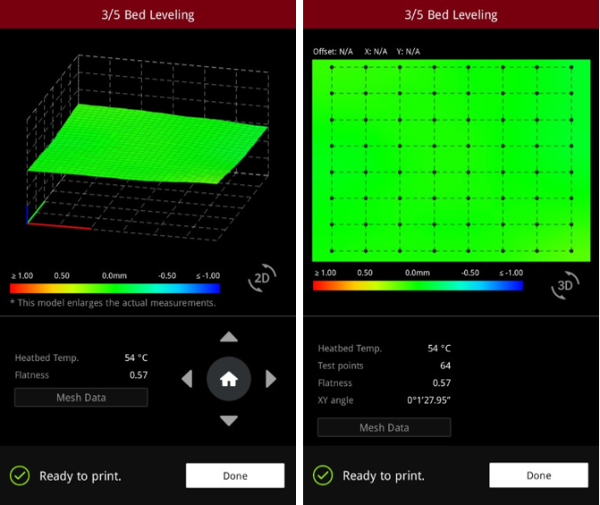
When leveling is complete, the 3D bed leveling result will be displayed on the screen. Tap the 2D switch icon  to toggle between 3D representation of the result to 2D.
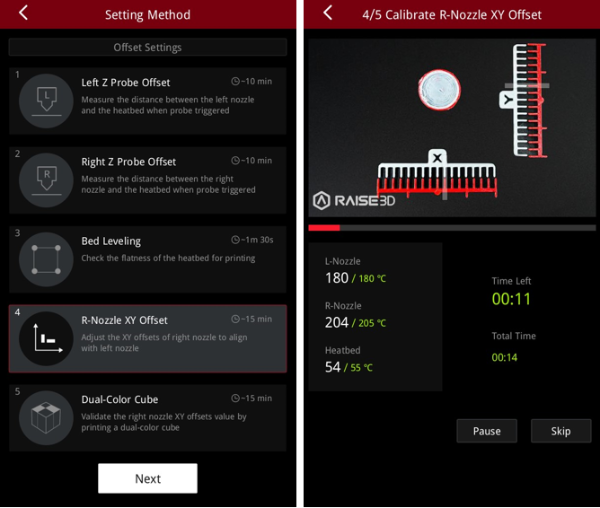
The “R-Nozzle XY Offset” is to calibrate the XY offset of the right nozzle so that it aligns with the left nozzle.
The printer will heat up automatically and print two test models.

After printing, according to the instructions on the screen, select a pair of lines that are completely aligned on the X model and the Y model respectively. As exemplified in the figure, the number that corresponds to the pair of aligned lines on the X model is 1, and the number that corresponds to the pair of aligned lines on the Y model is 2.
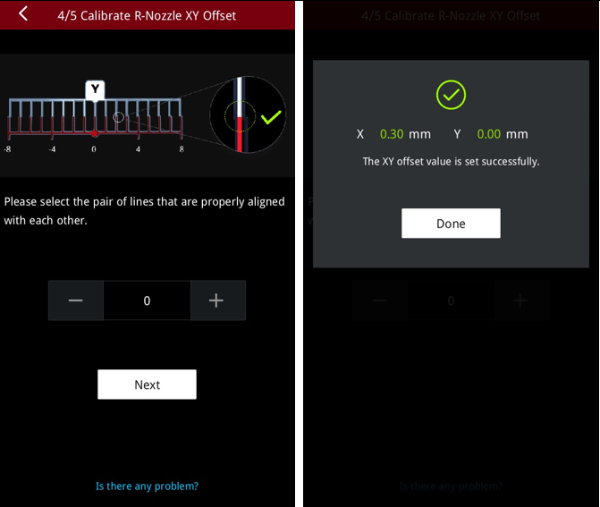
Input the serial number on the screen. The printer will automatically calibrate the XY Offset of the right nozzle and display the current calibrated value.
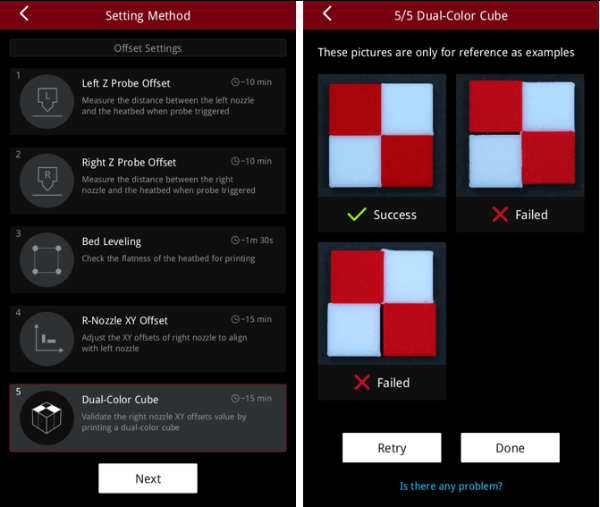
The “Dual-Color Cube” is to validate the XY offset value of the right nozzle by printing a test model comprised of dual-color cubes.
After printing, please compare the printed dual-color cube with the sample graphic on the screen, and check if there is an obvious gap between the color blocks.
If there is no gap between the color blocks, it means that the X/Y/Z direction offset value of the right nozzle is within a reasonable range.
If there is a gap between the color blocks, please tap "Retry" and re-run the “R-Nozzle XY Offset” and “Dual-Color Cube” to recalibrate the XY offset value of the right nozzle.
