
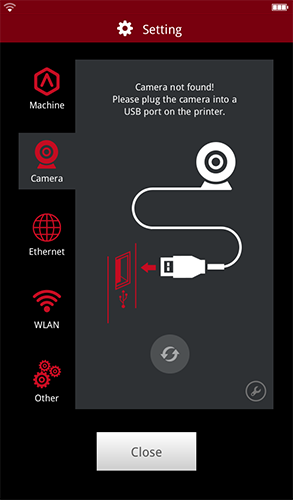
Click the "Setting > Camera" to enter the Camera page. If the printer does not have a built-in Camera, plug in the Raise3D Camera upgrade into an available USB port on the printer, then click the refresh button to enter the camera selection page.
Select the camera and wait for the connection. Pictures can be viewed on RaiseTouch and ideaMaker after successfully connected.

Select the camera and click ok to connect to the selected camera. Click the camera button to view the picture taken on the RaiseTouch. Click the close button to turn off the camera function.

Note:
1. Camera is not accessible from your computer unless you are using ideaMaker version 3.1.7 or newer.
2. Auto connect at startup can be set in Camera Advanced Settings.

-END-
