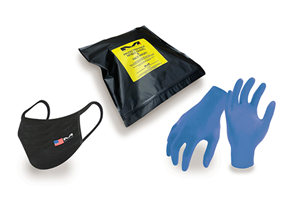
Tools (the following images are for reference only):
1) Sandpaper, grit ranging from 400 to 1200

2) Varnish

3) Protective gloves and mask

After the operation steps of washing, curing, removing supports, and polishing support points as needed, the transparency of models printed using Raise3D High Clear Resin can be improved using the following method. This is useful for 3D-printed lenses, microfluidic devices, prisms, and other models where high transparency is necessary.
Note: Please wear protective gloves and a mask before performing the following steps.
1. Polish and buff: Polishing and buffing can effectively remove the surface layer lines and defects, improving the part's transparency and luster. Starting with 400-grit sandpaper and gradually increasing the grit to 1200 can ensure a smooth surface of the part and reduce the scratches and layer lines so as to enhance the transparency.
a) Polish the part with sandpaper, either under running water or using wet sandpaper. Multiple rounds of polishing may be necessary to achieve the desired smoothness. Start with 400 grit sandpaper and gradually move on to 600, 800, and 1000-grit sandpaper as needed, and try to make the polished texture consistent with the original model's texture.

b) The results of in-depth polishing are shown in the following three figures, from left to right, representing the initial state before in-depth polishing, the state after the first in-depth polishing, and the state after multiple rounds of in-depth polishing.

2. Wash Model: Use the Raise3D DF Wash or an ultrasonic washer to remove debris left from polishing and buffing. After washing, thoroughly dry the model. This step removes grease and dust from the surface of the model, providing a clean surface for spraying. A dry surface helps with the adhesion of varnish, ensuring the transparency and surface finish of the sprayed model.

3. Spray Varnish: Spraying varnish is a simple, economical, and quick method of finishing simple parts. Varnish suitable for furniture or model painting can be found online or at hardware stores. Spraying two to three layers of varnish onto the model can increase the transparency and surface finish.
a) Place the model in an open area and spray the varnish evenly onto the model at a 45° angle from above, ensuring that every surface is coated.

b) After the model is dried, repeat Step 3a above and spray the varnish 2-3 times.
4.Cure: After spraying varnish onto the model, allow it to dry, and then place the model into the DF Cure for curing for 10-30 seconds.

The lower-left figure represents the state before curing after varnishing, while the lower-right figure represents the state after curing following varnishing.

After completing all the steps mentioned above, the process about how to improve the transparency for the high clear resin models is complete. If you want to color or paint the model to enhance its artistic appeal, you can directly use acrylic paint for filling. Since the model has already been washed and cured before the paint filling, there is no need to wash it again with the cleaning solvent after the paint is filled. The effect after paint filling is shown in the following figure.

[24.005-EN.1.0.20250102-How to Improve Transparency in High Clear Resin Models]
-END-


