
Click Preview button so that you can check the sliced model as Figure 1.
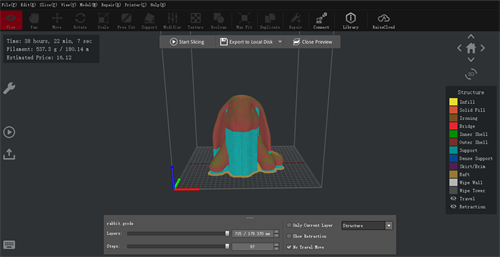
Figure 1: Preview how the model will be printed.
In this page you can check the Time, Filament, Estimated Price, Retraction and Travel move.
Time refers that the time required to the printing task.
Filament refers that the filament quantity required to the printing task.
Estimated Price refers that the cost required to the printing task.
The blue lines refer to the moving paths of nozzle. The orange marks refer to the retraction points.
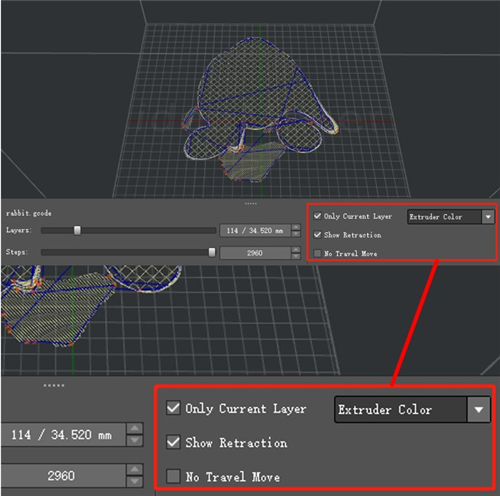
Figure 2: Check the retraction points with "Show Retraction". Check one layer with "Only Current Layer".
It can also show different structures in different colors by selecting Structure in drop list.
The cyan parts refer to support and Raft. The red part refers to outer shell. The green parts refer to the inner shells. The yellow parts refer to infill. The blue lines refer to the moving paths of nozzle.

Figure 3: Show different structures types in different colors.
It can also show or hide structures features.
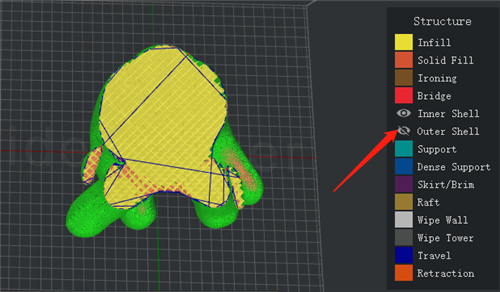
Figure 4: Hiding Outer Shell.
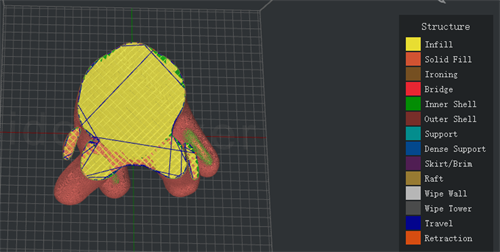
Figure 5: Showing the Outer Shell.

Figure 6: Enable "2D" to check the current layer with orthographic view.
Cross Section with this function enabled, you can check the model’s inner structure.
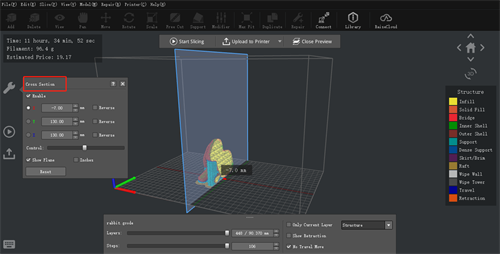
Figure 7: The "Cross Section" function.
 : Switch between Export and Upload by clicking the arrow on the right.
 : Upload the G-Code file to your printer.
 : Save the G-Code file to local disk.
 : Upload the G-Code file to RaiseCloud. (It can only work properly with ideaMaker version 3.6.0 or higher.)
 : Upload the G-Code file to OctoPrint. (It can only work properly with ideaMaker version 4.0.0 or higher.)
 : Start slicing your model.
 : Close the preview interface.
 : Check model with home view.
-END-
