
After the slicing is complete, a Slicing Result panel will be output by default in the upper-left hand corner of the ideaMaker interface as shown in the red box below. It shows the print time, material and price. When the cursor hovers over the icon  , the print time or the material amount will be displayed for each path type of the sliced model(s). After clicking the icon
  , you can save the slicing report to the local disk.
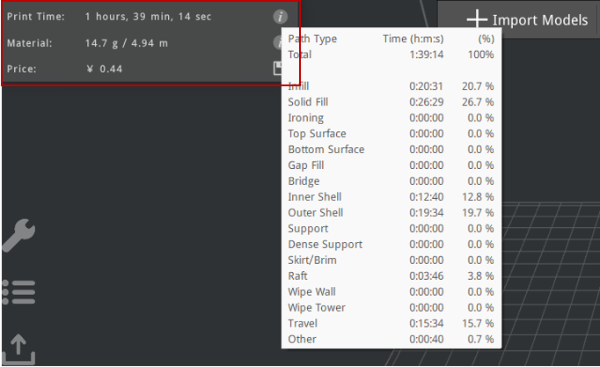
Figure 1: Slicing Result panel – estimated print time for each path type.
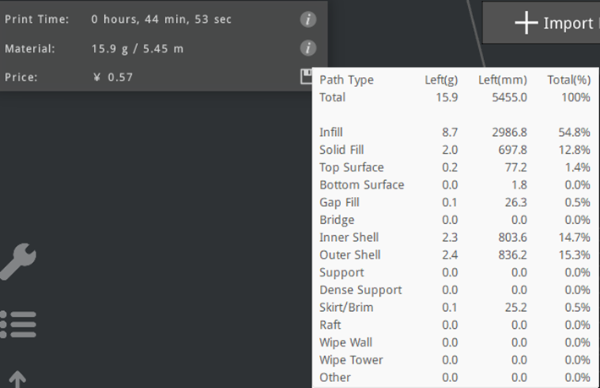
Figure 2: Slicing Result panel – estimated material amount for each path type.
Note: If both the left and right nozzles are used or only the right nozzle is used, it will display the filament amount for both the left and right nozzles respectively.
If you want to have the Estimated Print Result displayed, click Edit > Preferences > Interface > Show legacy slice report dialog. After slicing is complete, the Estimated Print Result panel will be displayed together with the Slicing Result panel. In the Estimated Print Result panel, you can view the estimated print time, material and price, and the layers/layer height, etc. Click Export Report to save the slicing report to your local disk.
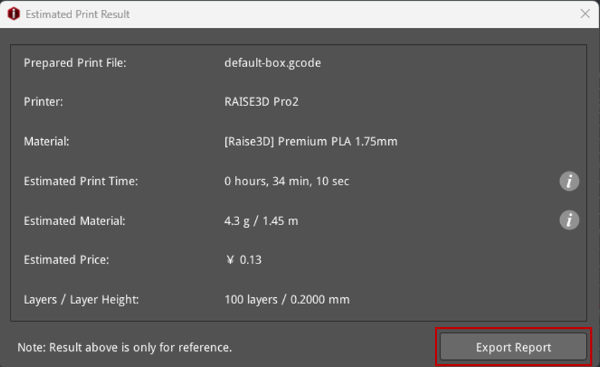
Figure 3: Estimated Print Result.
Click the icon  on the instant operation bar and then drag the sliders to adjust the displayed height to preview the printed content of each layer. When you have completed inspecting the preview, click the icon
  .
.
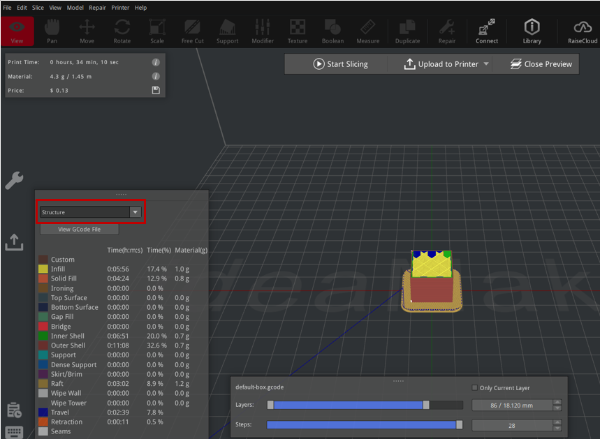
Figure 4: Preview the printed content of each layer.
