
1. First you need to make sure the printer and computer are connected to the same network.
For WLAN connection, there is a small gear button at the top-right corner of the screen. Press the gear button to go to the setting page.

Figure 1: Press the gear button to enter the setting page.
2. Select WLAN tab. Enable WLAN and select your network from the list then input the password.
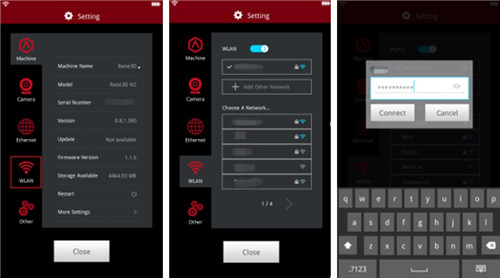
Figure 2: Connect the printer with your "WLAN".
After connecting WLAN for your printer, we will have three options to upload the sliced G-Code files.
Option 1: Click Upload button in Estimated Print Result window to upload the sliced .G-Code files as Figure 3.
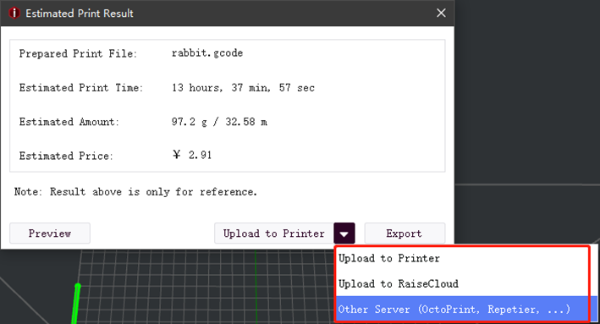
Figure 3: Upload the sliced G-Code files in the Estimated Print Result window.
Option 2: Click Upload to printer button in main screen to upload the sliced G-Code files as Figure 4.

Figure 4: Upload the sliced G-Code files to the printer from the main screen.
Option 3: Click + button or CLICK HERE TO UPDATE FILES button to update sliced G-Code files as Figure 5.
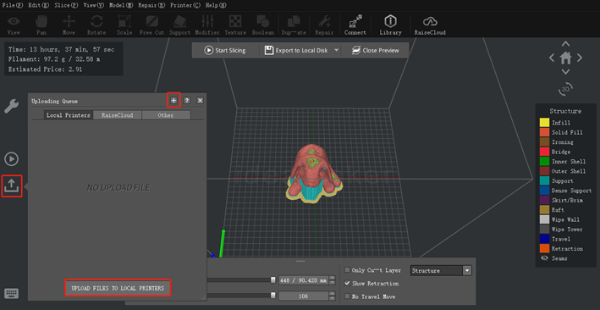
Figure 5: Upload the sliced G-Code files in the "Uploading Queue".
Then you will see the Select Printer page. You can select the printer you want to print with here. And you also can rename the model in Select Printer page.
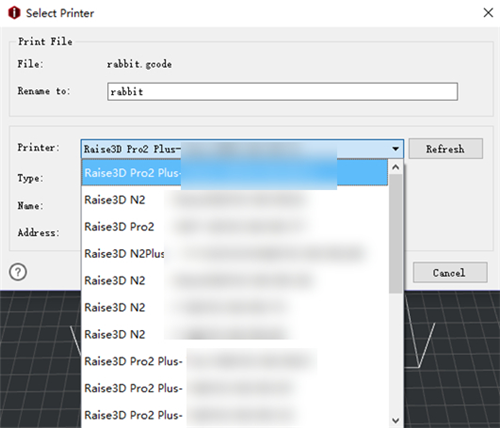
Figure 6: Click "Upload" in "Estimated Print Result" page and select a printer you want to use from the drop list.
3. After you click Upload, the Uploading Queue will appear on the left side of the screen. You can check the uploading progress here.
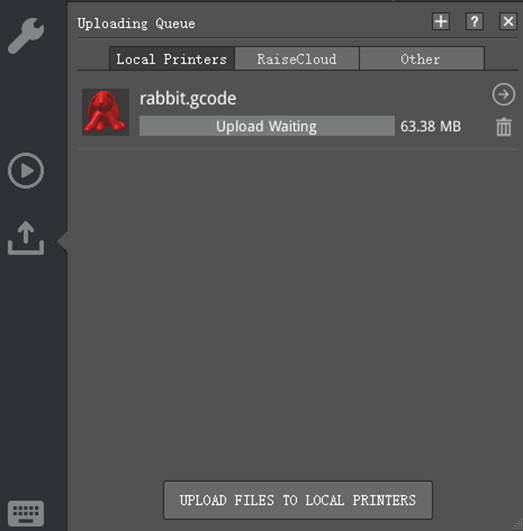
Figure 7: Check the uploading progress in the Uploading Queue at the left side of ideaMaker.
4. After the upload is completed, you can start a print. Select the print from the touch screen on the printer. The WLAN-uploaded files are placed in Local storage (SD card is only applicable to N series printers).

Figure 8: Uploaded files will be inside "Local Storage".
5.Remote connection.
You can also connect to your printer through ideaMaker remotely. Select Printer > Connect to Printer (Raise3D printers).
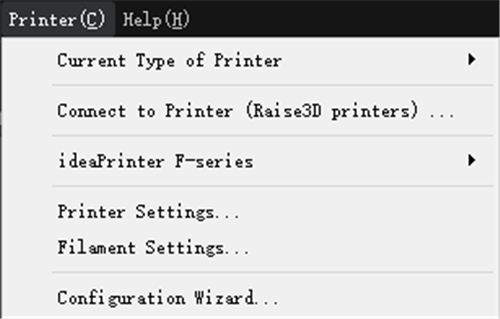
Figure 9: Select Printer > Connect to Printer (Raise3D printers).
There are three options to remote connect the printers.
Option 1: Click Scanning button, then click  button to refresh the printer as Figure 10.

Figure 10: Scanning Printers.
Select the printer you want to connect with in this page.

Figure 11: Select the printer you want to connect in the "Scanning" list. Click the arrow icon to enter.
 : click this button to add the selected printers to bookmarks.
 : A printer with this Hyper FFF™ logo indicates that the printer supports the Hyper Speed feature.
Option 2: Click "+" button then input printer’s serial number and IP Address to add printer.
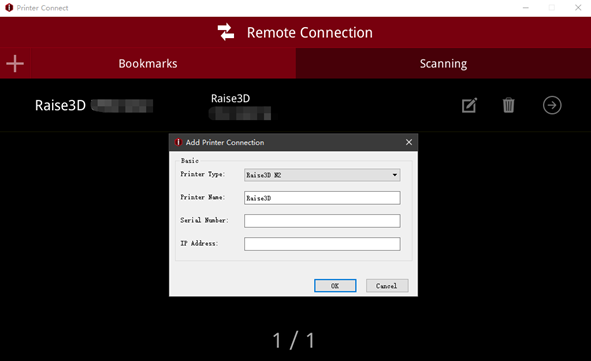
Figure 12: Add the printer to "Bookmarks".
Select the printer you want to connect with in this page.
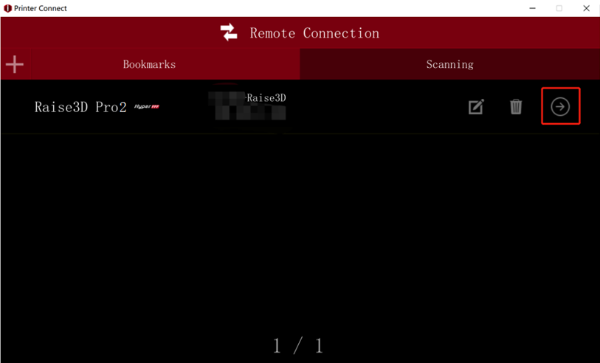
Figure 13: Select the printer you want to connect in the "Bookmarks" list. Click the arrow icon to enter.
 : Edit printer settings, Such as Printer Type, Printer name etc.
 : Delete the printer from Bookmarks
Waiting for connection.
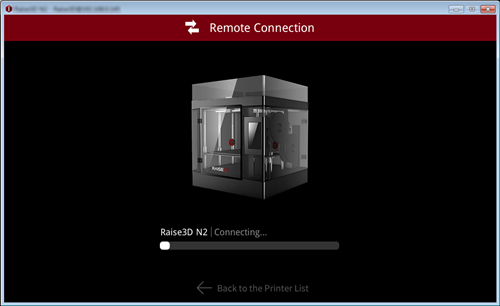
Figure 14: Connecting page.
Now you can control your printer remotely. ideaMaker has the same operational interface as the touch screen on your printer so it is possible to control the printer directly from here as well. The uploaded files will be placed in local storage (SD card is only applicable to N series printers).

Figure 15: Click "Local storage" to check the uploaded files.
Select the file you want to print and press Print button to start.

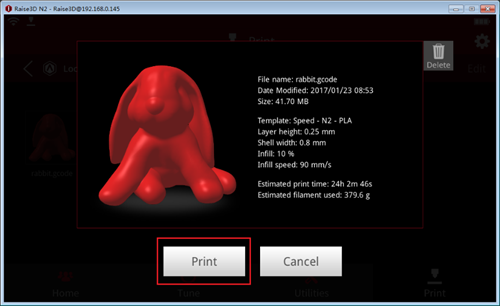
Figure 16: Select a file to print and check the file information.
-END-
