
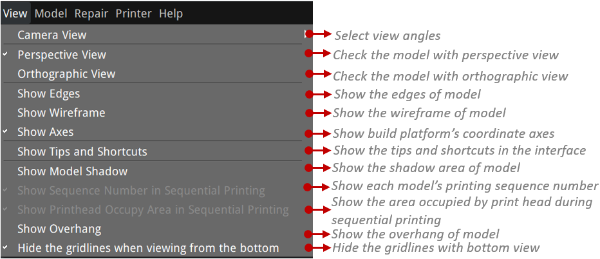
Note: You can also change the model view freely by right clicking and dragging your mouse.
Show Axes: With this function enabled, ideaMaker will show the printer’s coordinate axes, as shown in Figure 1.
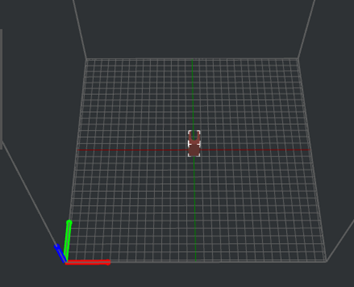
Figure 1: Show axes.
Show Model Shadow: With this function enabled, ideaMaker will show the model’s shadow on the build surface, as shown in Figure 2.
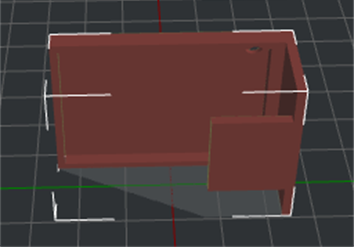
Figure 2: Show the model shadow.
Show Sequence Number in Sequential Printing: With this function enabled, when you check Enable Sequential Printing from the Sequential Printing tab in the Prepare to Slice panel, it will display the printing order of multiple models. As shown in Figure 3, the box (1) will be printed first, and the sphere (2) will be printed later.
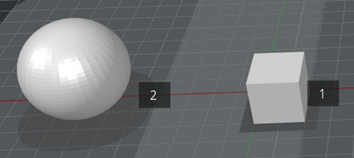
Figure 3: Show Sequence Number in Sequential Printing.
Show Printhead Occupy Area in Sequential Printing: With this function enabled, ideaMaker will show the area occupied by print head during sequential printing as shown in the gray area in Figure 4.
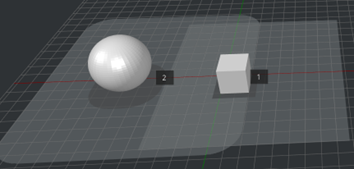
Figure 4: Show Printhead Occupy Area in Sequential Printing.
Show Overhang: with this function enabled, ideaMaker will show the model’s overhang, as shown in Figure 5.
Note: If the model’s overhang angle is smaller than the Overhang Angle in Support Structure panel, the overhang will not be displayed.
Figure 5: Show overhang.
Hide the gridlines when viewing from the bottom: With this function enabled, the gridlines are hidden when viewing from the bottom of the build platform.
