
 : Click this button to add supports to the model in the Support Structure panel.
Note: If supports have been previously generated, ideaMaker will ask you whether or not to remove the existing supports before creating new supports.

Figure 1: Dialog box asking whether to remove the existing supports.
Auto Supports:
Pillar Size: refers to the size of each pillar in support.
Note: The number of supports is dictated by the infill ratio, and the pillar size controls where supports will be generated.
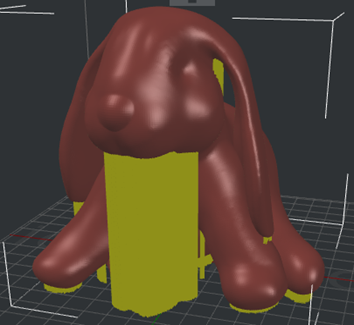
Figure 2: Set Pillar Size to 1mm.
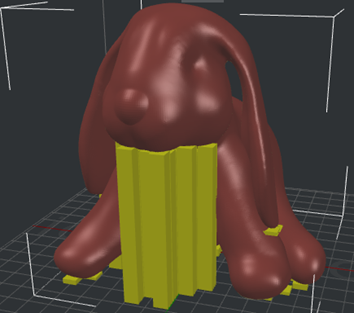
Figure 3: Set Pillar Size to 10mm.
Overhang Angle: Refers to the value which decides whether the model needs support or not. If the real overhang angle is smaller than this value, support will not be generated.
Touch Platform Only: After checking this option, only the supports directly contacting the build plate will be generated.
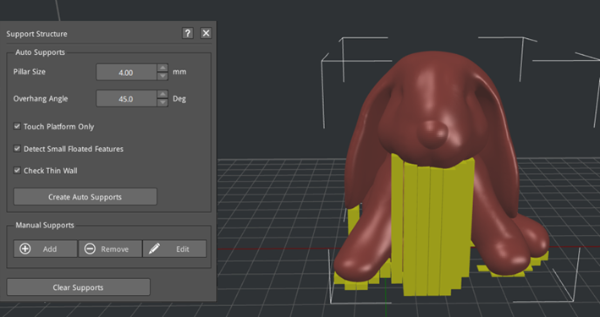
Figure 4: You can set the Pillar Size and Overhang Angle first. And try Create Auto Supports. Then adjust the support with Manual Supports.
Detect Small Floated Features: With this function enabled, ideaMaker will automatically detect and preserve smaller details in the model that do not contact the build plate surface and produce appropriate supports.
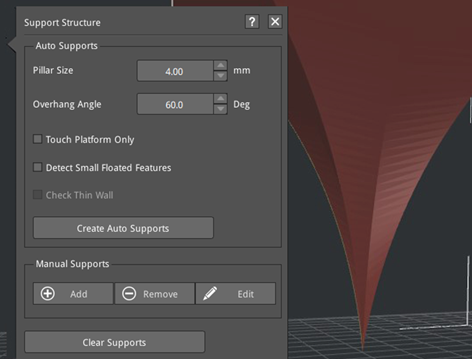
Figure 5: Disable the Function of Detect Small Floated Features.

Figure 6: Enable the Function of Detect Small Floated Features.
Check Thin Wall: With this function enabled, ideaMaker will automatically generate supports for the thin wall structures of a model. With this function disabled, ideaMaker will neither detect thin wall structures nor generate supports.
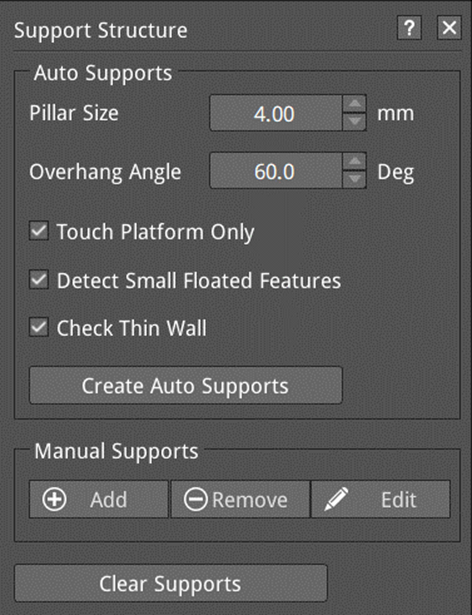
Figure 7: Enable the Function of Check Thin Wall.
Manual Supports:
Add: Adds one support pillar.
Remove: Deletes one support pillar.
Edit: Edit the position and height of the support pillar.
Ø Pillar Z-Pos: Refers to the vertical distance between the columnar support and the build plate.
Ø Pillar Height: Refers to the full length of the support pillar.
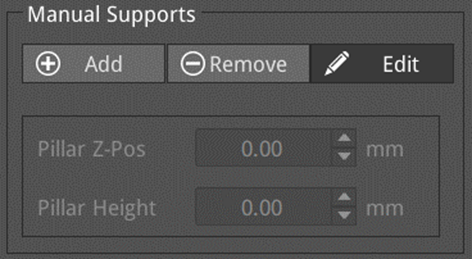
Figure 8: Pillar Z-pos and Pillar Height will only appear after you click the Edit button.
Clear Supports: After clicking this button, all added supports will be deleted.
When the model has FFF supports and needs to be transferred to a DLP printer, you will be notified that the support structure invalid. If you click Cancel, you will undo the printer switch and return to the original FFF printer; if you click Delete Supports, the FFF supports will be automatically deleted and ideaMaker will switch to the target printer.
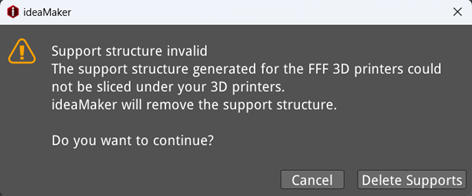
Figure 9: A prompt box warning that the support structure invalid.
