
 : Click on the Support icon in the tool bar, you can create supports in the operation property zone.
Note: If support has been previously generated, ideaMaker will ask you if you want to clear existing pillars before creating new supports.
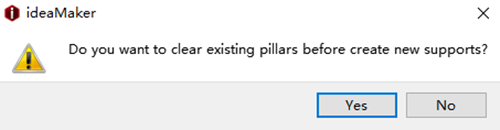
Figure 1: Clear existing pillars.
Auto Supports:
Pillar Size refers to the size of each pillar in support.
Note: amount of supports is dictated by the infill ratio the pillar size controls where supports will be generated.
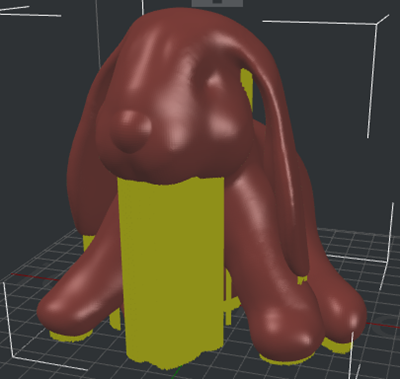
Figure 2: Set "Pillar Size" to be 1mm.
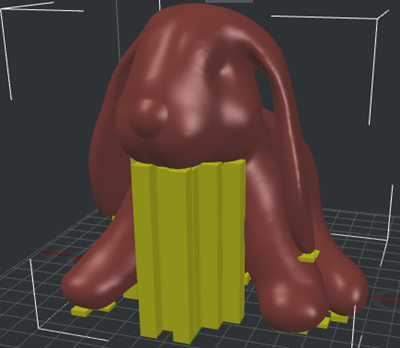
Figure 3: Set "Pillar Size" to be 10mm.
Overhang Angle refers to the value which decides whether the model needs support or not. If the real overhang angle is smaller than this value, support will not be generated.
Touch Platform Only refers to only creating the supports which will touch the build platform.

Figure 4: You can set the "Pillar Size" and "Overhang Angle" first. And try "Create Auto Supports". Then adjust the support with "Manual Supports".
Detect Small Floated Features With this function enabled, ideaMaker will automatically detect and preserve smaller details in the model that are not connected to the build surface and produce the appropriate support structure.

Figure 5: Unable the Function of "Detect Small Floated Features".
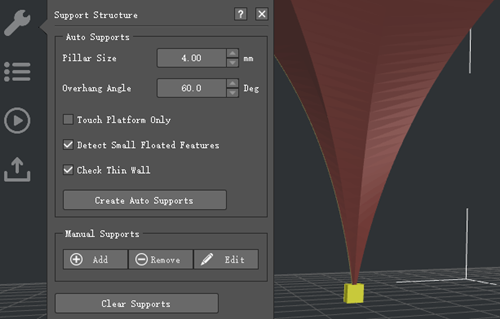
Figure 6: Enable the function of "Detect Small Floated Features".
Check Thin Wall means that with this function enabled, ideaMaker will automatically create travel moves or spurious points when the model is a "thin wall" structure. If not, ideaMaker will not detect thin wall structures, and won't generate support structures.
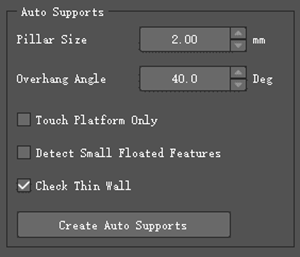
Figure 7: Enable the Function of "Check Thin Wall".
Manual Supports:
Add one support pillar, Remove one support pillar and Edit the support size.
Pillar Z-Pos refers to the start height of the selected support pillar.
Pillar Height refers to the full length of the selected support pillar.
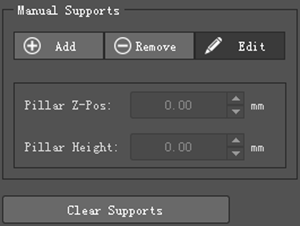
Figure 8: Pillar Z-pos and height options will only appear after you click the "Edit" button.
-END-
