
Enable Sequential Printing: With this function enabled, ideaMaker will print one model at a time. The nozzle will stay around the printing area to print one of the models, and the build plate keeps moving downwards until this printing is complete. Then the nozzle will move to the next model’s printing area to start printing the next model. You can enable this feature under Prepare to Slice > Sequential Printing.
Notes:
1. This function only works for a single extruder. The models’ maximum Z height cannot be greater than the Gantry Height, and the spacing between models cannot be smaller than the Clearance Settings.
2. When all models on the build plate are set to print by using the right nozzle and the Sequential Printing function is enabled, ideaMaker will force the entire sequential printing to be completed by only using the right nozzle when slicing. If some models are set to print by using the left nozzle while others are set to print by using the right nozzle, IdeaMaker will force the use of the left nozzle to print all models.
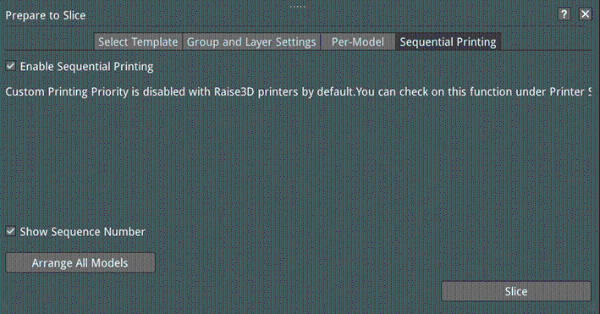
Figure 1: Sequential Printing
Gantry Height: Refers to the distance between the nozzle and the gantry. To avoid printing errors, we do not recommend adjusting this value for the Raise3D series printers.
For details, please see Chapter 8 Extruder Settings.
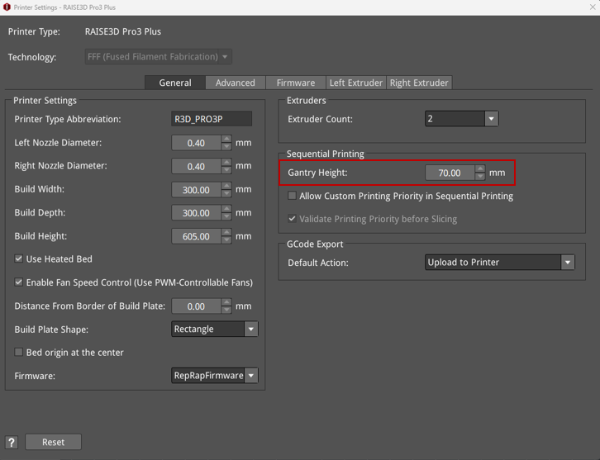
Figure 2: Gantry Height.
Show Sequence Number: With this function enabled, ideaMaker will display each model’s printing sequence number.
Arrange All Models: Arranges the models automatically when printing several models at the same time.
Note: Models will be arranged according to the occupied area. You can also arrange each model’s position by clicking Move from the tool bar.
Slice: Refers to slicing the model to get a .GCode file and a .data file.
Added Sequential Printing information on Home page and Camera page under Remote Control.
Under the sequential printing mode, the touchscreen can display the current model being printed, the total number of the models to be printed, and the name of the next model.
Note: If the .GCode file is generated by third-party slicing software, the Sequential Printing Mode won’t be shown in the ideaMaker remote control page or on the touchscreen.
During Sequential Printing, the printing information shown on the touchscreen will be the information for the whole printing job (rather than for the individual model).
Time Est.: Shows the remaining time to complete the whole printing job and how much of the whole printing job has been already completed (rather than for one single object).
Current: Shows the name of the printing file.
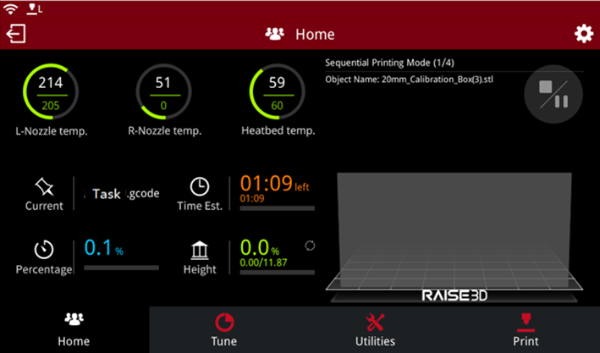
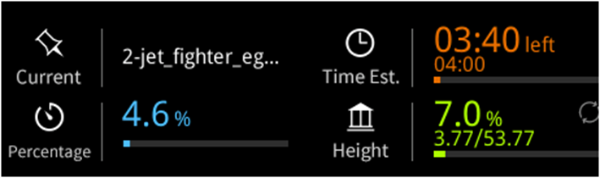
Figure 3: Touchscreen interface under Sequential Printing.
Sequential Printing Mode (1/4): Will only print one object at a time and will display the height for the model under printing. The height is for the individual model rather than the whole printing job. 1 refers to the current printing numerical number and 4 refers to the total quantity of printing models.
Object Name: The name of the current printing model.
