
In the Prepare to Slice panel, click the fourth More from top to bottom, as shown in the above Figure 2. Click Create to open the Create Template panel.
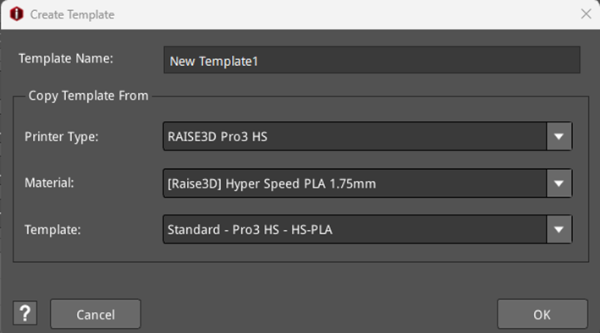
Figure 1: Create a new template.
Template Name: The new template’s name that was created, which you can also rename.
Copy Template From: Refers to the current template from which this new template will be copied.
Printer Type: Refers to the printer type of the copied template.
Material: Refers to the filament type of the copied template.
Template: Refers to the name of the copied template.
For example, create a new template and name it PLA1. Click OK and the Create Template panel will display the Basic and General settings of the new template, as shown in Figure 2. After making some basic settings, click OK to complete creating the new template, as shown in Figure 9.
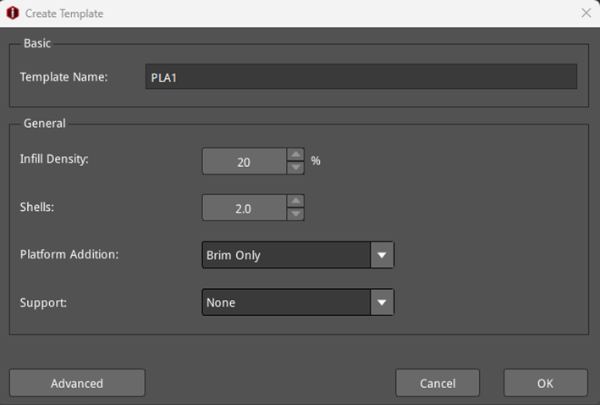
Figure 2: The Create Template panel containing the Basic and General settings.
Infill Density: Indicates the percentage of the inside of the model that will be filled with material. The more filament that is used to fill the inside of the model, the more solid the model will be.
Shells: Indicates how many loops will make up the model’s walls. A decimal value will alternate the number of shells printed. For example, 2.5 will alternate between printing 2 and 3 shells.
Platform Addition: Indicates whether to use Raft/Brim/Skirt.
Ø Skirt: The Skirt is a loop or series of loops of filaments extruded around the first layer of the model to confirm a stable flow of the filament for the model during printing.
ØRaft: The Raft is composed of a few layers placed on the build plate surface before the model is printed to help the model better stick to the build plate.
Ø Brim: The Brim is an outward extension of the first layer (like the brim of a hat) that allows for better adhesion to the build plate surface.
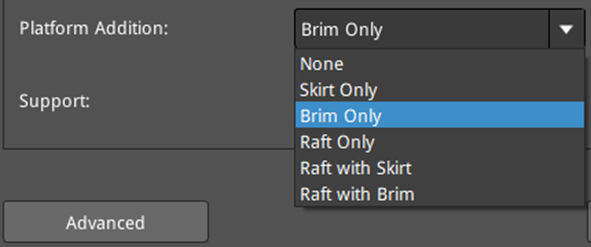
Figure 3: Platform Addition types.
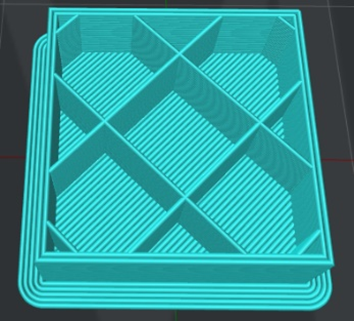
Figure 4: Sliced with 2 shells, 10% fill density and Brim Only.
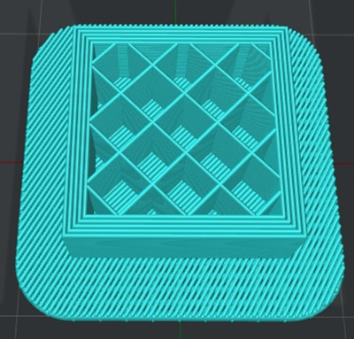
Figure 5: Sliced with 5 shells, 20% fill density and Raft Only.
Support: Means that the printer will print support structures for a model’s overhanging part.
Ø None: Refers to no support structure for the model.
Ø Touch Platform Only: Refers to only adding support structures that will only touch the build plate. The support structures located from one surface of the model to another surface of the model will not be created.
Ø All: Refers to adding support structures to all the overhanging parts of the model that are equal to or greater than the Max Overhang Angle.

Figure 6: Three types of supports.
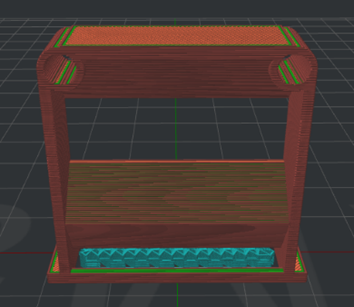
Figure 7: Print supports by choosing Touch Platform Only.
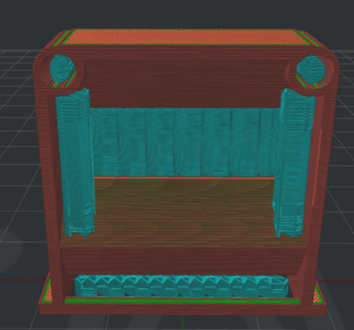
Figure 8: Print supports by choosing All.
Advanced: Enters the templates’ Advanced Settings panel, which will be introduced in Chapter 5.1.3 Edit Template.
Cancel: Closes the Create Template panel and cancels creating a new template.
OK: Creates a new template, as shown in Figure 9.
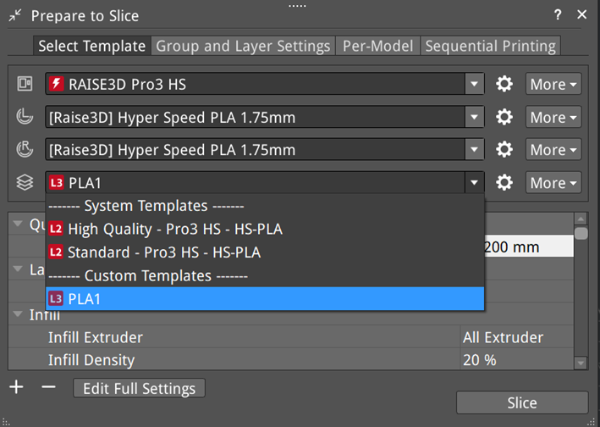
Figure 9: Complete creating a new template.
