
In the Prepare to Slice panel, click the fourth  icon (from top to bottom) to open the Advanced Settings panel. There are many settings you can change to optimize the printing results.
Advanced settings include Quality, Layer, Extruder, Infill, Solid Fill, Support, Platform Additions, Cooling, Temperature, Speed, Advanced, Ooze, Other, Special, Gcode and Notes. They will be introduced one by one.
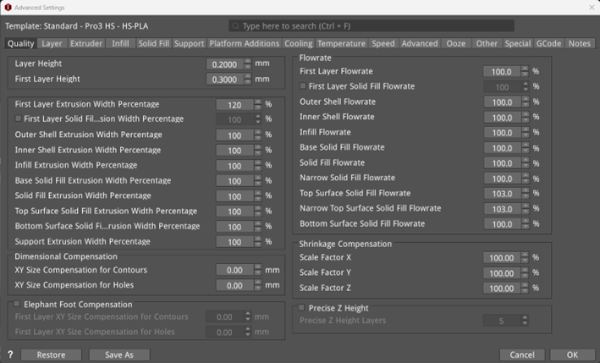
Figure 1: The Advanced Settings panel.
You can see the template you are using in the top left corner of the Advanced Settings panel.
Note: The newly-added template’s name can be edited but the default template’s name cannot be edited.
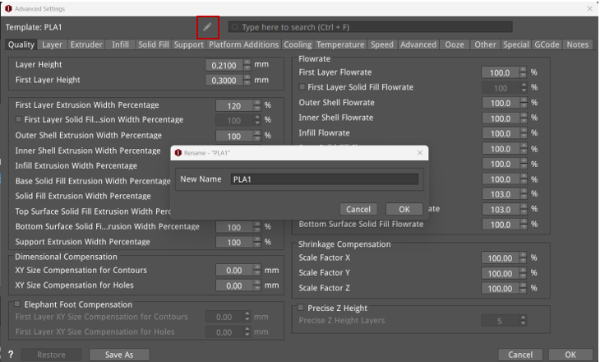
Figure 2: Click the pencil icon to modify the template’s name.
You can also search settings on the top right of Advanced Settings panel. In the quick search bar, input the keywords of the parameters you want to set, press the Enter key, and ideaMaker will quickly locate the settings tab where the keywords can be found, making it easier for you to find and set these parameters.
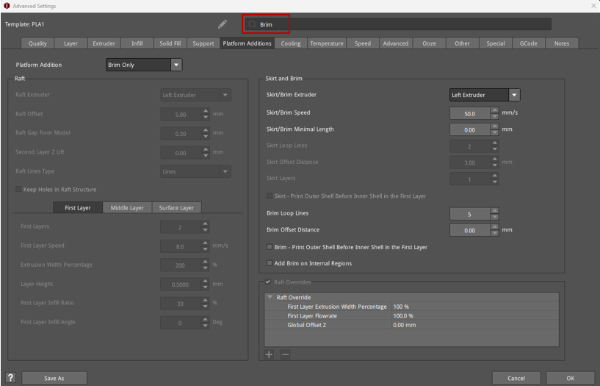
Figure 3: Input Brim in the quick search bar, and then the Platform Additions tab is quickly located and allows the user to change the relative settings.
 : Click this icon to Open the Raise3D Support Center webpage, which provides an introduction to the corresponding settings.
Restore: Restores all modified settings to the defaults or to the latest saved settings.
Save As: Saves the current settings as a new printing template.
Cancel: Cancels setting changes and closes the Advanced Settings panel.
OK: After clicking OK, the current new settings will be temporarily saved in the edited printing template, and the Advanced Settings panel will be closed.
If you have made any modifications to the template’s settings and clicked OK, an asterisk (*) will appear to the left of the template’s name, as shown in Figure 4. At this point, open the Advanced Settings panel of this template again. If you want to cancel a previous new setting, you can click the icon  before the new setting. If you want to cancel all new settings, click Restore to the Last Revision > OK. If the settings in the template are the same as the settings saved in the last time, the template’s name will be restored to the previously saved one.
If you want to permanently save the new settings, select the More drop-down menu after the gear icon, click Save a revision, and the new settings will be saved to the edited printing template. The asterisk (*) will disappear from the template’s name, as shown in Figure 5. (Note: If the parameter settings of the default template have been modified, the asterisk will not disappear after clicking Save a revision.)
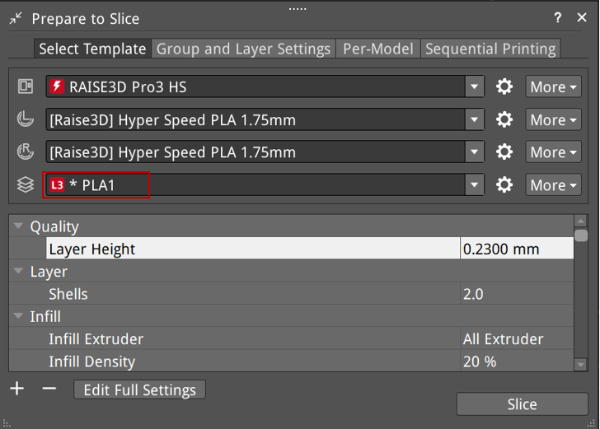
Figure 4: Save the new settings temporarily in the edited template.
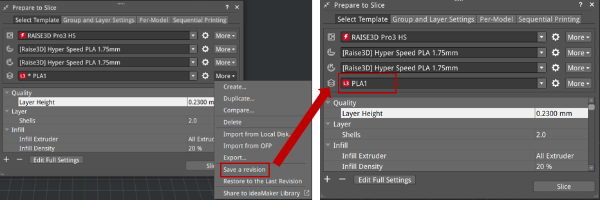
Figure 5: Save the new settings permanently in the edited template.
