
Open ideaMaker, click "File" > "Examples" > "Calibration" > "Calibration-Extruder-Offset.idea".
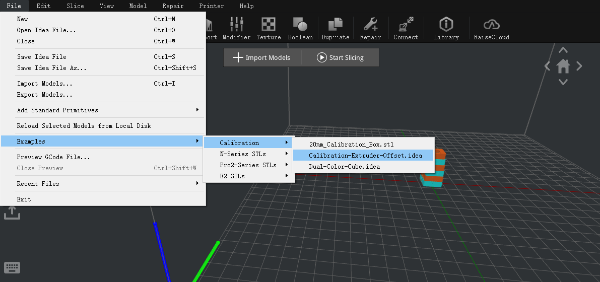
Figure 1: Calibration-Extruder-offset model.
First click "Start Slicing" icon, then choose " Printer Type" as Raise3D Pro2 series, "Filament" type as Raise3D PLA, and then choose a printing template, last click "Slice" to slice the calibration model (slice the model with default settings, do not change any parameter).

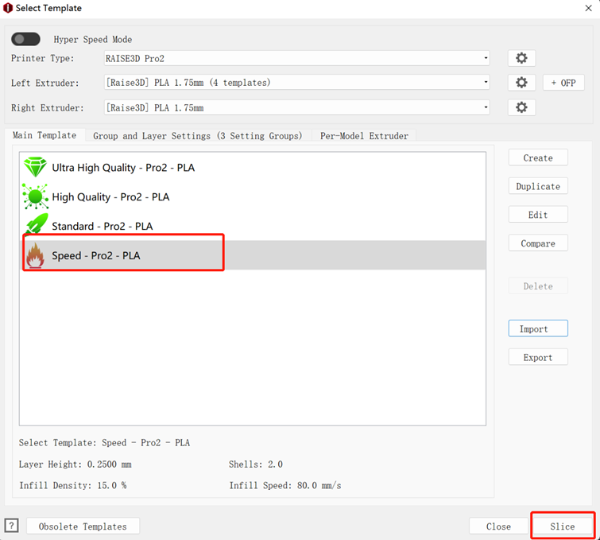
Figure 2: Start a slice.
Print it, then view the printed model from the top surface and align this to the visual graphic seen on screen. The direction can be identified with the large notch along the Y direction, and the small notch in the X direction.

Figure 3: View the printed model.
If the original offset setting is correctly aligned, the model will be ladder-shaped and evenly spaced in all four directions.
This is position is X Offset = 0, Y Offset = 0.
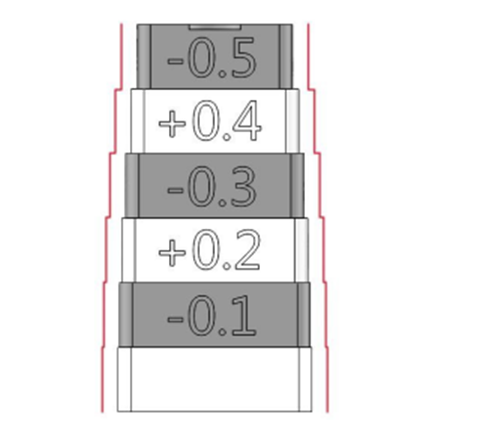
Figure 4: Left and right extruder aligned properly.
If the original offset requires adjustment, check each layer and identify two aligned layers for each direction.
Record the upper value depicted on the model.
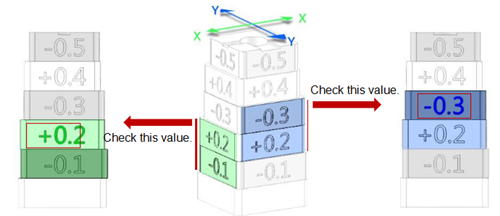
Figure 5: Examples.
In the case above, the values are: X Offset = + 0.2mm, Y Offset = -0.3mm.
Calculate the offset using the formula on the next page.
Right Extruder Offset X = 25mm + (+0.2mm) = 25.2mm
Right Extruder Offset Y = 0mm + (-0.3mm) = -0.3mm.
Open the Extruders interface, you can find it under touch screen Setting > Machine > More Settings > Hardware > Extruders, then record the offset value as Figure 6. Check they X and Y offsets and add your recorded values to what is shown on the screen. If X was set to 25 and Y was set to 0, we would end with the values shown above based on the example.

Figure 6: Record offset value into touch screen.
Open ideaMaker, click "File" > "Examples" > "Calibration" > "Dual-Color-Cube.idea".
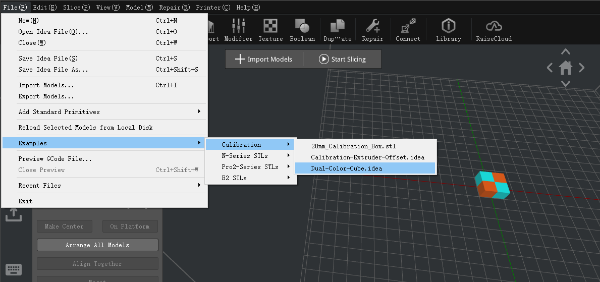
Figure 7: Dual-Color-Cube.
Slice it with PLA default setting, then print it, and then view the printed model from the top surface to see if there is obvious gap between colored blocks as Figure 8.
If there are noticeable imperfections, repeat the calibration steps.
If there are no obvious gaps present in the model, congratulations. Your printer is now properly adjusted for dual extrusion printing.
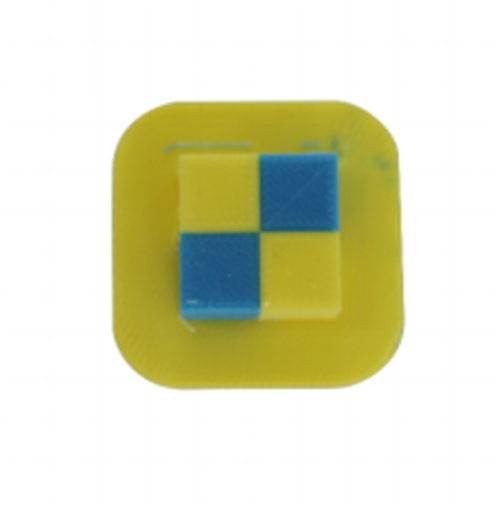
Figure 8: Dual-Color-Cube printing result.
