
Power on the printer. Then click the Setting button, as shown in Figure 1.

Figure 1: Setting.
Click the Maintenance button, then click the Offset Calibration button, as shown in Figure 2 and Figure 3.

Figure 2: Maintenance.

Figure 3: Offset Calibration.
Make sure the left and right nozzles installed on your printer are 0.4mm in diameter, and the filaments are PLA.
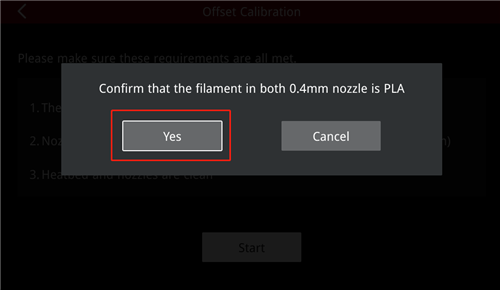
Figure 4: Confirm Nozzle diameter and material.
Choose R-Nozzle XY Offset, then click the Next button, as shown in Figure 5.

Figure 5: R-Nozzle XY Offset.
Make sure the build plate, nozzles, and probes are clean. Then click the Next button, as shown in Figure 6.
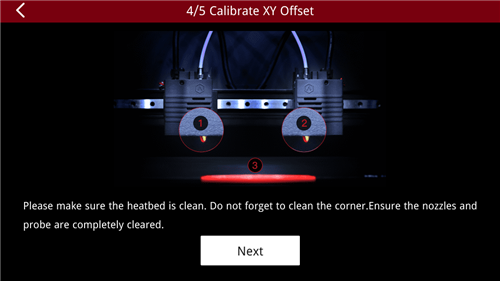
Figure 6: Clean Build Plate, Nozzles and Probes.
Print the Offset Calibration model. After the printing task has finished, the touch screen will display the interface, as shown in Figure 7. Select the pair of vertical lines that you think is properly aligned, then choose the corresponding line number on the touch screen and click the Next button.
For example: If the final printing result is the first line (starting from the middle point, the first line on the right), you just need to click "1" on the touch screen.
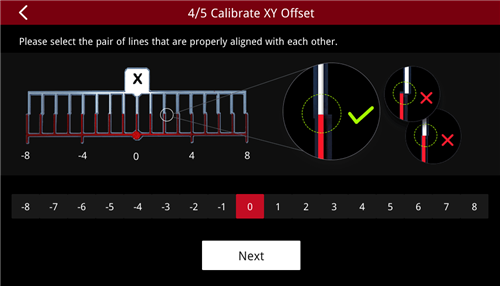

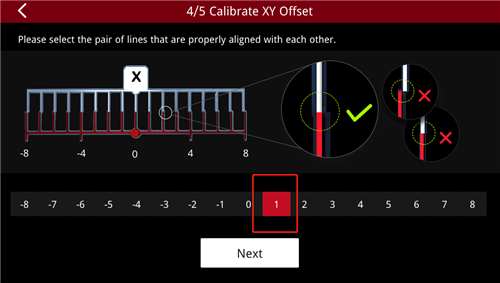
Figure 7: Select the most aligned lines in X direction.
Print the Offset Calibration model. After the printing task is finished, the touch screen will display the interface, as shown in Figure 8. Select the pair of the left and right lines that you think are properly aligned, then choose the corresponding line number on the touch screen and click the Next button.
For example: If the final printing result is the first line (start from the middle point, the first line on the left), you just need to click "-1" on the touch screen.
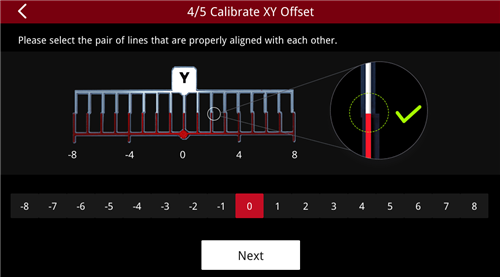
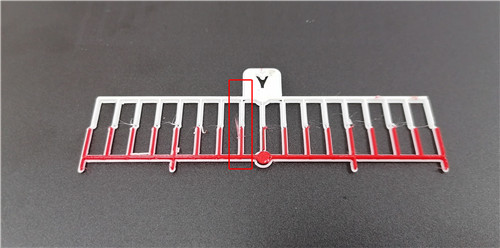
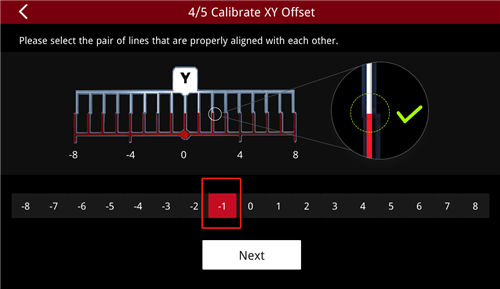
Figure 8: Select the Aligned Lines in the Y direction.
According to the lines you chose, RaiseTouch will automatically figure out the XY offset value, and save it to the printer. Click Done button as Figure 9.
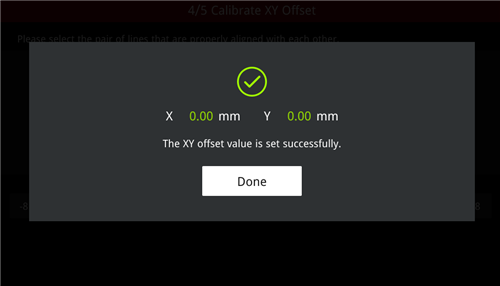
Figure 9: Apply XY Offset Value.
Choose Dual-Color-Cube, then click the Next button to print the calibration model, as shown in Figure 10.
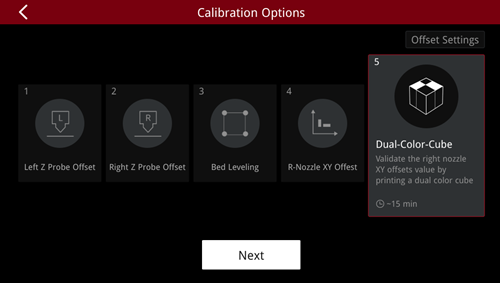
Figure 10: Dual-Color-Cube.
If the models printed by the left and right extruder are well aligned, click the Done button to complete the Calibration XY Offset operation.
If there is an overlap or gap in the left and right extruder printing model, click Retry to re-calibrate the XY offset.
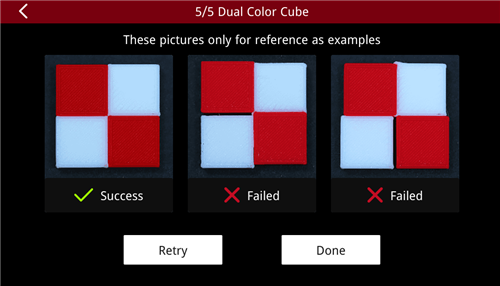

Figure 11: Dual-Color Cube Printing Result.
-END-
