
If you want to print a multiple-filament model, you need to determine which extruder should print which part of the model, and then assemble the model in ideaMaker before slicing.
Option 1: Enter the Prepare to Slice panel and click the Per-Model tab.
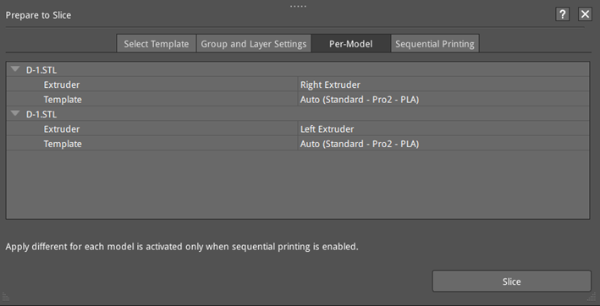
Figure 1: Select different extruders to print different parts of the model.
Option 2: Click the icon  on the left of the main interface to the open the Model Info panel, and choose the extruder for your model.
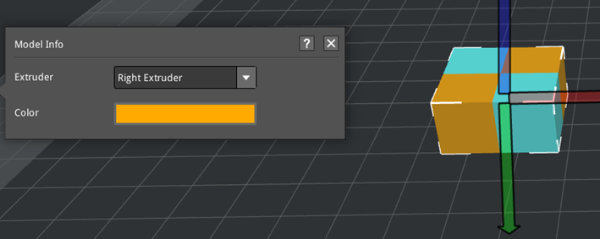
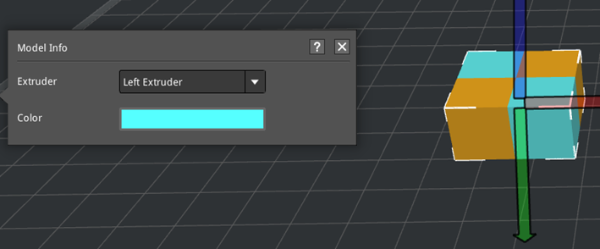
Figure 2: Select different extruders to print different parts of the model.
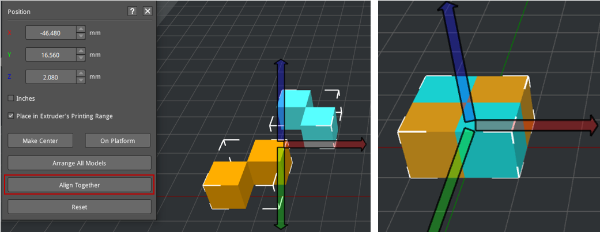
Figure 3: Select Move > Align Together to align the models. If the models are not aligned properly, you may need to try to move the models manually.
When slicing the model, if you want to use a specific filament to print support and raft (such as a soluble filament), you need to set the extruder for printing them.
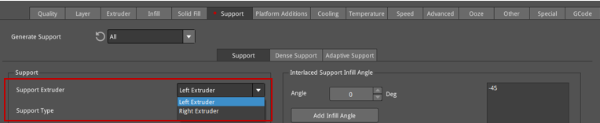
Figure 4: Select an extruder that will print the support.

Figure 5: Select an extruder that will print the raft.
If you use different filament while printing in multiple-extruder-mode, you need to set the extruder temperature separately.

Figure 6: Confirm the temperature is suitable for your filament.
To better print a model using multiple extruders, you also need to control the ooze of each extruder. Those settings in the Advanced Settings panel are as below:
Force Retraction On Layer Change: The retraction will automatically be triggered when the nozzle moves to the next layer.
Avoid Retraction Inside Models: Disables retraction when printing the inner structures of the model.
Extruder Switch Ooze Control: The retraction settings for extruders when one nozzle completes the printing of one layer and the other nozzle starts printing.
Ø Retraction Speed of Extruder -switch: The speed of retraction when extruders switch.
Ø Retraction Amount of Extruder -switch: The amount of filament retraction when extruders switch. 0 refers to no retraction at all.
Ø Restart Speed of Extruder-switch: The extrusion speed after the retraction for an extruder change.
Ø Extra Restart Amount of Extruder-switch: The amount of additional filament compensation after the retraction for an extruder change.
Avoid Traveling Through Holes: With this function enabled, the printhead will bypass the hole part to prevent stringing on the inside of holes.
Enable Maximum Travel Path Length: With this function enabled, the extruder will move through the hole directly, if the length of travel path around the hole is longer than the maximum value.
Stop printing Wipe Wall and Wipe Tower: With this function enabled, ideaMaker will detect how many extruders will be used in the remaining printing task. If only one extruder is used, it will stop printing Wipe Wall or Wipe Tower to reduce printing time and filament consumption.
Cool down inactive extruder if only one extruder is used in remaining task: With this function enabled, ideaMaker will detect how many extruders will be used in the remaining printing task. If only one extruder is used, it will stop heating the inactive extruder to avoid filament oozing.
See Chapter 5.1.3.12 for details of Wipe Wall.
