
When you want to edit the parameters for your filament, please check the steps as below:
Note: It is strongly recommended for users not to edit material parameters themselves as it may affect internal algorithms.
Open the Prepare to Slice panel, select the filament for the Left/Right nozzle, and click on the gear icon for the Left/Right nozzle’s filament to open the Material Settings panel.
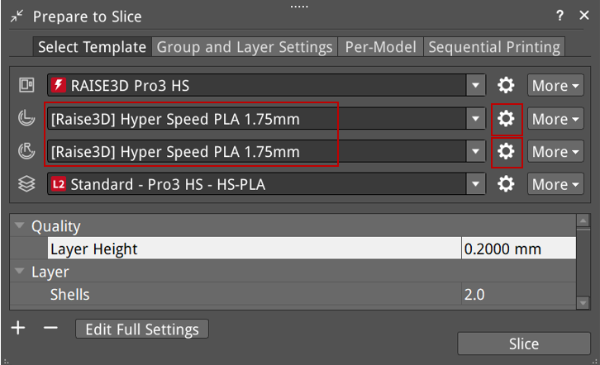
Figure 1: Click the gear icon for the material settings in the Prepare to Slice panel.

Figure 2: Open the Material Settings panel for the selected filament.
In this panel, you can edit the material’s parameters, such as Display Name, Material Type Abbreviation, Brand, Display Name, Diameter, Density, Price, Flowrate, and so on.
Reset: After editing the material settings, if you want to cancel the editing, you can click Reset to restore the parameters to their default values. (This feature is only applicable to the default templates.)
Save: After modifying the material settings, the Save button will pop up. Click this button to save the modified material settings to the current material template.
Override Slicing Settings in Templates Linked to the Material: With this function enabled, the following settings will be used to override settings in the slicing template which is linked to the current filament. Click + to open the Add Settings panel to choose more settings, as shown in Figure 3. Click – to delete the selected settings.
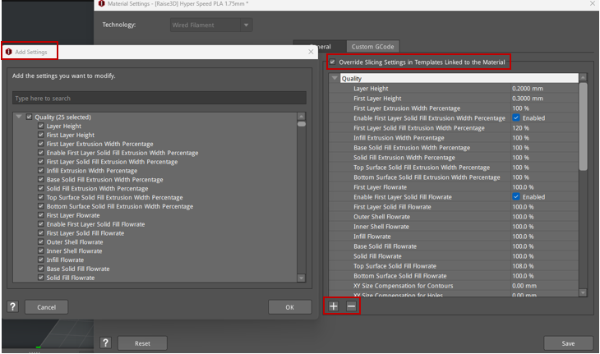
Figure 3: Override slicing settings.
After enabling the Override Slicing Settings in Templates Linked to the Material, you can edit the slicing settings directly, as shown in Figure 4.
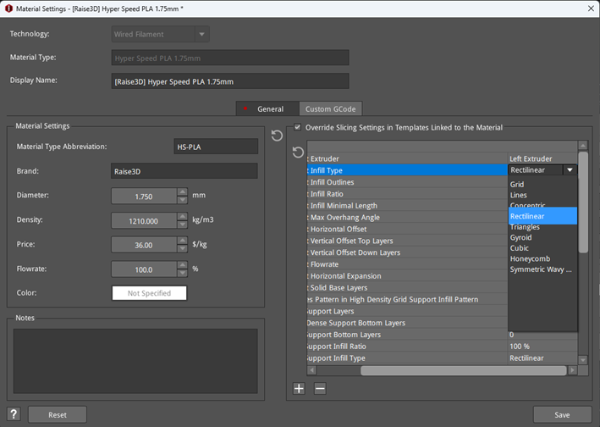
Figure 4: Edit the slicing settings in the Material Settings panel.
Custom GCode: In this page, you can customize some specific printing parameters to optimize your printing result.
Start GCode: The inserted custom GCode in Material Settings will be executed after Start GCode in the main template. Custom GCode will be executed from the left extruder to the right extruder if the printer has multiple extruders. You can insert placeholders for slice settings from the settings list on the right side.
End GCode: The inserted custom GCode in Material Settings will be executed before End GCode in the main template. Custom GCode will be executed from the left extruder to the right extruder if the printer has multiple extruders. You can insert placeholders for slice settings from the settings list on the right side.
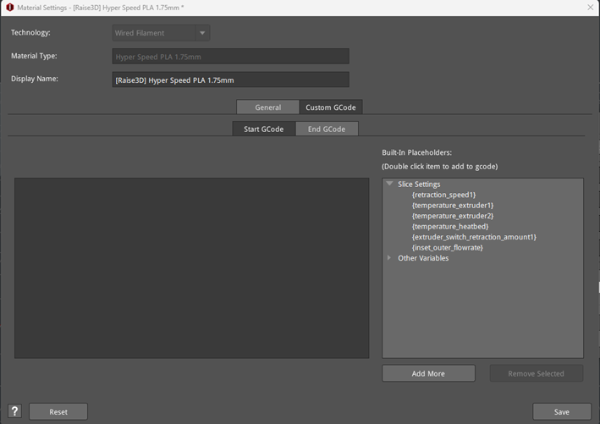
Figure 5: Custom GCode.
When the setting parameters of the official material are different from the default values, an asterisk (*) will appear before the material’s name in the Prepare to Slice panel, as shown in Figure 6.
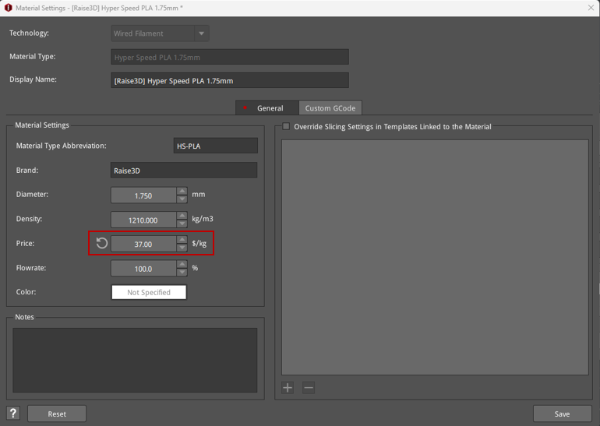
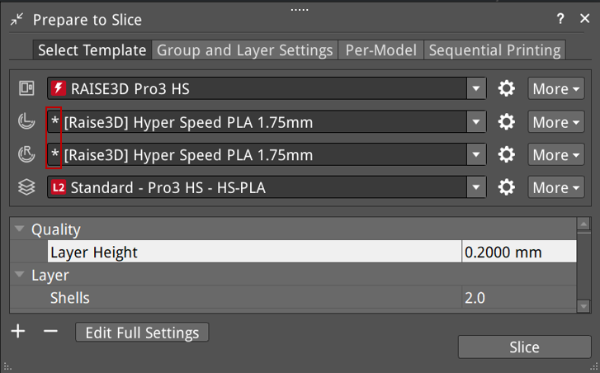
Figure 6: After modifying the default setting parameters of the official material, an asterisk is added before the material’s name.
