
When you want to edit the parameters of your filament, check the steps below:
Option 1: Edit the existing template.
Printer > Filament Settings
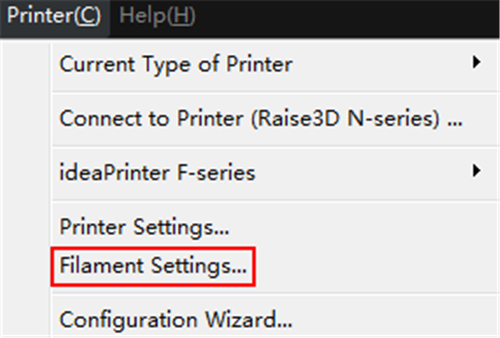
Figure 1: Select "Printer" >"Filament Settings" from menu bar.

Figure 2: Select a filament from the drop list and edit its parameters.
In this page, you can edit the parameters of your filament. The default settings are for Raise3D own filament and Raise3D certificated filament.
Remove refers to deleting the current filament template.
Note: remove function only work for the template which was added manually, the default template cannot be removed.
Export refers to exporting filament template from ideaMaker to your computer.
Reset refers to resetting parameters to default settings.
Note: reset function only work for default template.
Import refers to importing a filament template from your computer.
Save refers to saving the current filament template.
Close refers to closing the current filament template.
Override Slicing Settings in Template Linked to the Filament refers that with this function enabled, below setting will be used to override setting in slicing template which is linked to current filament.
Press "+" to add more settings as Figure 3.
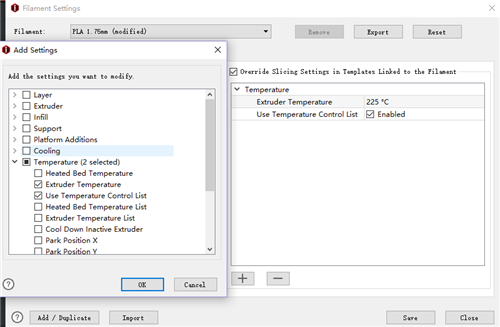
Figure 3: Override Slicing Settings.
Note: The settings which are override in filament can be edited by press "Edit" button as Figure 4.

Figure 4: Edit the override settings in Filament Settings.
Custom GCode: In this page, you can customize some specific printing parameters to optimize your printing result.
Start GCode refers that the inserted custom GCodes in Filament Settings will be executed after Start GCode in the main template. Custom GCodes will printed from left extruder to right extruder if the printer has multiple extruders. And you can insert placeholders for slice settings from the settings list at right side.
End GCode refers that the inserted custom GCodes in Filament Settings will be executed before End GCode in the main template. Custom GCodes will printed from left extruder to right extruder if the printer has multiple extruders. And you can insert placeholders for slice settings from the settings list at right side.
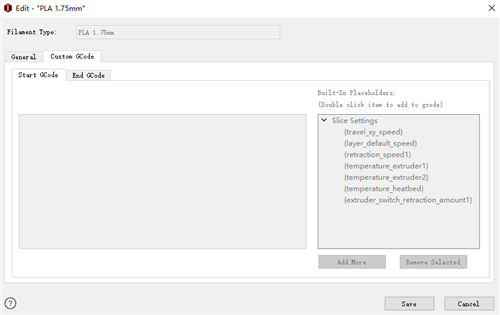
Figure 5: Custom GCode.
Option 2: Enter Select template tab and click setting button.
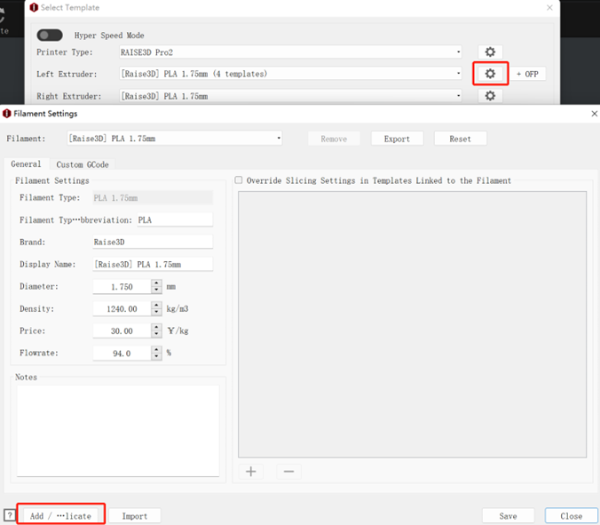
Figure 6: Click "setting button" and click "Add" button.
-END-
