
Tool:
① 2 mm hex wrench

1. Lower the build plate to a suitable height.
1) Enter the “Utilities” page.

Figure 1 Enter the “Utilities” page.
2) Select the Z axis, then select the "Down" or "Up" arrow to adjust the Z axis to the appropriate position.
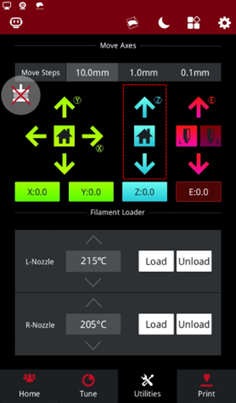
Figure 2 Adjust the Z axis to the appropriate position.
2. Power off the printer. Make sure the build plate reduces to room temperature and remove the build plate.
1) Turn the 2 thumbscrews counterclockwise until the thumbscrews come loose.
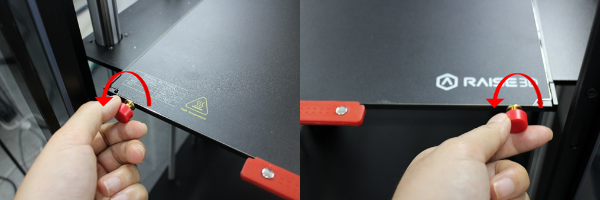
Figure 3 Turn the 2 thumbscrews counterclockwise.
3) Hold the red handle on the build plate, lift the build plate slightly and then remove it.

Figure 4 Remove the build plate.
1. Use a 2mm hex wrench to loosen the 9 long screws on the heated bed.


Figure 5 Loosen the 9 long screws on the heated bed.
2. Unplug the connecting wire of the heated bed and the thermocouple cable.
Note: The connector of the connecting cable and the thermocouple cable are connected tightly, please press the buckle and then remove it.

Figure 6 Unplug the connecting wire and the thermocouple cable.
3. Hold the heated bed with both hands and take it out.
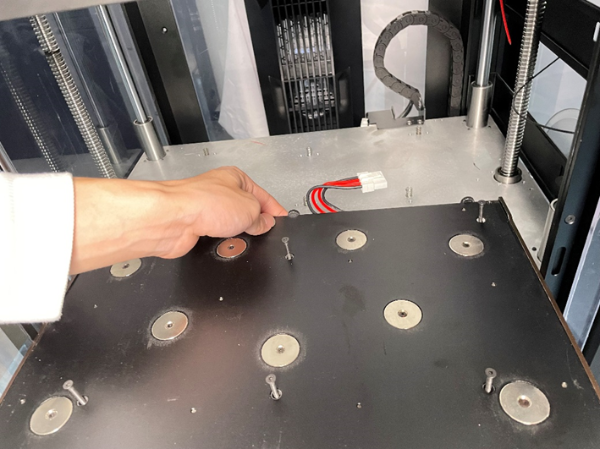
Figure 7 Take out the heated bed.
Note: Do not move the 9 springs on the bed to prevent the springs from falling or being lost. Keep the spring for later installation.

Figure 8 Keep the spring for later installation.
4. Transfer the heated bed to an open workbench and carefully turn over the heated bed.
Note: The long screws are easy to fall off when you turn over the heated bed, be care for not to remove the long screws.

Figure 9 Turn over the heated bed.
5. Use a 2mm hex wrench to remove the 19 short screws on the heated bed.
Note: You can mark the position of the short screws on the heated bed to avoid installing the short screws into the long screws mounting holes later.

Figure 10 Remove the 19 short screws.
6. Lift and remove the insulating plate.
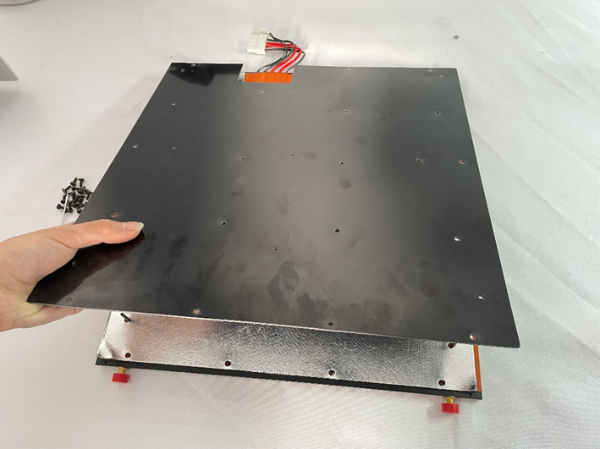
Figure 11 Lift and remove the insulating plate.
7. Remove the old orange silicone heated bed (the silver insulation cotton is attached to it).
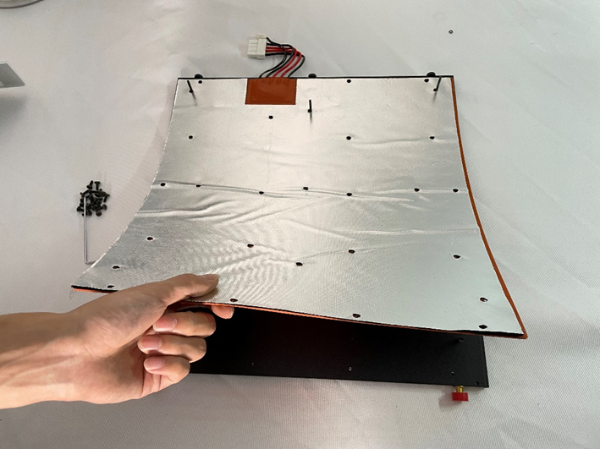
Figure 12 Remove the old orange silicone heated bed.
Note: If you want to replace the silver insulation cotton, you can peel off it.

Figure 13 Replace the silver insulation cotton.
1. Prepare a new silicone heated bed, pass the silicone heated bed on the bottom plate through the long screws, and align it completely with the bottom plate.
Note: Make sure that the connecting wire of the heated bed is in the upper left corner.

Figure 14 Pass the silicone heated bed on the plate through the long screws.
2. Prepare a new silver insulation cotton, put the insulation cotton through the long fixing screws and place it on the bottom plate, and align it with the bottom plate.
Note: Make sure that the notch of the silver insulation cotton is in the upper left corner.
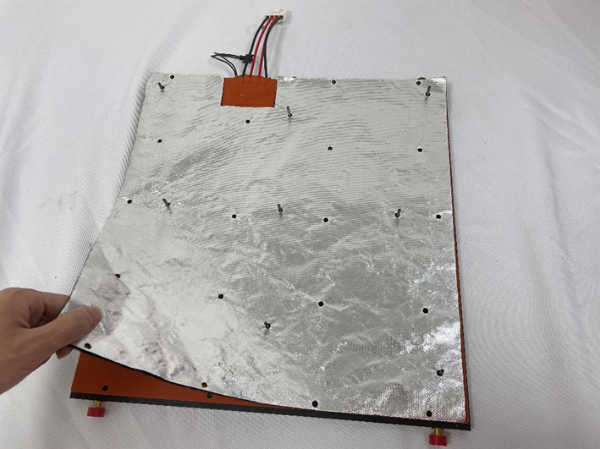
Figure 15 Replace the silver insulation cotton.
3. Install the insulation plate. Thread the insulation plate through the long screws and place it on the bottom plate and align it with the bottom plate
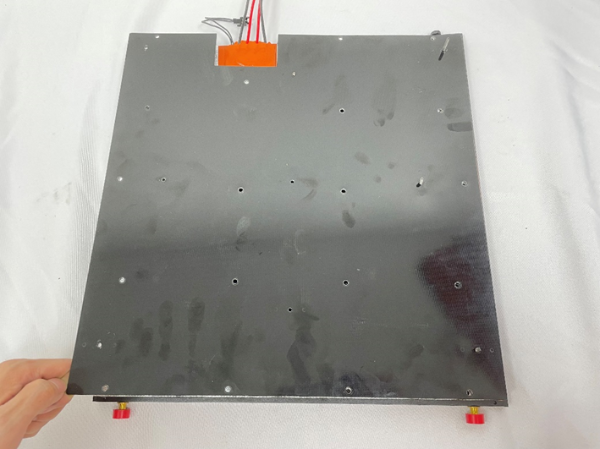
Figure 16 Install the insulation plate.
4. Use a 2mm hex wrench to re-install the 19 short screws on the heated bed.
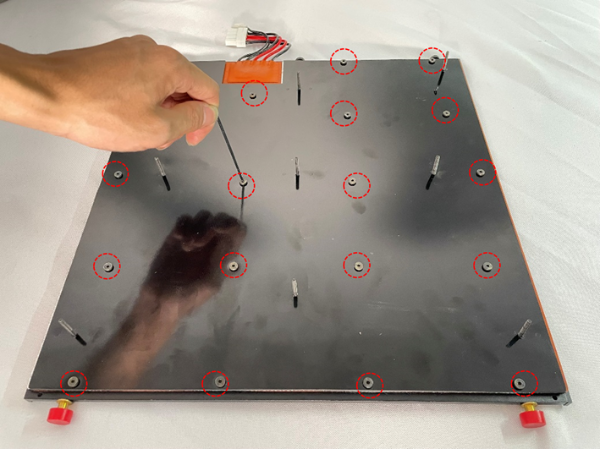
Figure 17 Re-install the 19 short screws on the heated bed.
5. Turn the entire heated bed over after tightening the short screws. The long screws are easy to fall off when flipping, please be careful not to lose the long screws. Put the heated bed into the printer.

Figure 18 Turn over the heated bed and put it into the printer.
6. Align the 9 long screws with the 9 springs and insert the 9 long screws into the bottom platform.

Figure 19 Insert the 9 long screws into the bottom platform.
7. Use a 2mm hex wrench to tighten the 9 long screws.
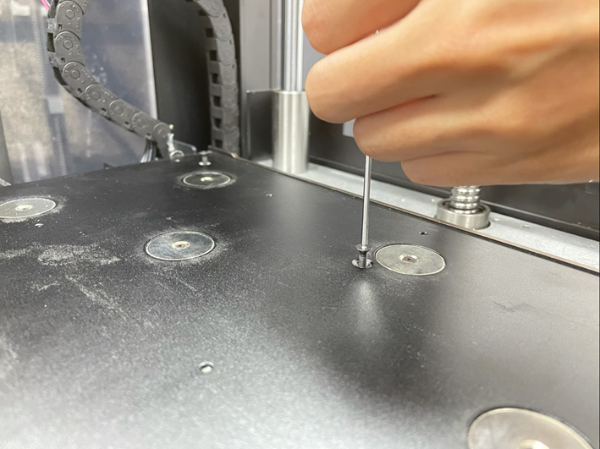
Figure 19 Tighten the 9 long screws.
8. Reinsert the heating cable and thermocouple cable into the connector and lock the buckle.
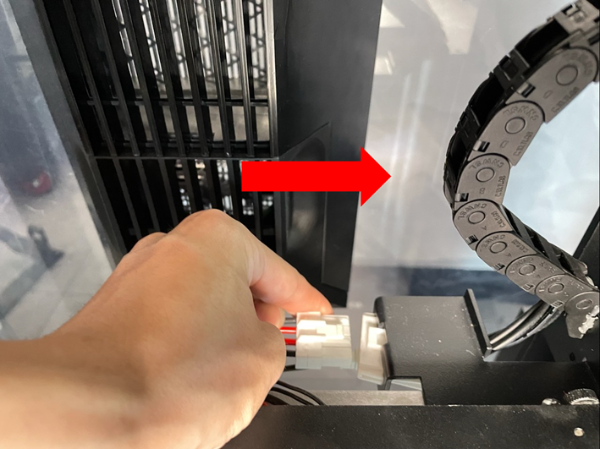
Figure 20 Insert the heating cable and thermocouple cable.
9. Reinstall the build plate. Attach the entire build plate to the heated bed, the edge of the build plate needs to be clamped on the thumbscrews.
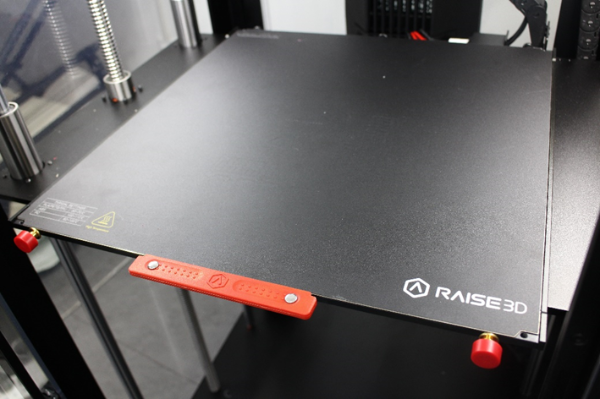
Figure 21 Reinstall the build plate.
10. Turn the 2 thumbscrews clockwise until the thumbscrews are tighten.
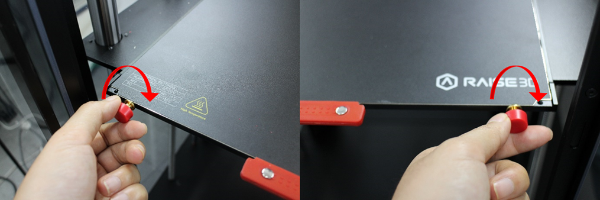
Figure 22 Turn the 2 thumbscrews clockwise.
1. You will need to run an auto-bed leveling to re-level the build plate. Auto-leveling will maintain the distance between the nozzles and the build plate, thus creating an even print area. For how to level the bed, please refer to Pro3 Series-How to Level the Bed.
[15.049-EN.1.0.20220525-Pro3 Series-How to Replace the Silicone Heated Bed]
-END-
