
Tool:
①USB flash drive
1. After replacing a new version of the hot end controller board, the firmware needs to be updated, otherwise the printer may not be able to print normally.
2. After you update the RaiseTouch firmware, please update the hot end controller board firmware synchronously.
1. Check the hot end controller board version number of your printer. Click the “Setting” button to enter the setting interface. Then click “Machine>More Settings>Hardware Information>Sub controller" to check the version number of the current hot end controller board.
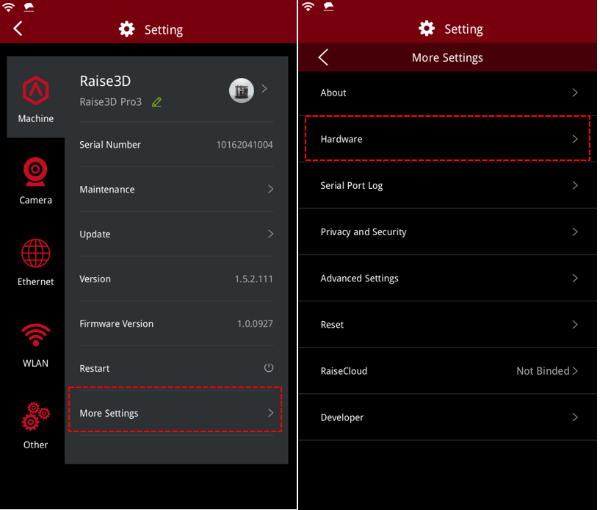
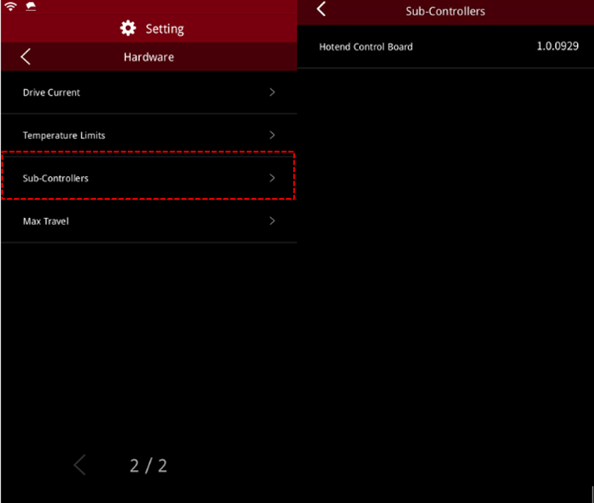
Figure 1 Check the firmware version number of the hot end controller board.
2. If the version number is lower than v.1.0.1018, the firmware update may fail after replacing the hot end controller board. Please contact Raise 3D aftersales team for support.
If the version number is above v.1.0.1018, please proceed to the next step.
1. Please make sure that all cables are properly connected before updating, otherwise the update will fail.
2 . Before updating the firmware of the hot end controller board, please update the RaiseTouch firmware to the latest version. Otherwise, the update will fail. How to update RaiseTouch firmware, see Pro 3 Series-How to Update RaiseTouch Firmware.
3. Click the " Settings" button in the upper left corner of the home page to enter the settings interface. Go to "Machine > Update > Local Update > Update Motion Controller Board Firmware", select the update file with the suffix ". mcufirm " to update.
Note :
The file with the suffix ". mcufirm " is the firmware of the hot end controller board.
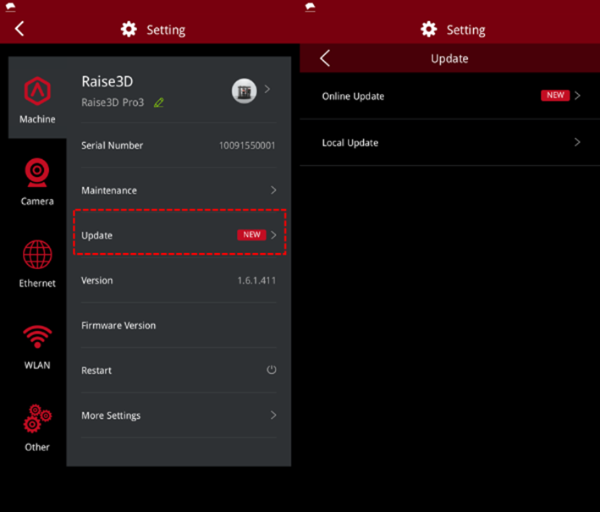
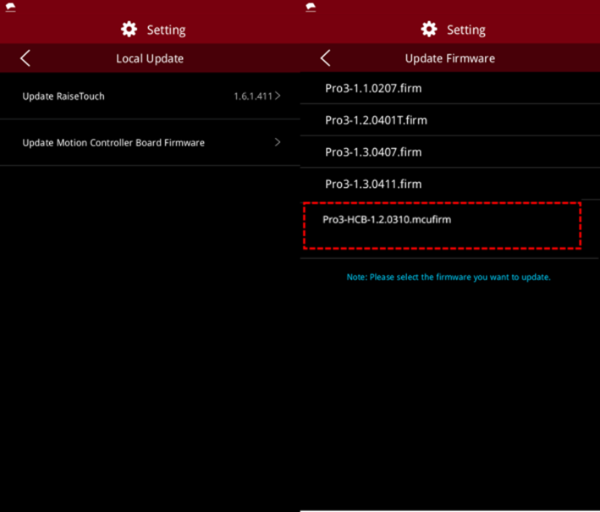
Figure 2 Update the firmware.
4. Please restart the printer after updating the firmware of the hot end controller board.
1. Before carrying out a print test, you need to check the following parts to ensure that the they can operate normally.
1) Turn on the printer, enter the "Utilities" interface, click the "Home all" button of the Z axis, and check whether the extruder can move normally.
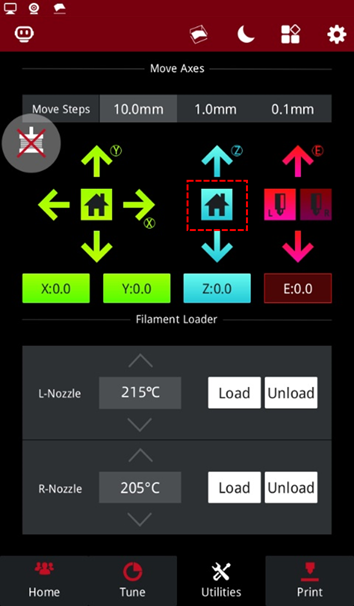
Figure 3 Click the Z axis "Home all" button.
2) On the homepage, click the icon to quickly enter the bed leveling interface. Click the “Simple Mode”, run 9-point leveling, and check the flatness of the build plate.
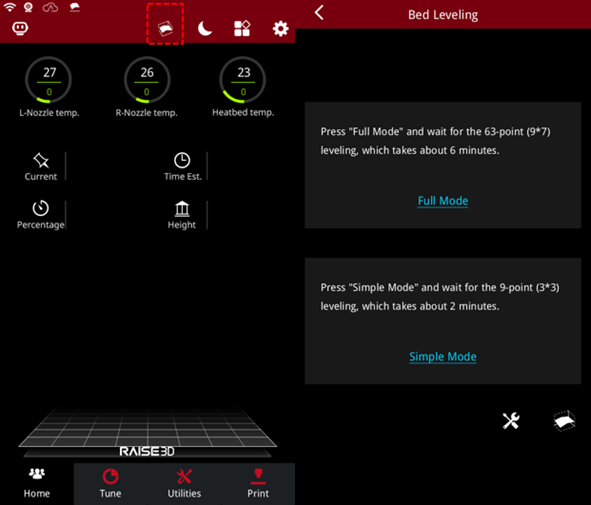
Figure 4 Run the bed leveling.
3) Load and unload the filament to the left and right extruders to check whether the filament can be load and unload normally. please see the Pro3 Series-How To Load And Unload The Filament .
4) Turn on the model cooling fan. Go to the "Parameter Adjustment" page, set the fan speed to 100, and check whether the fan runs normally.
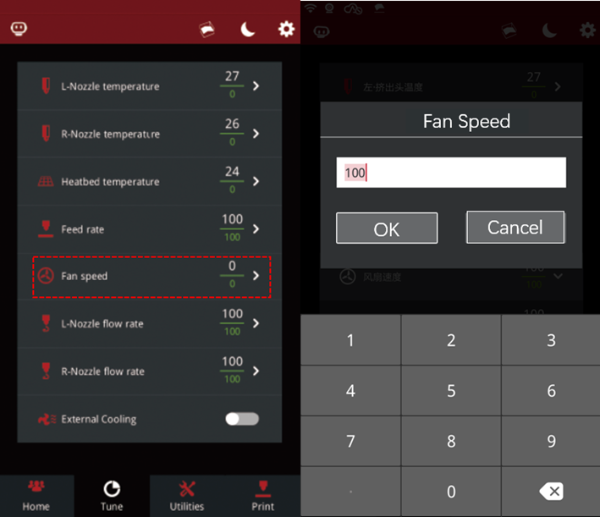
Figure 5 Check the fan.
5) On the "Utilities" interface, switch the left and right nozzles to check whether the left and right nozzles can be switched normally.

Figure 6 Check whether the left and right nozzles can be switched normally.
6) Check if the extruder indicator light is normal. Please refer to the FAQ for the meaning of the extruder indicator light.
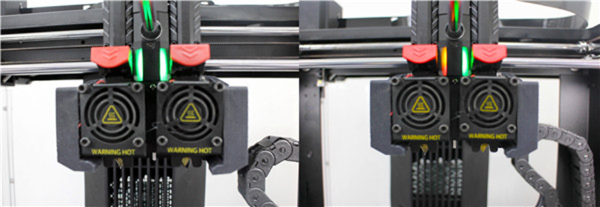
Figure 7 Check the extruder indicator light.
2. Perform the above operations, if any fault is found, please re-check the wiring or whether the firmware is successfully updated.
3. Please refer to Pro3 Series-How to Replace the Hot End Controller Board to check the wiring. If you encounter any problems, please contact support@raise3d.comfor support.
[15.060-EN.1.0.20220513-Pro3 series- How to Update the Hot End Controller Board Firmware]
-END-
America | Asia | Europe
Sales & Business: sale s @raise3d.com
Technical Support: help.raise3d.com
For any other inquiries: inquiry@raise3d.com
